Draught proofing is one of the most effective ways to improve your home’s thermal efficiency and warmth. For around £120, you can save about £50 annually on fuel bills (according to Which?).
The Energy Saving Trust estimates that draught-proofing doors and windows can save £10-£50 per year and reduce heating bills by up to 10%. A draught-proofed home feels warmer, allowing you to lower the thermostat. Best of all, draught proofing is an easy DIY task with immediate benefits.
What is a Draught?
A draught is a cold air current that enters your home through gaps and cracks, often found around windows, doors, chimneys, and even floorboards. These unwanted air leaks not only make your living space colder and less comfortable but also cause your heating system to work harder, leading to higher energy bills.
Identifying and sealing these draughts can significantly improve your home’s warmth and energy efficiency. By blocking these chilly breezes, you can maintain a cozy indoor environment, reduce your heating costs, and contribute to a more sustainable living space.
Finding and Sealing Draughts
The biggest impact on comfort and savings comes from addressing the largest drafts, which are often the easiest to locate.
Use the back of your hand to feel for drafts, as it’s more sensitive to temperature changes and airflow. Some suggest using a candle, but be cautious due to the fire risk.
Check for unwanted gaps around doors, windows, loft hatches, pipes, floors, skirting, chimneys, fireplaces, and electrical fittings.
With rising energy costs and environmental concerns, ensuring your home is energy-efficient through draught-proofing is absolutely essential.
Areas to Avoid Draught Proofing
Certain rooms require good ventilation for safety and comfort. Rooms with open fires or flues need fresh air to maintain proper airflow.
Additionally, spaces prone to excess moisture, like bathrooms, kitchens, and utility rooms, require ventilation to remove damp air.
Air bricks are essential for ventilation and should never be covered or filled. Learn more about air bricks and their installation in our air bricks project.
Remember not to cover extractor fans, as they play a crucial role in preventing moisture buildup, condensation, and black mould growth.
Draught Proofing Doors and Windows
Draught proofing doors and windows is a simple yet effective way to improve the energy efficiency of your home.
It involves sealing any gaps and cracks around doors and windows to prevent cold air from entering and warm air from escaping. This not only helps to keep your home warmer and more comfortable but also reduces your energy bills by lowering the amount of heat lost.
Sealing Draughts in Sash Windows
Older homes in Britain often feature traditional sash windows, which can develop draughts due to gaps over time. If you have sash windows, we’ve created a dedicated project to assist you in effectively sealing these draughts.
Check out our project on sealing sash windows for step-by-step guidance.
Draught Proofing Tips for Windows
To tackle draughts around windows and doors, consider installing draught strips. Modern self-adhesive draught proofing strips are easy to apply and offer improved efficiency and durability compared to older options. These strips are typically affixed around the inside of window frames or the sections where windows close, effectively sealing any gaps when shut.
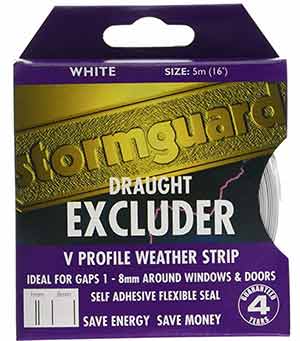
Stormguard draught excluder E strip – Available here from Amazon
For effective door and sash window draught proofing, consider tack-on sprung metal or plastic strips with rubber or compressible seals. These strips are best positioned along the sides and tops of doors for optimal sealing.
Draught Proofing Doors: Tips and Techniques
For the bottom or threshold of the door, invest in specially designed draught proofing products tailored to your door’s width. Brush-style excluders work well in most cases, but for wooden or tiled floors, consider under door excluders made of soft rubber or foam, which plug any gaps effectively.

Draught excluder – Image courtesy of shopcade.com
Address draughts from letterboxes with special products that fit over the letter plate area, significantly reducing incoming draughts. These kits typically include sealed units for both the outside and inside, sealing closed to prevent draught penetration.
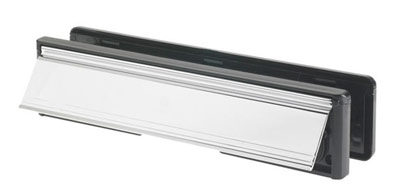
Polished chrome letter plate with draught excluder
Combat draughts from keyholes by fitting a keyhole cover, known as an escutcheon plate, which drops over the hole when not in use, effectively blocking the draught. Remember, internal doors leading into unheated or uninhabited rooms should also be draught proofed to maintain indoor temperature levels.
Draught Proofing Loft Hatches
When insulating your loft, don’t forget to insulate the hatch. Hot air rises, and without proper insulation, it can easily escape through the hatch. Attach insulation to the top side of the hatch cover to retain warmth in your home.
Use insulation strips, similar to those used for doors and windows, to draught proof the hatch. These strips create a tight seal, preventing air from flowing through the gap, reducing draughts and energy wastage, ultimately cutting heating costs.
Draught Proofing Pipe Work and Wall Cracks
Insulating hot water and heating pipes in unheated areas is crucial, but don’t overlook gaps where pipes pass through walls and partitions. These gaps can lead to draughts.
Fill these gaps with flexible filler like decorators caulk or silicone-based mastic to prevent air leakage. Choose a flexible filler to accommodate pipe movement due to temperature changes.
For larger gaps, use expanding foam filler for excellent insulation. Once it expands and sets, trim it flush with the wall and touch up with caulk or decorators filler if needed.
Apply filler carefully, wiping off excess with a damp cloth before it dries. For more guidance on dealing with cracks, refer to our Filling Cracks Project.
Draught Proofing Floors, Skirting, Chimneys, and Fireplaces
Similar to filling gaps around pipe work, draught proofing floors and skirting involves using caulk or fillers, which come in various colours to match floorboards and blend in.
For detailed instructions on filling gaps between floorboards, refer to our project dedicated to this topic.
Draught Proofing Chimneys and Fireplaces
Fireplaces, chimneys, and open flues create direct pathways for cold air to enter your home when not in use. You have two options to address this.
One solution is to install a cap on the chimney stack, preventing air from entering from above, that is if it’s not being used obviously e.g. the fire itself has been decommissioned.
Alternatively, you can use a device inserted from below to block airflow. These devices, resembling umbrellas or balloons and should feature conspicuous indicators to remind you to remove them before lighting a fire.
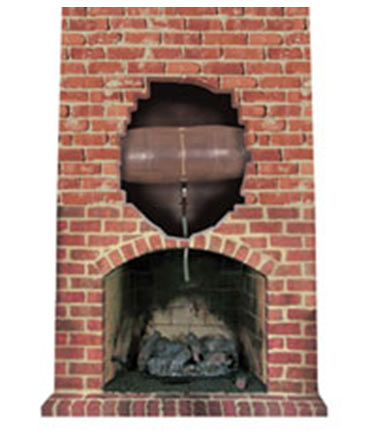
A chimney balloon in place – Image courtesy of greensource.construction.com
Draught Proofing Electrical Fittings in Ceilings or Walls
Addressing gaps in electrical fittings is crucial to prevent draughts. Downlights, especially, can be problematic as they create openings in ceilings.
A practical solution is to use downlight caps or covers, which reduce airflow through the light fixture and maintain fire safety. These covers also prevent loft insulation from being pressed into the fitting, minimising fire risks.
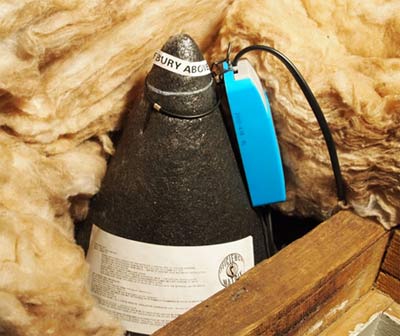
A down light cover – image courtesy of efficiencymatrix.com.au
Despite the above, it’s also essential to consider ventilation needs, especially if you have fuel-burning appliances like heaters or boilers. Consulting a professional before draught proofing is advisable to ensure adequate ventilation remains. If ventilation is compromised, adding a ventilator to a window pane can help, along with installing a carbon monoxide alarm for safety.
Additionally, be mindful of potential condensation issues, especially in areas like the bathroom and kitchen. Although plugging gaps stops problem draughts, it does have the adverse effect of removing a lot of natural ventilation. Installing controlled ventilation solutions such as extractor fans can mitigate this problem effectively.
To ensure that you remain warm and cozy during the colder months of the year and also that you don’t waste money on heating that’s simply leaking out your home it’s massively important that any draughts are resolved as quickly and efficiently as possible, so follow our tips above and get them resolved.