The electric cooker is pretty much the staple appliance in most kitchens and whether it’s a standard domestic cooker or something a little more industrial, if you find yourself without one, you’re absoluteley stuffed!
If your old faithful electric cooker has finally given up the ghost and you’re looking at replacements and the cost of not only buying a new cooker but getting it installed, you may be thinking; That’s fine, I’ll just install it myself!
Before you do go down the DIY install route, there are quite a few things to consider first.
Warning: To complete electrical works you must comply with Electrical Regulations – Click here for more information.
How Should an Electric Cooker be Installed?
Installing or fitting an electric cooker must be done on its own circuit. An electric cooker cannot be spurred of any other circuit or socket and must be controlled by its own fuse at the consumer unit or fuse box.
For this reason, if this is a new installation e.g. you’re not connecting into an existing cooker supply, it counts as installing a new circuit and is forbidden by anyone other than a Part P qualified electrician. Please see our project on part P if you do not understand this.
Connecting the cooker cable to the mains supply is the last part of this project. When connecting a cooker or working on any electrical circuit, the appropriate fuse in the fuse box or MCB in the consumer unit should be withdrawn or turned off before you do anything.
You should also turn the power off at the cooker control unit (if it has a switch). This is the connection point that the cooker connects to the mains supply – more on this below.
What Type of Circuit does an Electric Cooker use?
An electric cooker will always use its own circuit that runs directly from the consumer unit or fuse box to the cooker and uses its own MCB or fuse. It must also use the correct size cable for the the amount of power it needs to draw.
As the cable doesn’t run back to the consumer unit or fuse board (as a standard ring main would) and effectively ends at the point it connects to the cooker, this is classed as a radial circuit. So in answer, an electric cooker runs on a radial circuit.
What Type of Switch, Cable and Fuse/MCB is Needed for a Cooker?
An electric cooker will need to use the correct sized electrical cable and fuse or MCB for the amount of power it will draw and this depends on its wattage.
Electric cookers draw huge amounts of current because of the heat they need to produce for cooking.
To cope with the demand for current required by the cooker, a larger fuse or MCB is required, as is thicker cable and a double pole isolating switch.
If the fuse or MCB that’s used isn’t large enough to cope with the current drawn it will simply trip as soon as it’s used.
On the other hand, if the fuse or MCB that’s used is too big, then in the event of any problems it may not trip or blow at the correct time.
Likewise if the cable that’s used is not large enough to supply the cooker it can easily heat up and catch fire!
The actual size of cable required can vary and is directly related to the power of the individual cooker you’re working with (See our table on cable sizes and check the power rating of your cooker in the manufacturers instruction manual).
In 99% of cases 6mm T&E (twin and earth) cable and a 32amp fuse or MCB should be sufficient, but as said, what’s actually required is down to the individual appliance you’re working on, so you need to check and make sure that the circuit you’re installing or the existing circuit is up to the job!
So, as you can see, using the correct cable and fuse/MCB for your appliance is absolutely essential.
In terms of the switch that’s used, this is also equally important. All electric cookers must be installed using a double pole switch!
With a standard switch installed on a circuit, when it’s turned off it interrupts the live wire of the circuit – the switch breaks the connection in the live wire cutting off the power.
With a double pole switch the connection to the live and the neutral is broken so there is no fear of any residual current causing a shock when the switch is off.
Cooker Control Unit
The cooker must be connected to a cooker control unit (as seen in the image below). It must be connected via the correct size cable that in turn, is connected to the correct size fuse or MCB in your consumer unit or fuse box.
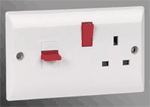
Cooker control switch featuring a 13amp standard plug socket
The cooker control unit fits into a standard patress box, just like a socket outlet or switch and may be flush or surface mounted. Some cooker control units offer simple switching facilities but others also include a standard socket.
If a 13amp socket is included in the cooker control unit, an additional demand of 5 amps is placed on the circuit and your cable and switches must reflect this increase.
Cooker control units are also generally fitted with neon lights to signify that the unit and/or switch is turned on or off and to confirm if there is current reaching the connected appliance.
One point to note is that your electric cooker should be installed within 2 metres of the cooker control unit, however due to the obvious heat generated by the cooker, it should never be installed above it, it should be places slightly to the side.
What Different Types of Electric Cooker are There?
There are 3 main different types of electric cooker available today, these are:
- Freestanding electric cookers
- Built-in electric cookers
- Built under electric cookers
The main differences between each of the cooker types listed above is how and where they are installed.
Freestanding Electric Cookers
As the name may suggest, this type of cooker is essentially a self contained unit and normally features an oven at the base, gril above it and then three or four hobs above the grill section.
Freestanding cookers are normally around the standard width of 600mm and are installed in a standard unit-width gap between other kitchen cupboards or at the end of a run.
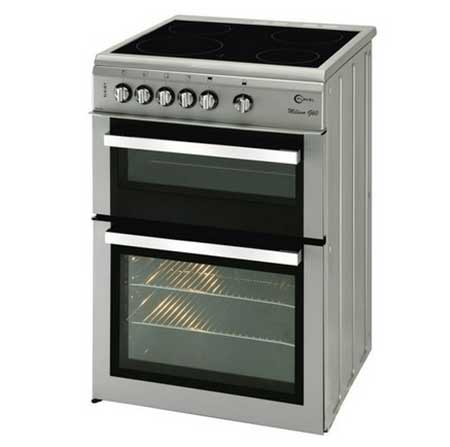
Free standing electric cooker
One thing to note is that occasionally, freestanding cookers are secured to the walls surface behind them via a chain. This is to prevent them from toppling over if they are pulled forwards.
This securing chain is a required safety device for gas freestanding cookers to prevent it from falling forwards and ripping the gas pipe off of the wall causing a gas leak, but can occasionally also be fitted to electric freestanding cookers.
Built-in Electric Cookers
The built-in (or eye-level) electric cooker is normally fitted inside a standard kitchen unit carcass at around 720mm from floor level, hence the alternate name of an eye-level cooker.
The height requirements are normally to allow for a cupboard or set of pan drawers to be installed beneath it.
As I’m sure you have guessed, the built-in electric cooker does not feature any integrated hobs as they would be too high to use. Instead, separate gas or electric powered hobs are installed in another location in the kitchen.
They are also available as either single or double ovens.
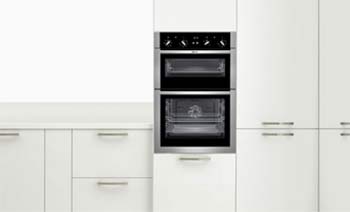
Built-in electric cooker
Built Under Electric Cookers
Similarly to the built-in cooker, the built under cooker is installed within a standard kitchen unit carcass, but instead of being fitted at eye-level, it’s installed under a kitchen worktop.
When looking to purchase a build under oven it’s a very easy mistake to make to confuse a build under oven with a built-in oven, but they are distinctly different in that built-in ovens tend to be around 880-890mm in height whereas built under ovens are only around 720mm in height.
As with build-in cookers, build under cookers do not feature an integrated hobs. In most cases a separate gas or electric hob unit is installed above the built under oven to give the appearance that they are a single unit when in fact they are not.

Built under electric double oven
Regardless of the type of oven you are dealing with the actual process and principles involved in fitting and connecting up an electric cooker should be pretty much the same for each different type.
What if I Have a Gas Oven or Hob, Do I Still Need an Electric Supply?
If you do have a gas oven or hob, yes you probably will still need an electric supply. Although the main body of the oven or hob may run off of gas, there are other components that will still require electricity to operate.
Many modern ovens and cookers are fan assisted, meaning that they have a fan built into the rear of the oven area that can be turned on that then blows the generated hot air around the oven so that it’s evenly distributed and what ever is in the oven is in turn cooked evenly.
These fans are more often than not electrically powered.
Additionally, most modern ovens have some sort of timing function to enable the oven to be turned off after a set cooking time. This will also probably need an electric supply to operate.
In the case of a gas-powered hob, you might think; how can this possibly need a supply of electricity to work?
In answer, the hob itself will be fully reliant on gas, but the igniter that sparks to light the gas will in most cases need an electricity supply in order to generate a spark.
Wiring up an Electric Cooker
If you have read through the above in detail you should now be well aware of the rules of fitting an electric cooker and whether you are allowed to do this.
For the purposes of this project we are going to be doing a like-for-like swap e.g. an old broken electric cooker for a brand new one of the same type, in the same location but more efficient and due to this, requires less power to run.
As stated above, the principles of removing the old cooker and connecting the new one should be pretty much the same regardless of the type of electric cooker you are dealing with.
We also know that the electrics in the property are all in good condition and fully working due to a recent upgrade from an old style fuse board to a new consumer unit.
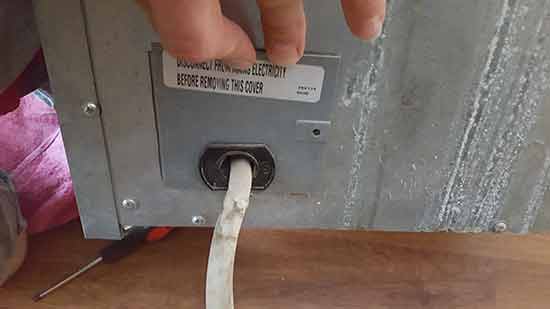
Step 1 – Turn off the Power!
As we have stated a fair few times already, but needs to be said again – before we do anything at all, turn off the power!
This means turning the power off at both the cooker control unit and also isolating the circuit directly in the consumer unit or fuse box e.g. turning off the MCB or pulling out the fuse.
This provides double protection in that if someone inadvertently turns the power back on at the consumer unit/fuse box, you’re still protected as the cooker control switch is turned off.
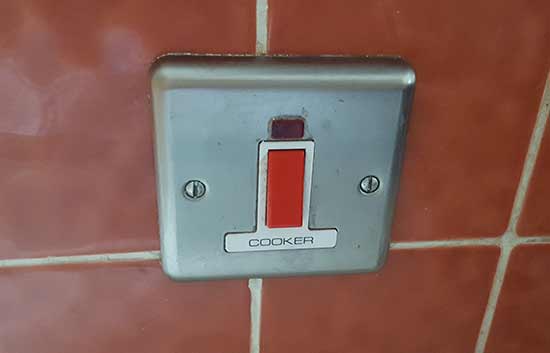
Power turned off at cooker control unit
Step 2 – Remove the old Electric Oven
Before fitting the new oven in place, the old one will need to be removed.
If you’re working with a freestanding cooker, then this can in most cases simply be gently pulled forwards until it is free of the recess it’s sitting in.
In this case as we are working with a build under cooker, it will first need to be unscrewed so that it can be pulled out. This should also be the case for a built-in oven.
Firstly, if there is a plinth installed at the base, pop your fingers up and under and pull this forwards to pull it off. It should simply be clipped to the unit legs so should come off easily. This is just to get it out the way.
Plinth below cooker unit to be removed
It’s a good idea to have a vacuum handy here as it can be a bit dusty and grimy behind the plinth.
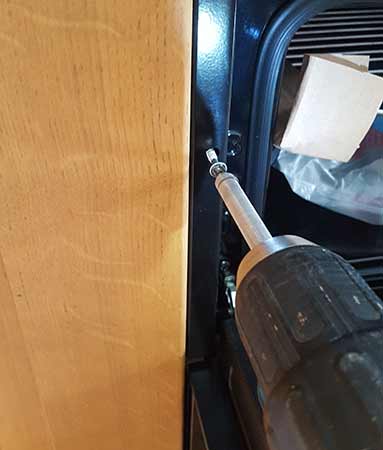
Next, open up both the bottom and top oven (if there is one) doors and down each side you should see a screw head some where. These screws are what secures the cooker in place. Use a drill/driver or screwdriver to remove each screw.
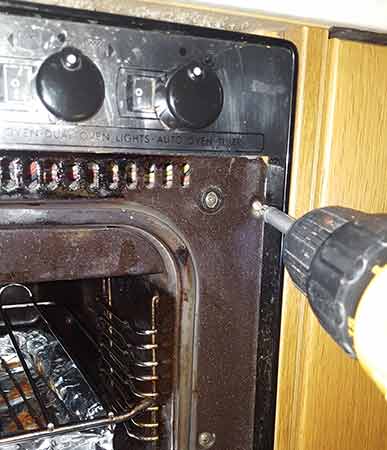
Removing each retaining screw to enable cooker removal
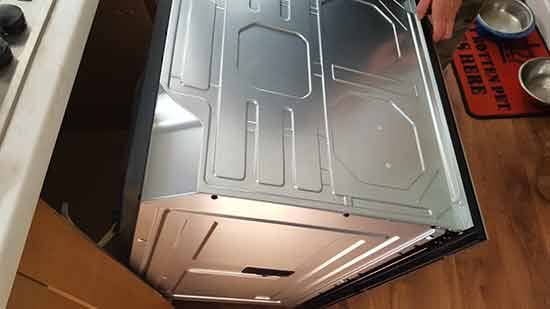
With any and all screws removed, pull the cooker gently forwards and it should start to pull out from the unit carcass.
Pulling old electric cooker out to remove it
Don’t pull it all the way out as yet as they can be quite heavy (40kgs or more). Get some help to pull the old electric cooker all the way out, but just before it comes out, drop it down so that the front bottom edge rests on the floor.
This will allow you to see exactly what’s going on behind it in terms of how much length you have on the cable connecting it to the cooker control unit.
There should be more than enough if the person who installed the old cooker did this correctly.
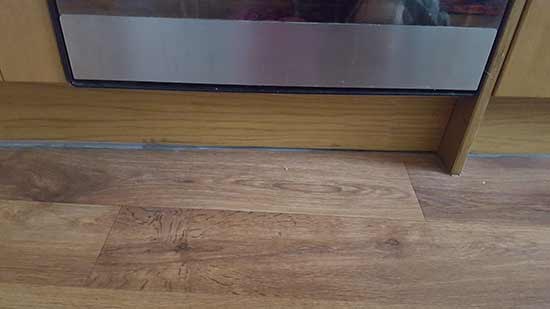
Pull old cooker forwards until you can see the cable
Once you’ve confirmed all is well and you have enough slack on the cable, pull the old cooker out and place it to one side out of the way
Step 3 – Measure to Check new Oven Fits
Before popping the new cooker into place for a test fit, it’s a good idea to have a quick measure up just to make sure that your new one will indeed fit.
In this case as there was a gas hob installed above the old cooker, the gas feed pipe for the hob needed to be considered in terms of the new cooker.
We measured up the old cookers slope, built in to compensate for this and other potential items and how this compared to the new cooker.
Fortunately, the new cooker was slightly shorter in terms of depth, which meant that the slope was pushed forwards that bit more resulting in plenty of room.
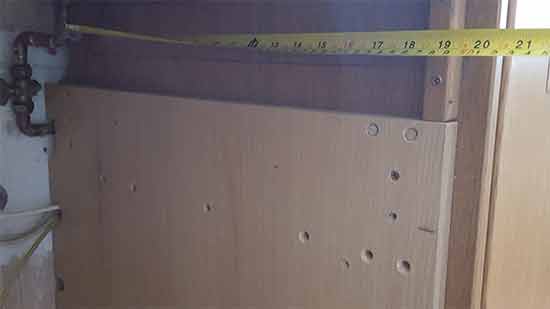
Measure installation space and old cooker to make sure new cooker fits
Note: If you find that your new electric cooker, once fitted, fouls any gas pipes as it’s a slightly different size or shape to the old one DO NOT attempt to adjust this yourself in any way. You will need to contact a Gas Safe registered engineer to move the pipe for you
Step 4 – Disconnect the Cable to the old Oven
Before attempting this, just make sure again that the power is totally off to the old cooker!
Follow the cable to the rear of the old cooker to where it’s connected. Depending on manufacturer and type of cooker this may vary, but essentially the cable will be connected to some type of terminal.
In this case it was behind a metal plate. We removed the screw holding the plate in place to reveal the connection terminal behind it.
Remove the terminal cover plate to reveal the connection terminal
Once the connection terminal had been exposed, we could then go ahead and disconnect it. Using a screwdriver, we loosened the live, neutral and earth terminals and then prised the cable free of the terminal.
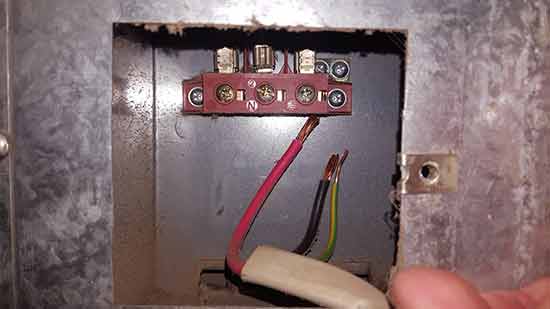
Loosen the live, neutral and earth terminals and remove the electrical supply cable
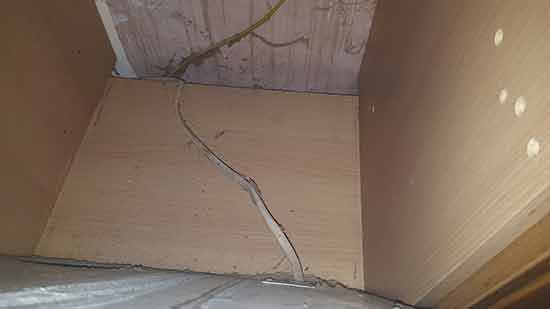
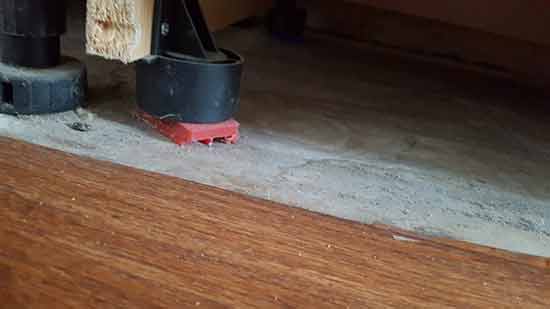
Step 5 – Have a Good Clean up
With everything now out of the way it’s a great idea to have a good clean up. Things can get pretty dirty behind cookers as they are rarely moved.
Vacuum up the dust and debris and then give everything a good clean using some suitable multisurface cleaner.
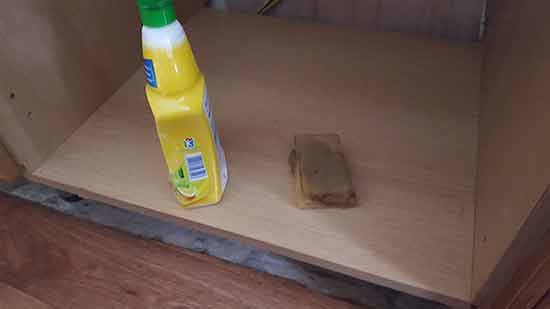
Have a good clean up after removing and disconnecting the old cooker
Step 6 – Test Fit new Oven
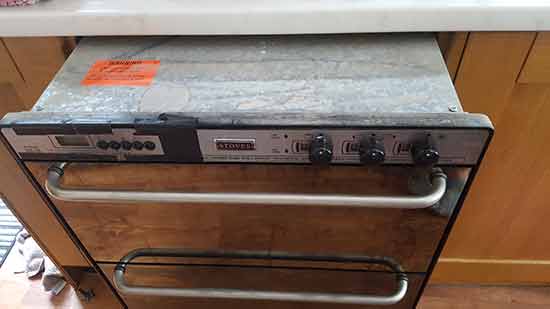
Before we even think about connecting anything up, it’s important to test fit the new cooker in place, just to make sure all is well and good.
Using a second pair of hands to assist, gently lift the new cooker in to place and then slide it back into the kitchen unit housing.
If all is well and good, the new cooker should slide in fairly easily. If not you will need to pull it back out and inspect it to find out why.
Tip: To allow the new cooker to slide in a little easier, squirt some furniture polish on the base and around the sides of the interior of the unit carcass.
Position the new cooker in place to make sure that it fits
In this case, once fitted we found that the new cooker was 5mm taller than the old one, meaning it did not slide under the worktop.
To cure this, we pulled it back out and then dropped the unit down just over 5mm by replacing some of the packers that were in place under the unit feet.
Make any fine adjustments to the kitchen unit so that the new cooker fits as it should
Step 7 – Connect up new Electric Cooker
Now that we know that the new cooker will fit into the unit recess as it should do, before we can actually fit it in place, the final job is to connect the electrical supply cable to the terminal on the rear of the new cooker.
In the case of our supply cable, it was fairly old so was still using the old style wire colours as opposed to the new. This is fine as long as it’s been tested and confirmed to still be fit for purpose.
As it had been tested after the new consumer unit install a few months previous we knew this was the case and could go ahead and connect it up.
If however you are in any doubt that it may not be, get it checked by a qualified electrician.
To get the new cooker connected up if you are dealing cables still on the old wire colour scheme, it’s just a case of matching each cable to the correct terminal.
Old Wire Colours
- Red = Live
- Black = Neutral
- Yellow and Green = Earth
If however you are dealing with wires using the new wire colour scheme, they are as follows (more information on wire colours can be found in our project here):
New Wire Colours
- Brown = Live
- Blue = Neutral
- Yellow and Green = Earth
In most cases there will be some kind over cover over the terminals to protect them and prevent shocks and anything from touching the live terminal. Remove this for now.
With the terminals exposed, we used a screwdriver to loosen each one and then connected the red to the “L” terminal, the black to the “N” terminal and the yellow and green to the “E” terminal.
The protective cover was then refitted to hide and protect everything.
Just to make sure all was well, the power was then turned back on to make sure the cooker fired up. Once confirmed, the power was once more turned off.
Turn on the power to test the oven turns on as it should
Step 8 – Install new Oven
Now that the electrical supply cable is connected up correctly and we have tested that the oven turns on as it should do, it’s time to get it fixed in place.
Position the cooker with the rear bottom edge resting on the base of the unit and then lift the front edge (with help if needed) and slide it backwards into the unit carcass, applying some gentle pressure.
Once in place, ensure the sides of the cooker are flush with the edge of the carcass so that it can be screwed in place.
Once flush, use a drill/driver to screw a screw into each fixing point.
Once fully in place, screw in screws to the fixing points to hold the cooker securely
Step 9 – Remove all Packaging and Turn it on
Once fixed properly in place, the last job is to remove any and all packaging from the front of the cooker and also more importantly, anything from inside.
Once all gone, you can then safely turn the power back on and fire it up to make sure it works as it should do.
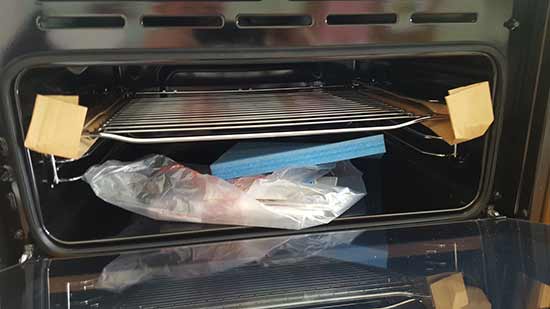
Before use, make sure you remove any and all packaging from the cooker
Replacing and connecting up an electric cooker is a fairly simple job as long as everything is in place to allow for a straight swap. If, however, there is any doubt, you should always get a professional electrician in to do the work for you.
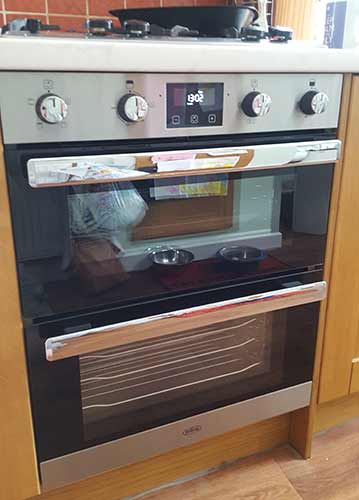
New electric cooker successfully installed