The dictionary definition of “Feathering” is “To become thin, or less dense at the edges” and the term is applied to any operation where a material is reduced from one thickness to almost nothing.
Clearly it originates with the properties of an actual feather where the density is reduced both from the centre to edge in a horzontal direction, as well as getting thinner and less dense from top to bottom.
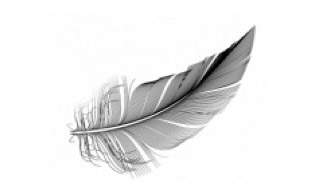
Feathers get less dense along their length
Feather Edged Boards Used for Fencing and Garden Buildings
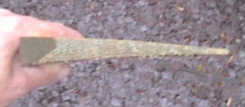
The most obvious application for the DIYer or Home Improver, is in the Feather edged boards used for overlap fencing and panelling.
The top edge of the board is quite thick and it tapers down to a thinner edge at the bottom. This allows each board to overlap the one below it by a margin large enough for the water to run down the boards and keep the structure watertight.
Feather edge fence panels are called close boarded panels because, obviously, the boards are very close to each other. To find out more about this, see our project page on close board fencing.
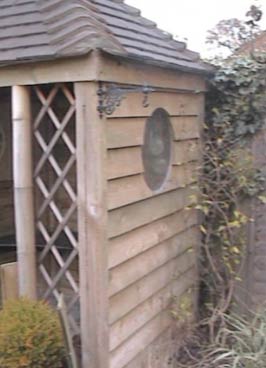
Using Feather Edged Boards to keep a shelter watertight
Because of the difference in thickness of a feather edged board, they usually develop a slight bow. Whereas with most timbers a bow would be a disadvantage, with feather edged boards it can be turned into an advantage.
By making sure the underside of the bow (the concave surface) faces the building, the bottom edge hugs the board beneath it really tightly when the board is fixed. This stops and water blowing up underneath the boards.
A slight bow in a Feather Edged Board can help it stay watertight
Feather Edging Used in Preparing for Decoration
Feathering Out Filler
Feathering is very useful when dealing with humps and bumps in walls, floors and ceilings, Done either with filler, plaster or sand and cement, it is simply an application which is thicker at one edge than the other. This allows you to even out uneven surfaces.
Many walls have lumps, bumps, depressions and hollows. These rarely show up until the first coat of paint goes on and then the reflection of the light casts all sorts of shadows making the paintwork look shoddy.
Most often these bumps etc are not very big at all but it really makes a difference to the finished job.
Feathering out with some filler will allow you to create a surface which will appear flatter even if it is not. By tapering the bumps and hollows out, the light will have no edges to reflect off and it will appear flat to the eye.
As you can see in the image below, the filler or plaster starts at its thickest at the hump and is gradually feathered out to meet the existing surface of the wall. Feathering is most often done with a wide scraper or a plasterers trowel, such as the one shown below.
There are really wide blades used for feathering out wider gaps or bumps in walls and these are called caulking blades but for the novice it might be best to use a normal (but wide) scraper and even a plasterers float or trowel.
You can see a caulking blade being used with an ideal feathering out material called Fill and Skim in our video on YouTube.

Feathering out a lump in a wall so that it is no longer noticeable
Filling and Feathering out Different Levels and Coats of Paint
Feathering out also applies to rubbing down paint where a section is missing through flaking or being knocked or chipped.
Use a fine sandpaper and rub the edges of the chipped edge hard so it slopes gently to the middle all round. This will give a flatter appearance.
Please note, it does not very often make the chip invisible and some fine surface filler can be placed into the chip to be smoothed out with a paint scraper.
Sanding down these areas is much better achieved with a Detail sander, Mouse Sander or a Delta Sander. Using differing pressures on the tool will allow you to get the surface looking flat. Be sure to get a sander with a dust bag as the sanding dust gets everywhere.
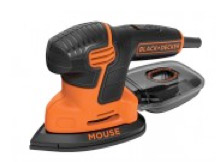
Feathering out paint layers can be done with a mouse sander
Tools Used for Feathering out
Plasterers Trowels or floats come in a few sizes. Professional plasterers use longer, wider floats as they get paid by the amount they get on a wall in a day. The bigger the float, the more they get on! You will only need a standard float which is usually 11 inches by 4 inches wide.
The important thing when choosing a float for either skim plastering or feathering out, is that it has a very thin blade. If the trowel steel is too thick it will not bend with the undulating surface of the wall and you will forever have trowel marks in your filler which you will need to sand down.
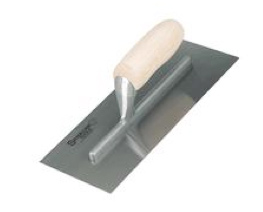
Standard plasterers finishing trowel
A wide scraper or a taping knife will allow you to feather out filler neatly and disguise the lump, bum or hollow in your wall.
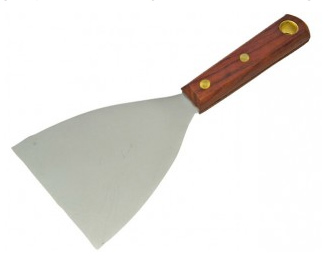
Feather out with a wide scraper or filling knife
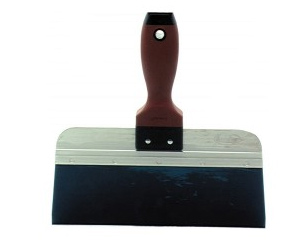
Feather out dry lining joints, filler or plaster with a taping knife or caulker
Feathering out Dry Wall Plasterboard and Plasterboard Partitions
One of the most popular methods of erecting house walls or dividing rooms is by using stud walls with a plasterboard covering. This is called “Drywall” in the US and the term has stuck over here but plasterboard partitions and dry wall are not necessarily the same thing.
Plasterboard partitions are (under normal circumstances) timber stud walls covered with plasterboard and then coated with skim plaster. You can see how to erect plasterboard partitions in our project here and also how to skim plaster the partiion once complete in our project here.
If you would like to know more about dry lining and errecting dry lined walls, see our project here.
Dry lining however is usually done on the same type of stud wall but this time the boards are not plastered, they are just painted. Keeping the wall “dry” (apart from the paint of course).
The plasterboard used for dry lining is slightly different from the normal sheets of plasterboard in that it has tapered, or feathered edges. As the image below shows, the edge of the board is tapered a little to allow (when the joint is screwed to an upright or horizontal stud or noggin) a strip of dry walling tape to be stuck over it and then some dry wall filler, or Fill and Skim (see below) to be feathered out over the tape.
Because of the feather or taper in the board itself this means the filler can finish flush with the surface of the board and when painted the joint is completely hidden.
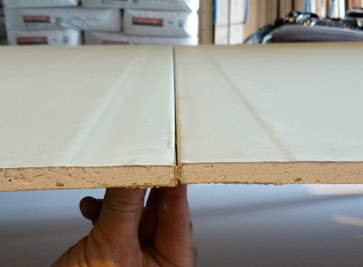
Use tapered or feathered edge plasterboard for dry lining
Materials Used for Feathering out Plaster, Filler or Dry Wall
Feathering will not, in most cases, allow you to finish with a perfectly flat wall. If the bump is proud of the wall in the first place, as in our diagram above, then the best you can hope for is a surface, which to the naked eye, is flat.
To get rid of any surface bumps or lumps and finish with a totally flat surface, the chances are you will have to chisel off the lump and make good the hole with some filler.
If you are attempting to feather out with filler, use some All-Purpose filler which can be pre or ready mixed. This will help you feather out well as the filler will be of the same consistency every time you use it.
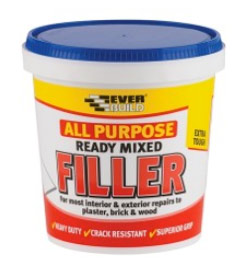
Ready mixed all purpose filler ideal for filling holes and feathering out lumps
For larger areas that need feathering out, for example when you have inserted a door frame and filled in round the edges which may not then be flush with the existing plaster finish, or where a new section of wall meets and older one, you might want to look at something called Fill and Skim.
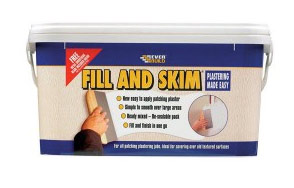
Everbuild Fill and Skim ready mixed substitute plaster
This is a tub of ready mixed material that just needs a bit of water added to create, in effect, a cross between filler and skim plaster.