An FCU or fused connection unit is essentially an inline fuse and in the UK they are mainly used where a new electrical supply is taken from an existing supply that is going to feature more than 1 single additional socket or a certain type of appliance.
This is often the case when a new radial circuit (more than 1 new socket) is taken from an existing radial circuit or ring main.
If any issues occur on the new circuit due to an appliance that has been plugged in creating too much load, the fuse in the FCU blows and isolates the new branch to reduce the chances of any damage or shock injury.
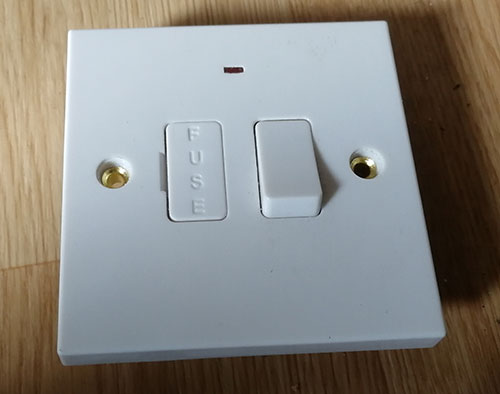
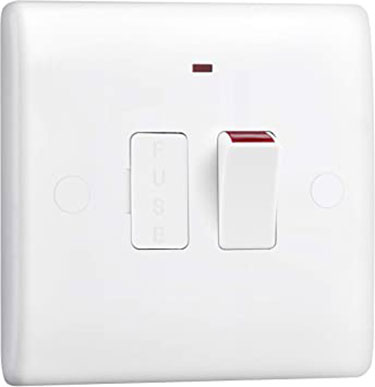
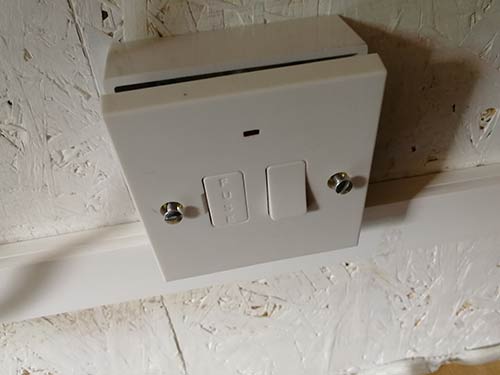
Standard 1 gang switched fused connection unit
Rules and Regulations for Electrical Work
As we all know, electrical work is inherently dangerous and should only ever be attempted by someone with the skills and knowledge to do it safely and correctly. In essence, this means what’s known as a “competent person”.
In terms of what a competent person is, this is someone with the necessary skills and knowledge to do the work to regulations standards, fully test the circuit once complete and then issue a minor works certificate to prove everything has been done as it should be. Essentially the only person able to do this is a Part P registered electrician.
If you aren’t Part P registered then in terms of the jobs you are able to do, this will be pretty much limited to just changing existing socket and switch face plates and also existing light fittings. Failure to comply with these rules can mean that your home insurance is invalidated and you may also face issues if you try to sell your home, so be warned!
When are Fused Connection Units Used?
The fused connection unit is an electrical unit that features a fuse. The incoming electrical supply runs through the fuse and the outgoing supply then goes to the load or appliance, ensuring that the load item is protected by the fuse.
If the load being drawn by the appliance becomes too great for the circuit, the fuse blows and cuts the supply preventing the chances of overheating, fire or electrical injury.
With this in mind a fused connection unit is generally used where there is a chance that the appliance or object drawing power could pull too much and create a potentially dangerous situation.
It is for this reason that they are required when adding additional radial circuits to any form of existing circuit. If you add an additional 4 sockets to an existing circuit, potentially a washing machine, tumble dryer, vacuum and kettle could all be plugged in and turned on at the same time.
As each of these items can draw huge amounts of current (some more than others) if they were all running at the same time they could easily pull too much current, cause massive overheating and then ultimately a fire.
The above is a bit of an extreme example but paints a good picture. As a summary, an FCU is generally used where there is the risk of either too much current being pulled from a circuit or the circuit itself is in a potentially dangerous location such as a bathroom.
Although the circuit itself will be protected by its own fuse or MCB in the fuse box or consumer unit, the fused connection unit acts as a secondary safety fallback, providing a further level of protection.
Some common uses for fused connection units are as follows:
- Creating new radial circuit from an existing radial or ring main
- To power an appliance that pulls a lot of current e.g. washing machine, cooker, dishwasher, boiler etc.
- For electric power showers
- For appliances in bathrooms e.g. shaver sockets
Different Types of Fused Connection Unit
In the UK there are 5 different types of fused connection unit; switched with a flex outlet, switched without a flex outlet, single and double pole and un-switched.
Each different type of fused connection unit is used for a specific scenario, here’s a brief run down of each type and when it’s generally used:
Switched With Flex Outlet
A switched fused connection unit with a flex outlet features an integrated internal fuse that cuts power to the connected device in the event that large amounts of current are drawn.
The unit also features a manual switch to the allow the connected appliance to be manually turned on and off.
With other FCU’s the electrical supply cable normally runs out of the unit in either trunking or is chased into the surface behind, but with this unit a flex wire runs out of the unit itself to the connected device.
Switched FCU with flex outlet
Switched Without Flex Outlet
As you might guess from the name, a switched FCU features not only a fused unit but also an isolation switch so the power supply can be manually turned off.
These are generally used for appliances where being able to turn them off manually can be a great benefit. A good example of this is an electric heater or a cooker.
Both electric heaters and cookers draws large amounts of current so it needs a fused connection unit but at the same time it may not be left on all the time so an additional means of turning it off is a real bonus.
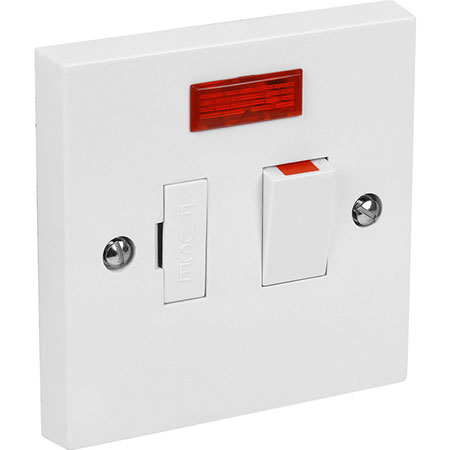
Switched FCU without flex outlet
Unswitched
Again as the name suggests, unlike the example above that has a manual switch, an un-switched FCU only features a fuse and no manual switch.
These units are generally used for appliances that require a constant supply of power. A good example is a freezer.
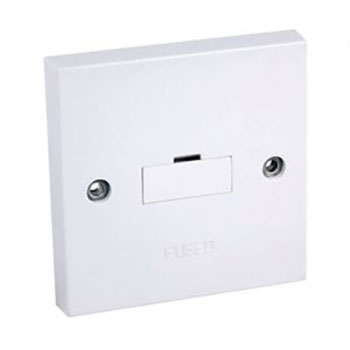
Unswitched FCU
Single and Double Pole FCU’s
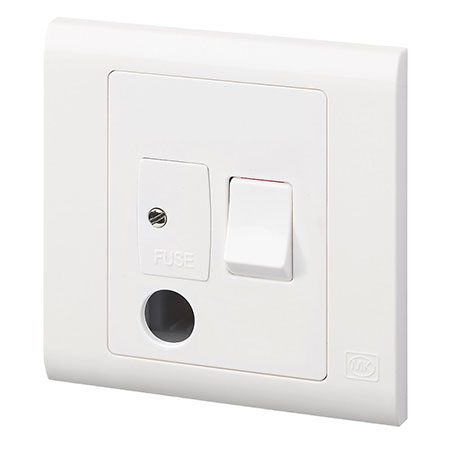
A single pole FCU is generally regarded as being less comprehensive then a double pole unit. With a single pole, the supply is only cut to the live wire and the neutral is left still connected.
With double pole units the supply is cut to both the live and neutral making it a more complete safety device. Double pole units are generally used for devices that use large amounts of current such as cookers and boilers.
Single pole fused connection unit
Tools and Products Needed for Fitting Fused Connection Units
In order to successfully fit a fused connection unit, the following tools and products are generally used:
- Drill/driver
- Small flat blade screwdriver
- Philips screwdriver
- Utility knife
- VDE wire strippers
- Plastic/metal back box (depending whether you are surface mounting or chasing in)
- VDE Pliers
- VDE side cutters
- 8x 30mm screws
- Wall plugs (if fixing to masonry wall)
- 6mm masonry bit (if fixing to masonry wall)
- Enough 2.5mm twin and earth wire to complete job
- Chosen fused connection unit
How to Fit a Fused Connection Unit
Fitting a fused connection unit is a fairly easy task. In this example our electrician is going to spur off of an existing socket to add 2 new sockets by adding a fused connection unit between the existing socket and new sockets.
Step 1 – Isolate Power
Before anything else is done, the very first job to do is to is to isolate the power to the circuit you will be working on. This means either pulling out the fuse in the fuse box or turning off the MCB in the consumer unit.
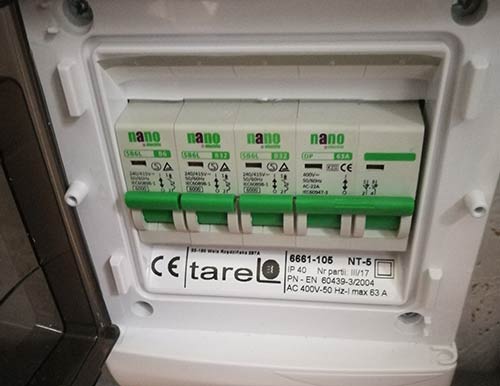
Isolating power at consumer unit
Step 2 – Fit Back Box
The next job is to then fix the back box in place where the FCU is to be installed. This will either be a metal one (find out how to install metal back boxes here) or a plastic back box (find out how to install plastic back boxes here).
In this example the electrician is using a plastic back box for the FCU as it’s being installed in a shed. If it was being installed in a house a better more professional finish would be to use a metal back box and recess it into the wall.
As the supply and feed cables are being run in a length of trunking it was notched out to allow the cable to run through and then the blanks were removed so it could be screwed to the wall ensuring. Before finally fixing, it was fully straightened and levelled.
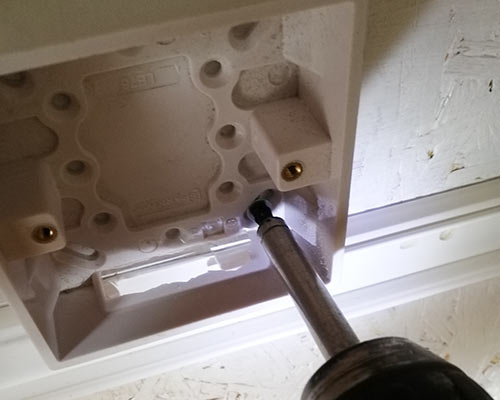
Back box for FCU fixed in place on wall
Step 3 – Run Electrical Cables
The next job was to run the feed and supply cables from the spur point (in this case an existing socket) and from the FCU to the new sockets.
The existing socket was opened up and the blanks removed from the back box where the cable is being run.
Using the correct sized cable, in this case 2.5mm twin and earth, the cable was cut to the required length and the wires at both ends were stripped. Find out how to strip wires in our project here.
Once stripped, the cables were then run from the existing socket, through the trunking to the FCU back box.
The wire at the existing socket end was then connected up to the existing socket to the correct terminals on the rear, e.g. brown live to live, neutral blue to neutral and earth to earth.
Depending on how old the property is, the wire colours may differ slightly. To find out about old and new wire colours see our project here.
Next, another length of cable was cut and run from the fused connection unit back box out to where the new socket will be placed. Both ends of the cable were also stripped before installing.
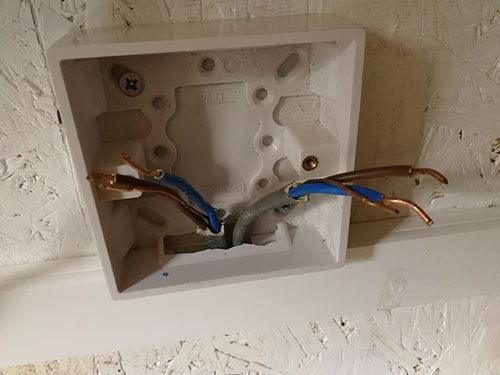
Running feed and supply cables form existing socket to fused connection unit back box
Step 4 – Connect up Fused Connection Unit
Once the feed and supply cables have been run, the fused connection unit is then connected up.
On the rear of the FCU there will be 6 separate terminals, 3 are for the supply in to the unit and the other 3 are for the load going out of the unit. Which one is which will be stated on the unit or in the manufacturers instructions.
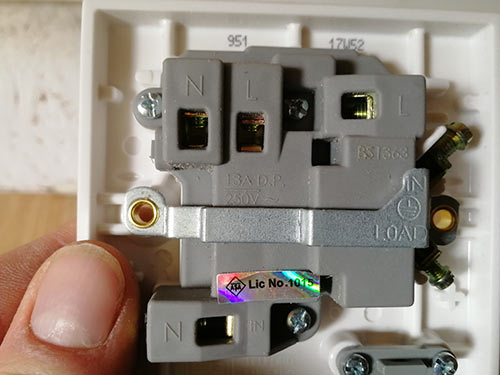
Reverse view of fused connection unit showing all connection terminals
Firstly, the incoming supply wires are connected. The brown live should be connected to “L IN”, the blue neutral to “N IN” and the earth to “EARTH IN” (ensuring to add earth sheath to the bare earth wire).
Next, the load wires are connected up. Connect the brown live wire to “L LOAD”, the blue neutral to “N LOAD” and the bare earth wire to “EARTH LOAD”
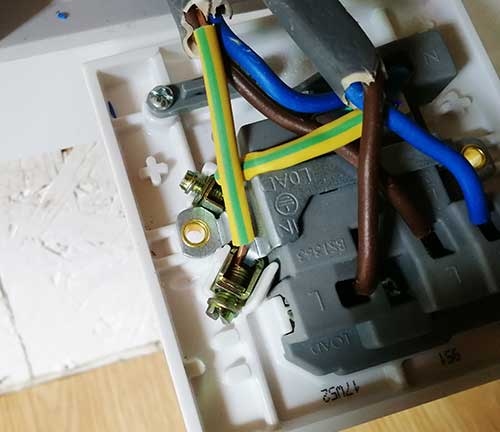
Supply and load wires connected to fused connection unit
Step 5 – Screw FCU Face Plate to Back Box
Once all the wires have been connected to the correct terminals on the back of the FCU face plate it is then screwed on to the front of the back box, securing it in place.
Each screw is pushed through each hole and then lined up with the screw holes on the back box. A flat blade screw driver is then used to tighten them up. They shouldn’t be tightened too much as the plastic back boxes can easily crack. This is also the case for the face plate.
Screwing fused connection unit face plate on to back box
Step 6 – Connect up Load
Once the FCU is all connected up the load cable is then also connected to complete the circuit.
Once any back boxes are fixed in place, the supply cable to the reverse of the plug socket(s) are wired into the correct terminals, brown live to “L”, blue neutral to “N” and earth to earth terminal.
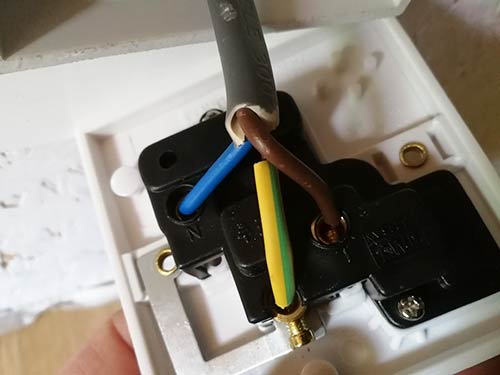
New socket connected up with load cable from fused connection unit
How to Replace a Fuse in a Fused Connection Unit
In the event that the internal fuse in your FCU blows due to excessive current being drawn you will need to replace it.
This is a fairly simple job to do but before you do anything make sure you isolate the circuit and turn off the power at your consumer unit first!
Once isolated it’s now just a question of removing the fuse and replacing it. Depending on the type of FCU you have, the fuse panel will either prise out using a small flat blade screwdriver or you may need to unscrew a small screw first.
Once the fuse panel has been opened, remove the old fuse and replace it with a new one. You must replace the old fuse with a new fuse of exactly the same amperage!
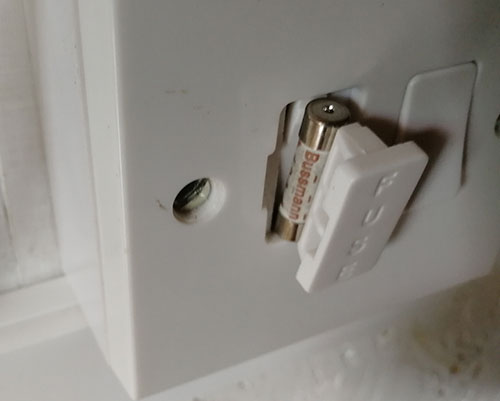
Replacing blown fuse in fused connection unit
Once replaced, push the fuse panel back in and turn the power back on and ensure any connected devices now have power.
One final important point is that you will need to find out what caused the fuse to blow in the first place so that the issue doesn’t occur again. If it was an appliance that caused the issue it may be faulty and will need testing.