A gravel board can either be made of timber or concrete and it sits between a fence panel and the ground. Its main purpose is to prevent the fence panel resting on damp and moist ground and rotting out.
In the majority of cases, a gravel board is either made from concrete or timber, with the timber version being pressure treated to ensure it also does not rot.
Fitting a gravel board to a run of fencing is not essential as the fence will still function as intended but it is a good idea simply due to the fact that any fence panels will last much longer.
What is a Gravel Board?
As we have mentioned at the top of this project page, fitting gravel boards between fence posts and under fence panels will stop any gravel, soil or whatever resides at ground level from damaging the actual fence itself, by preventing it from sitting on damp and moist ground.
Fitting a gravel board can also add a little more structural rigidity to your fence, especially in the case of timber gravel boards as they can be screwed to each fence post and effectively bond a run of fencing together.
The image below shows a gravel board fitted to a wooden post in the simplest possible way by fixing a vertical batten to each post and simply screwing the gravel board to the batten.
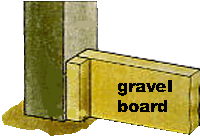
Timber gravel board
Galvanised clips or “Gravel board cleats” can be used to fix the gravel boards as they provide a degree of adjustment after fitting.
The gravel boards can be fitted to the face of the posts, the back of the posts or inbetween them, but in most instances this will be determined by the materials your fence posts are made from.
On the subject of materials, a gravel board will either be made from timber or pre-cast concrete. With timber gravel boards you will need to make sure that they have been pressure treated to prevent them rotting. Theses essentially no difference between teh two accept what they are made of.
Timber gravel boards are mostly used with timber fence posts, but they can also be used with concrete fence posts, but concrete gravel boards are mostly just used together with concrete fence posts as they slide nicely down into the recesses in each post.
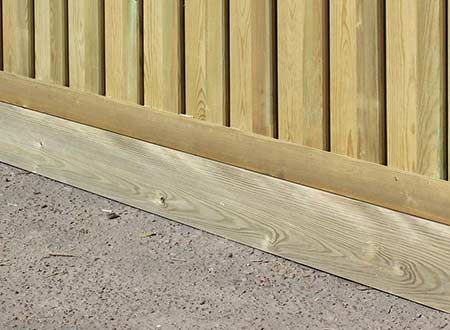
Timber gravel board fixed in place on a run of fencing – Image courtesy of jackson-fencing.co.uk
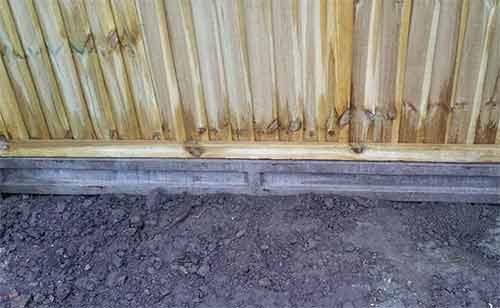
Concrete gravel board fixed in place in a run of fencing
They can be any size required. As long as they fit nicely and prevent the fence panels from resting on the ground, this is perfectly fine.
In most cases a gravel board, whether timber or concrete will be around 150mm in height, 22mm thick and 1.83m long. This is so that if used together with a 1.83m (6 foot) high fence panel, the total height of fence and gravel board will be 1.98m which is under the 2m height limit for fences.
There is no reason why two gravel boards cannot be placed on top of each other to give 300mm of protection.
Is a Concrete or Timber Gravel Board Best?
When comparing a timber gravel board to a concrete gravel board, each has their own advantages and disadvantages:
| Timber Gravel Boards | Concrete Gravel Boards | ||
|---|---|---|---|
| Pro’s | Con’s | Pro’s | Con’s |
| Cheap and readily available | Can easily rot | Should last a lifetime | Can be quite expensive |
| Good lifespan as long as they are treated | Can be easily damaged | Will not rot | Not to everyones tastes |
| Natural look and fit with timber fence panels | Have to be treated | Sturdy and resistant to damage | Very heavy |
| Easy to install | Can be painted | Can only really be used with concrete posts | |
| Available in different colours | Available in different styles | Not easy to cut to size | |
| Cheap to replace | Can be retrofitted | ||
As you can see, each type has it’s own clear advantages and disadvantages, but both will certainly fullfill the job they are intended to do.
When fitting a gravel board, ultimately the decision for which to go for is a personal one and either comes down to which type you like the look of or which you can afford.
Do Fence Panels Need Gravel Boards?
Essentially no, you do not need to fit gravel boards to any form of fencing if you don’t want to. You could just leave an inch or so gap between each panel and the ground to ensure they are kept away from damp and moisture, there are quite a few good reasons to do so.
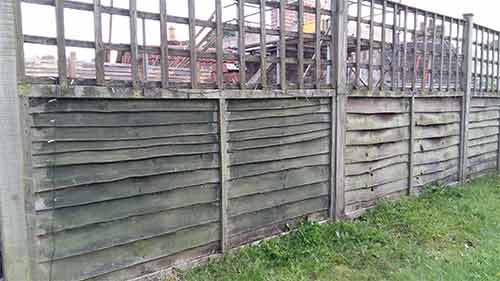
Run of fencing without gravel boards fitted
Not only will gravel boards help your timber fencing to resist moisture and rot and last a lot longer they also provide a good solid base for your fence panels to rest on, taking the strain off of any fixings.
A gravel board will also allow you to start with a level base, ensuring that all of your panels run in a totally straight line.
Going a little further from this, you can also cut gravel boards to match any slopes and undulations in ground level, so not only can you get a nice straight run of fencing but you can also plug any gaps.
Finally, the job as a whole always looks much neater and more professional with some nice gravel boards fitted!
How Long Does a Gravel Board Last?
How long a gravel board lasts really depends on what it’s made from.
If it’s made from untreated timber then the best you can expect is probably a few years tops and it will need replacing.
If their constructed using good quality pressure treated timber then you can reasonably expect anything up to 7 or 8 years.
If instead we are dealing with concrete gravel boards then that’s a whole different ball game. As concrete is pretty impervious to damp and moisture and as long as they are not damaged, concrete gravel boards can easily last a lifetime.
How to fit Gravel Boards to Fence Posts
In order to fit a gravel board, you first need some fence posts to work with.
If you’re starting from scratch and want to use timber posts, see our concreting in timber fenece posts project here.
If you are looking at installing concrete fence posts, see our installing concrete concrete fence posts project here.
Once you have installed your full run of fence posts and allowed any concrete or similar postfix to cure, you should now be ready to get started.
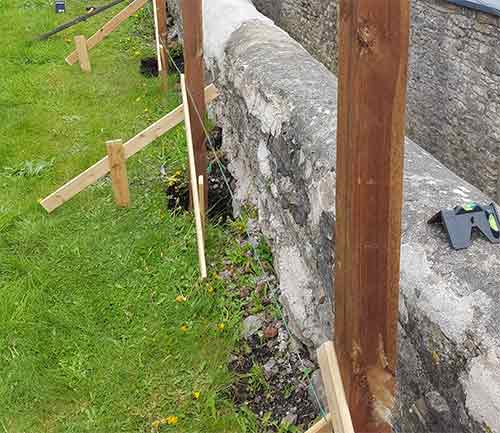
Fence posts installed and ready to fix gravel boards to
In the case that you are working with an existing run of fencing, before you can get started you will need to remove one or all of the fence panels you will be fitting your gravel boards beneath.
As a quick run down, locate any screws or nails being used to hold the fence panel to the fence post and remove them.
With the fixings removed you should then be able to easily take the panel(s) out and pop it/them to one side until needed later.
If you are delaing with an existing fence built using concrete fence posts, you should just be able to lift the panels up and out of the channels on the inside of the posts themselves.
With any fence posts errected or panels removed, you should now be ready to start.
The processes described below can be applied to almost all fencing types including close board fencing feather egde fencing and panelled fencing.
How to fix Gravel Boards to Timber Posts
The quickest and easiest way of fixing gravel boards to timber fence posts is to use timber “cleats”. These are small pieces of pressure treated batten that are screwed to the fence post and the gravel board is then screwed to the cleat.
Each cleat will need to be fixed the width of the thickness of the board back from the face or side of the post you are fixing to.
This is to ensure that the gravel board sits flush with the front of the post.
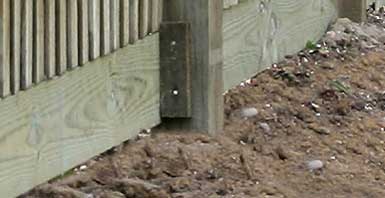
Timber cleat fixed to post ready for gravel board
If you want your gravel board to sit in the dead centre of the post, measure the post width and divide by 2. Now measure with of gravel board and divide by 2. Deduct the half width of the board from the half width of the post and this is the amount you need to measure and mark in from the post face and fix the cleat to.
The other option is to use two-pin galvanised cleats or galvanised gravel board clips.
The two-pin cleats are a little trickier to fit as you need to drill two vertical holes in your post to insert the pins into. You will need to ensure they are also level so the board sits nicely when it’s fixed in place.
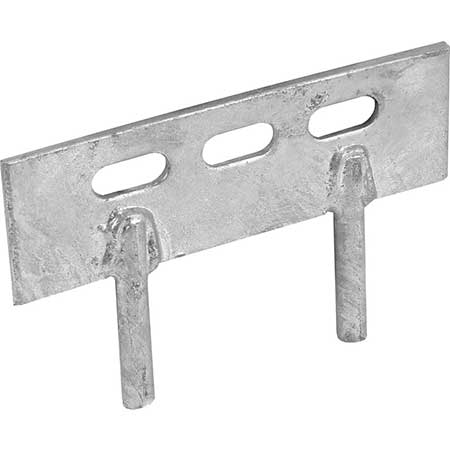
Galvanised 2 pin gravel board cleat
Once the board is fixed to each cleat, the horizontal outward force holds the board firmly in place.
The final fixing option is the gravel board clip. These are very easy to fit.
Simply measure the post width and divide it by 2 to find the centre then fix the clip over this centre point. This will result in your gravel board being fixed at the centre of each post.
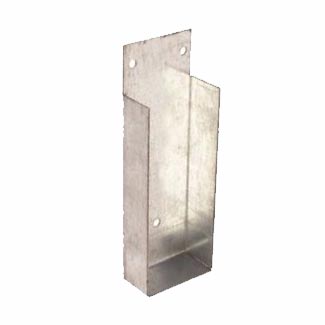
Galvanised metal gravel board clip
Which ever option you go for, always use galvanised nails or screws as they won’t rust and they will guarantee a long lasting solid fix.
Also, make sure that you attach your chosen fixing at the correct height on the post so that the base of each board is flush with the ground level or what ever height you require it to sit at.
How to fix Gravel Boards to Concrete Posts
One of the best features of slotted concrete fence posts is the fact that they have slots built into them.
These slots allow a fence panel to be simply slotted down into the post when it is in position holding it firmly without the need to drill holes or screw anything up.
Once the tricky part of getting the posts installed is completed, actually getting any fence panels fitted is a very quick job, just raise them up to the top of each post and drop them down in – simple!!
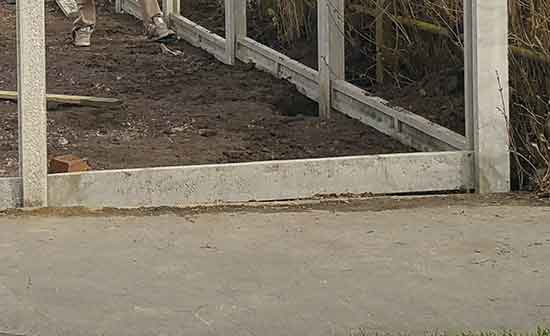
Concrete gravel board slotted down between concrete fence posts
This is exactly the same case for gravel boards. Before putting any fence panels in place, just slot each gravel board down in and then pop the panel down on top.
Note: In the event that your concrete fence posts do not have any slots, you will need to use clips or cleats, so read on below. If the posts you are working with do have slots, this is nearly always the best, quickest and most prefered option to go for.
Fixing clips and cleats to concrete fence posts is a little more difficult than fixing to timber posts mainly due to the fact that fixing to concrete involves drilling holes using a masonry bit and then inserting wall plugs or similar, rather than just screwing in a screw as you can with timber.
In terms of fixings, the same can be used as with timber posts e.g. timber cleats, galvanised 2-pin cleats or gravel board clips. These fixings can be used for both timber or concrete gravel boards.
As with timber posts, the easiest and quickest to go for are the timber cleats or clips, unless your concrete posts come with holes pre-drilled for the 2-pin cleats.
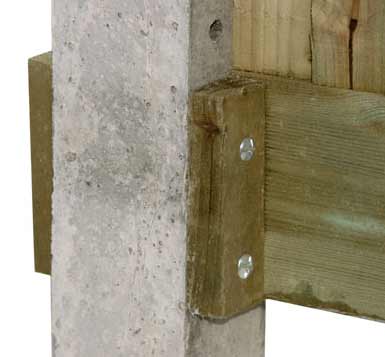
Timber cleats fixed to concrete fence post – Image courtesy of tate-fencing.co.uk
Whichever solution you go with you are going to need to drill some holes, but first you need to measure and mark where they are going to go.
For the sake of this explanation we are going to install our fixings in the centre of the post.
Measure the width of the post and then divide this figure by 2 and then measure and mark this figure on the post at the desired location at the base. This then defines the middle point of the post.
If using timber cleats, drill 2 pilot holes top and bottom along the centre line of each cleat and then hold it on the post at the location it’s going to be fixed. Using a drill and masonry drill bit, drill through each pilot hole just enough to mark the post and then put it to one side.
If using clips, hold one against the post where it is to be fixed and using a pen or pencil, mark through each fixing hole and put the clip to one side.
You can now use the marks to pin-point exactly where you need to drill your fixing holes so use your drill and a suitable size masonry drill bit for the fixings or inserts you are using to drill them out.
Once drilled you can then insert wall plugs if you are using them or position your cleat or clip in place if you are going to use concrete screws a similar type of fixing and screw it up tight.
Once your first gravel board fixing is in place you can then repeat the steps for any others required.
If you are using the 2-pin fixings, firstly mark a line in the middle of the post on the face you are fixing to at the base. Now measure how far apart the pins on the cleat are from each pin centre to pin centre.
Transfer this measurement on to the line on your post at the exact point you are positioning the cleat.
Use the correct size dril bit (should be around 10mm) to drill out each hole to the correct depth and once done do a test fit just to make sure all is well.
Repeat these steps for any others that are required and then you are ready to fix your gravel board in place.
For timber or 2-pin cleats, hold the gravel board next to the fixing ensuring it’s level and then mark on the gravel board where you need to drill through in order to attach the board. Once marked, drill your hole and then repeat for any further holes and fix your gravel board in position.
One final point to mention concerns adding gravel boards over uneven or sloping ground. In any of these instances the best and neatest solution is to “step” the fencing and gravel boards and can be seen in our stepped fencing project here.
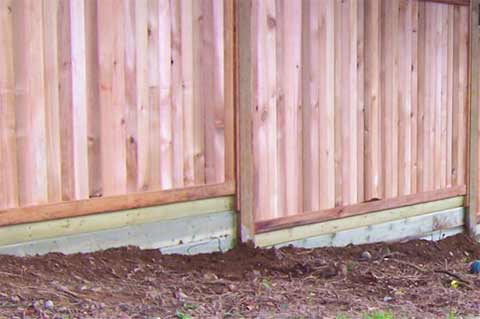
Stepped fencing using gravel boards
Alternatively where there is a very shallow slope, you can set the gravel board down into the ground as this will not only give you a nice level across the entire run of fencing, but also close up any gaps normally associated with stepped fencing.
In the event that you find that you need to cut either a concrete gravel board or concrete fence post to either shorten it or cut it around an existing object, the best tool to use is either an angle grinder or if you have one a petrol disc cutter as can be seen in the image below.
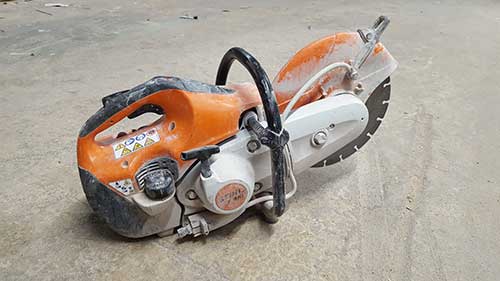
Petrol disc cutter for cutting concrete gravel boards and fence posts
Gravel Board With Hedgehog Hole
Staying with the subject of gaps, sometimes these aren’t a very good idea, particularly for any wildlife and especially for hedgehogs.
Natural gaps, splits and worn sections of fencing and perimeter barriers provide excellent access for many small creatures, allowing them to easily cross from one location to another, beit from a burrow or nest to furtile feeding grounds or a quick short cut that helps avoid a more riskier route.
In today’s busy world people are valuing their privacy and private space more and more and with this fencing is getting higher and more secure which often comes at the expense of our woodland friends.
In light of this issue, there are now several initiatives up and running, the main one being Hedgehog Street that aims to create Hedgehog and animal highways across otherwise inaccessible back gardens.
All you need to do to get involved is cut a small 5×5 inch hole in the base of your fence and ask your neighbours and their neighbours to do the same. This will then link all the gardens together and allow Hedgehogs and other small animals to easily cross from one end to another.
This is a great idea and a fantastic project to get the kids involved in!!
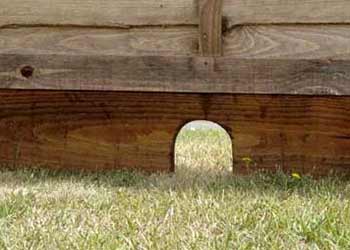
Hedgehog hole cut into gravel board
What to Treat Timber Gravel Boards With
As we stated at the top of this project, when using timer outside, always go for pressure treated timber as it’s much more resilliant to the effects of weathering, insects, algae and UV rays.
Treating pressure treated timber may seem a little pointless but it will help to preserve it and keep it in good shape even longer.
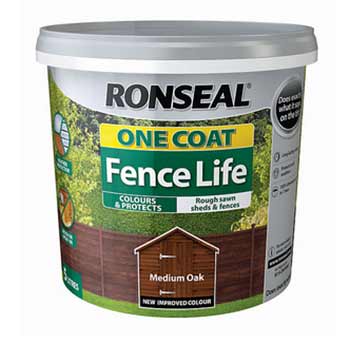
Shed and fence timber treatment
Any treatment required will only apply to timber fencing and gravel boards as concrete is resistant to rot and decay.
Generally the best treatment for gravel boards and fences is a specific exterior wood preservative. There is a huge range available today from any one of the leading brands such as Cuprinol, Barrettine, Sadolin etc.
If you want to retain a natural look for your timber fence or gravel board choose a clear wood preservative, but if you want to add some colour go for a coloured wood preservative.
For an added layer of protection you can also apply a layer of decking oil or similar, but this may affect the way in which any future treatments can be applied.
Paint is also an option for fences and gravel boards but in general, it won’t be as long lasting as using a preservative.
If you can, always go for a water based preservative or paint as opposed to a solvent based one as they are much more environmentally friendly.
How to Replace a Gravel Board
Replacing a gravel board is a fairly simple job if you have them in place already.
Where gravel boards are screwed or nailed onto fence posts using cleats or clips, simply unscrew any existing fixings, remove the old gravel board, cut your new board to length if needed and then reattach it.
Over time, gravel board cleats and clips can become damaged or worn if they are not constructed using galvanised steel or similar or if they are timber cleats, so before attaching any boards make sure you swap for new.
Even concrete gravel boards can become chipped and damaged over time, so if they need replacing, remove any fence panels on top and unslot the damaged gravel board. With this removed you can then simply slot a new one in and replace the fence panel.
Fitting a gravel board is an excellent idea if you do not have them installed already as they not only help your fence to last much longer by lifting it away from the damp and moist ground they also give a polished professional look to your fence run as a whole.

