Bathrooms and kitchens are wet and humid places! Using a waterproof floor of some kind is essential. Until now the choices were limited to lino and tiles. Many people have made the mistake of using ordinary laminate or wooden floors in these two rooms only to watch them swell up and warp as the water soaked in.
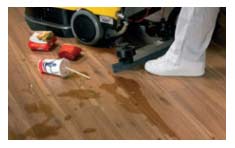
Water Spilt on Laminate Flooring
Over recent years there has been an explosion in the numbers of different flooring options you now have such as waterproof laminate flooring, vinyl laminate planks, stick on laminate effect flooring to name just a few with each having it’s own different type of fixing an installation process – some use snap together and locking joints and some can simly be glued down.
In this project we will concentrate on the snap together type laminate planks as these tend to be the most commonly available. Before laying your flooring through the use of this guide please check the manufacturers instructions for your flooring and how the joints are snapped together as the methods involved may be slightly different to those described below as if any of the joints are not snapped together correctly or are damaged then this may effect the waterproof abilities of the flooring.
With most waterproof laminate flooring the planks themselves are not designed to be submerged at any time, only to resist water from the top. It is therefore important that your existing floor is 100% dry before you lay them. If your floor is newly laid concrete or screed it must be allowed to cure for 60 days.
Fitting Waterproof Laminate Flooring
- Prepare the existing floor well. Ensure it is dry, solid, smooth and flat. Any carpet, carpet glue or tape or any other fixings should be removed. Voids or hollows in the floor should be filled and bumps should be removed or sanded down. Any bumps or hollows may prevent the joints from locking properly which in turn may allow them to leak.
- Lay the first board in the left hand corner of the room 6mm away from each wall. Use 6mm spacers to ensure the gap is the right size. This 6mm gap must be preserved along the length of each wall. If your walls are uneven see our project on scribing timber to resolve the problem.
- Lift the end of the first board and, with both boards at an angle; slot the next board in place. Press the joint down flat on the floor to ensure proper waterproof joint is made.
- Continue in this way until you are in reach of the right hand wall. If the last board in the row needs to be cut turn it over and mark where it needs to be cut. Don’t forget to allow for the 6mm gap.
- Start the second row with the offcut from the first row providing it is 300mm or longer. If it is not you should cut a new board.
- Press the board at an angle against the floorboard in the first (and subsequent) row, press forwards and fold down at the same time.
- For the second board of the second (and subsequent) row, place the short side at an angle against the first board and fold down ensuring that the board is positioned in the interlocking strip of the floorboard in the previous row.
- Lift the board you are holding as well as the previous board from this row and push to slide the current board against the row in front. It will then align with the previous plank. The current and previous plank can then be folded down to the floor.
Continue to the end making sure you keep the 6mm spacers in place and follow the diagrams below. Each carton of the flooring contains 10 boards 146mm x 1210mm each at a thickness of 5mm. Each carton covers 1.77 square metres.
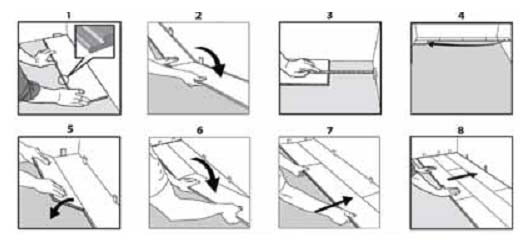
Laying waterproof flooring step by step
Sealing the Edges
The jointing systems supplied with your flooring will, once snapped together, provide a sealed joint that will prevent any water penetrating the surface and getting below to blow and rot the softer underbelly.
When the floor is laid it is time to cover the 6mm expansion joint you have left around the perimeter of the floor. You will have to ensure that this joint is also sealed to prevent water seepage. Use a suitable sealer such as silicone based kitchen or bathroom sealer.
Firstly seal the edge of the flooring to the walls edge. Once this is done fix your edgeing in place (this can be done using very small tack nails but may be better to use a construction adhesive).
Quadrant trim is the usual method of covering this joint and this is easily applied using a mitre saw. See our project on cutting skirting board to angles, the principles are the same.
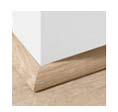
Flooring edging strip or quadrant trim applied to floor edges
With the quadrant strip fixed in place you will now have to seal the joint between the bottom of the strip to the floor and the top of the strip to the wall. Again, use a suitable silicone based sealer and then allow to dry for the specified time indicated on the packaging.
When you have finished admiring your handy work ensure that you have not dropped any sealer in any undesired places. If so clean it off and then give your floor a good clean using a suitable cleaning solution (check the manufacturers instructions on your flooring for what you can use) to remove any unwanted dust and debris.
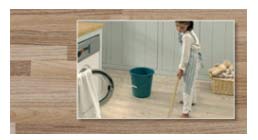
Give Your Floor a Good Clean