Fitting an outside tap is a great idea as it allows you to connect hose pipes and fill buckets and watering cans easily for a variety of jobs in and around the garden and outdoors.
If you haven’t done much plumbing before, cutting water pipes to fit an outside tap may seem rather daunting, however, by following the guide below it’s a job that anyone can do, read on.
Parts of an Outside Tap
There are several different parts that make up an outside tap and these include the main tap body, the spout, the spindle, the handle, gland, head and wall back plate. These are all integral to a fully functioning outside tap and this is what they do:
- Tap Body: The main part of the tap that holds everything else together
- Spout: The part that the water flows from
- Spindle: Attached to the washer and raises and lowers it from the sealing rim inside the tap body
- Handle: Allows you so screw and unscrew the spindle, turning the tap on and off
- Gland: Holds the spindle in the head and creates a seal, stopping water leaking up the spindle
- Head: Contains the tap valve and washer and unscrews form the body
- Wall Plate: Holds the tap body in place on the wall
- :
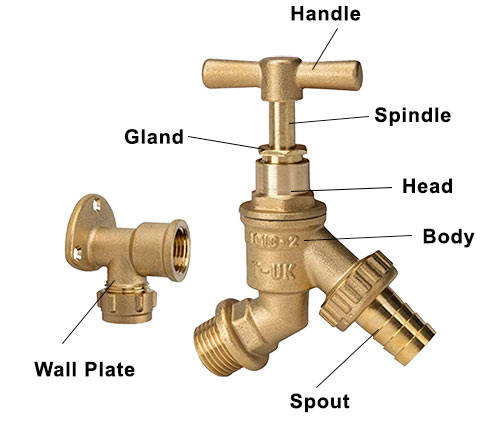
Parts of an outside tap
What Water Supply for an Outside Tap?
Aside from the tap the next most important item is a water supply. When looking for a location to install your tap, it’s a good idea to select one next to or near an existing mains water supply pipe.
In the majority of cases, most are joined to the domestic cold water under the sink that feeds the kitchen taps as there is generally plenty of room to install the necessary pipework and it’s obviously right next to a water supply.
However, the connection does not have to be made under the sink, as long as it’s a cold water supply at mains pressure, that’s all that’s needed. Don’t be tempted to feed an outside tap from water coming from a cold water tank as this will seriously affect cold water availability in the home.
When mains water comes to a property it must feed at least one tap with mains pressure before it goes up to a cold water tank so double check that the pipe you want to connect to is the tee to the tap not the tank.
There is usually a tangle of waste pipes and hot and cold water feed pipes under the sink which make connection of an outside tap difficult so in many cases it may be easier to look between the units, or even behind them to source a cold water feed to the outside tap which is a little easier to work with.
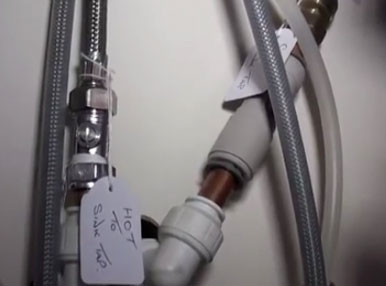
A tangle of hot and cold pipes under a sink unit
Do Outside Taps Need a Double Check Valve?
As stipulated by the water regulation, when installing an outside tap, it must feature a double check valve to prevent potential contamination of the water in the property in the event of any backflow.
A double check valve is a valve within the body of the tap which only allows the water to flow in one direction. In this case out of the spout.
The reason for it’s installation is that sometimes, without a check valve it is possible, when for example, running a hosepipe out to a paddling pool, should anything happen to that water supply and a vacuum be caused in the pipes behind the tap it would be possible for water to be sucked back into the system from the hosepipe and potentially the pool.
By adding a valve that only allows water to flow in one direction, this issue is avoided.
This could be likened to siphoning petrol out of a tank by giving the hose an initial suck, then letting the vacuum pressure do the rest.
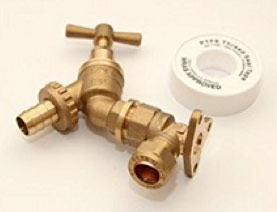
Make sure your outside tap has a double check valve
Should you Sleeve Pipes Running Through a Wall?
When running a water pipe or indeed any object through a wall you really should run a sleeve through the hole first and then run any pipes or similar through the sleaving.
In this case, the water carrying pipe (e.g. the pipe running from the supply to the tap) should be allowed to expand and contract naturally through temperature change without fear of erosion or puncture due to it expanding and rubbing on the rough masonry.
The only really safe way of doing this is by placing it in a sleeve through the wall.
The easiest way to make a sleeve is by using a length of 22mm plastic or copper pipe cut to the depth of the hole and then pushed through.
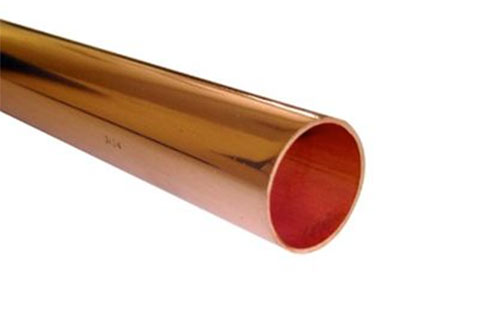
Copper pipe that can be used to create a sleeve
Tools and Materials for Fitting an Outside Tap
To insatall an outside tap correctly and ensure all works as it should do, you will need the following products and tools:
- Decent quality SDS drill
- 24mm long SDS masonry drill bit
- 8mm long SDS masonry drill bit
- Suitable length of copper pipe (for whole job or just upstand to tap outside)
- Suitable length of PVC pipe for job (if not using copper, but will need copper to run outside)
- Suitable selection of copper or plastic pipe fittings (depending on type of pipe you’re using)
- T-joint for teeing into mains supply
- Outside tap with double check valve and wall back plate
- Isolation valve
- Drain plug fitting
- Brass outside tap
- Selection of spanners or adjustable spanner
- Pipe slice
- 8x 40mm screws
- Wall plugs
- 6mm SDS masonry drill bit
- PTFE tape
- Suitable colour external sealant (for filling aroung hole through wall)
- Sealant gun
- Dust sheets
- Vacuum cleaner
As with all things in the building industry there are a huge range of products that exist to help make given jobs even easier and this is no different. With this in mind we need to mention that it’s possible to purchase a back plate and through-wall pipe all in one unit, which makes installation a fair bit easier.
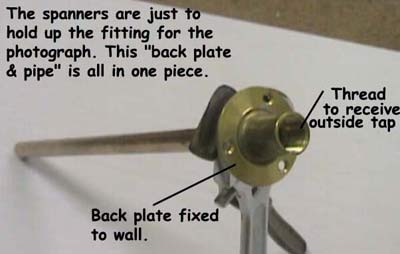
Fitting an outside tap back plate
The simplest way of installing or fitting an outside tap is to use a full kit so that you have everything you need and to these ends we have created our own Outside Tap Kit. Unfortunately as we don’t stock pipe and fittings as yet you will need to pick up 15mm and 22mm plastic or copper pipe as needed and also any required fittings.
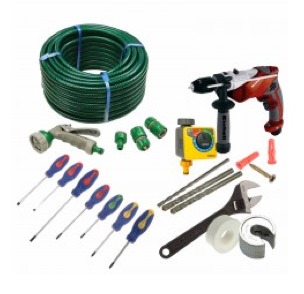
Everything you need to fit an outside tap
How to Fit an Outside Tap or Garden Tap
As you now know the type of tap you need and all the other tools and products, it’s now time to go through exactly how to fit an outside tap.
For this example we are going to use copper pipework and compression fittings and a standard wall plate for the tap.
Diagram for Fitting Outside Tap
The image below is a representation of what we are aiming for in terms of installing the tap. It shows all the necessary fittings, the isolation valve, drain plug, sleeve, back plate and tap, so you can also use this as a list of what you’ll need.
As you can see, all of this has been made using copper pipe and copper compression fittings and this is absolutely fine, but if you have never attempted any plumbing before we would suggest that you use Pushfit fittings as they are much easier to work with.
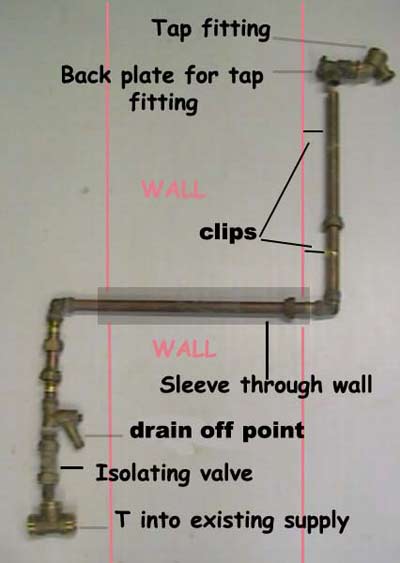
Setting up pipework to make outside tap connection
Step 1 – Choose Install Location
Before any installation work takes place, the first job is to find the best installation site possible. As we have mentioned, this should ideally be in a good location outside but also to make installation as easy as possible, close to an existing mains cold water pipe. This is normally under the kitchen sink.
Apart from a handy supply pipe you also need to ensure there is enough free space to install the necessary pipes and work comfortably.
One final task is to turn the water off!!!. If there is an isolation valve before the pipe you are hoping to cut to take your feed from, turn it off here, if not you’ll have to turn it off at your mains stopcock.
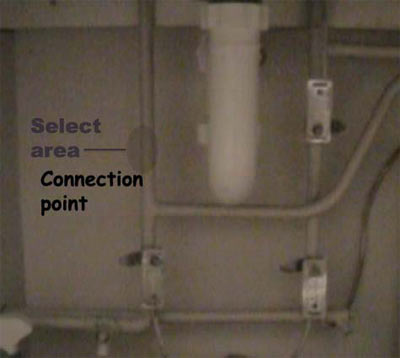
Select cold pipe under sink for outside tap connection
Step 2 – Cut Feed Pipe
Once you have chosen your install location the next job is to tee into an existing water supply pipe. This pipe will have to be cut to allow the introduction of the T-joint needed to branch off.
Choose a place to cut the pipes that has plenty of space around it and a good 100mm or so either side of the pipe so that you can easily get a T-joint in place.
Using a pipe slice, clip it over the exact point you want to make your cut and turn it clockwise until it cuts through the pipe. Even if you haven’t got a pipe slice it’s worth spending the £8 or so that they cost just to save yourself the hassle of trying to cut the pipe using a hacksaw or similar.
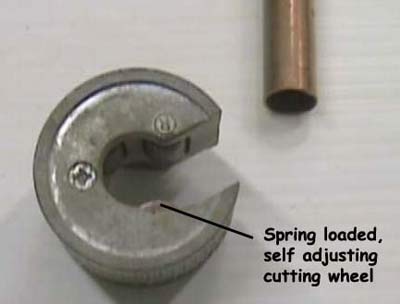
Use a pipe slice to cut your copper pipes
As we are fitting a T-joint we need to cut another section of pipe out to account for the size of the T-joint body, so measure the size of the joint body from base of collar to the same on the other side and then measure and mark this on a piece of pipe and cut it away.
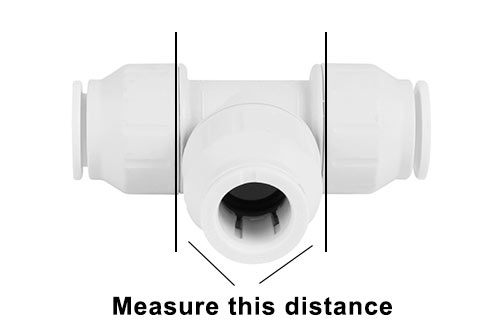
Measure body of T-joint fitting
If you do end up using a hacksaw, the end of the pipe will need de-burring properly so any sharp edges don’t cause damage to seals if you are using Pushfit fittings.
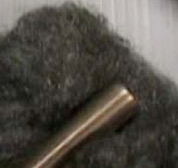
How to de-burr a copper pipe after cutting with hack saw
With the pipe cut, unscrew and remove the compression nut and olive from the end of your compression fittings and slip them over each end of the cut pipe, cap first and then olive and then wiggle the fitting body over each end of the pipe.
Push each olive down to meet the body and then wrap 3 or so layers of PTFE tape around the threads on the body and screw the compression cap up and tighten, making sure the joint for the new pipe branch is straight and level and pointing the right way.
If you’re using Pushfit fittings, simply wiggle the joint fitting on to the end of each pipe, making sure it’s pushed all the way down to the base and then pull it back slightly to make sure it’s engaged.
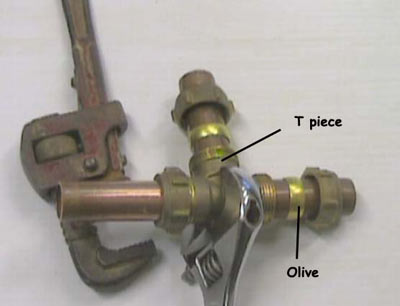
Fitting a compression Tee for outside tap connection
Step 3 – Mark and Drill Hole Through Wall
With the new T-joint in place for the pipe branch you can then work out exactly where to drill the hole through the wall to run the pipe through.
Ideally this will be somewhere where there is plenty of space as you will need to get a large drill in there.
Also, it will need to be in line with the branch joint of the T-fitting. To ensure this, place a spirit level under the bottom edge of the branch joint and level it and then run along the level and mark the wall where you want to drill the hole. Measure up around 7mm from your mark and make another mark and this should then be dead centre to the T-joint.
Cover the area with dust sheets and then pop the 8mm bit in the drill and position the tip on the drilling point and start drilling. Don’t force the drill bit into the surface too much, let the drill do the work.
When drilling the hole try to angle it down towards the outside by 8 – 10mm or so. This will help prevent any water running in from the outside.
Always start with a small drill first to drill a pilot hole as this takes the strain off the drill trying to drill too large a hole in one go and also when it busts through the wall on the other side it doesn’t blow a huge chunk off.
Once you’ve made it through with the small drill swap for the large bit and then re-drill the hole from the inside. Once about half way through, go outside and drill out the rest of the hole. As said, this will prevent the large drill bit blowing a huge chunk off the face of the outside wall.
Step 4 – Fit Isolation Valve and Drain Plug
Once the hole is drilled you can then start fitting the pipework. Cut a short length of pipe to run from the T-joint to an isolation valve. Again, using copper or Pushfit is totally fine, but if you are new to this sort of work then Pushfit is the way to go. Fit the valve to the end of the pipe.
Next, cut another short length of pipe to run from the isolation valve to a drain valve or drain plug. Fit the drain to the end of the pipe and then insert the other end into the isolation valve. Make sure any compression joints are tight and that you have used PTFE tape. We like to add one of these wherever possible as it allows you to drain down the outside tap pipework.
Finally, cut another length of pipe so that it runs up to the hole through the wall. It should be around 10 – 15mm short of the hole to allow for a 90° bend to be fitted. A pipe clip also needs to be fitted along this section.
Position the pipework up to the T-joint so the end is up to the collar and mark a point on the wall for the pipe clip to fit. Mark and drill the fixing hole and then fit the clip to the wall using a screw and wall plug.
Fit the other end of the pipework into the T-piece and then clip it into the pipe clip.
The isolation valve will allow you to turn off the supply to the outside tap at any time. It will also allow you to do the rest of the work after you have turned your water supply back on, allowing you to have a cup of tea without upsetting the whole family!
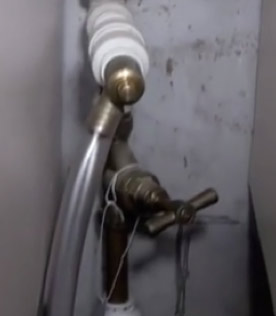
Drain cock in kitchen close to mains stop cock
Step 5 – Sleeve Hole and Run Pipe
Measure the depth of the hole and cut a suitable length piece of 22mm copper pipe so that it is roughly 10mm shorter than the hole depth so that you have a 5mm inset at either end.
Push the length if pipe into the hole. If it’s a little tight then use a scrap of wood as a drift and knock it in using a hammer. As said, ensure there is an equal gap of around 5mm at either end.
The sleeve stops any pressure from the masonry on the actual water pipework to the tap. Expansion and contraction can cause the water pipe to rub across the masonry and over time weaken it to the point is bursts.
Step 6 – Connect Pipe Through Wall
Connect a 90° bend fitting to the end of the pipework running from the drain valve and cut a length of pipe to run through the wall. This should be the total depth of the hole plus enough to run out to a 90° bend at either end.
On this note, you will need to use copper fittings when the pipe runs outside. Plastic doesn’t tend to do too well in extremes of temperature and will degrade quickly so copper is best.
You can use compression fittings or solder fittings, but if you can, solder here will be best as they are not as chunky and will allow you to make a tighter turn so that the wall plate can be fixed directly to the wall without having to pack it out to accommodate for a larger fitting.
To learn all about using solder fittings see our project here on how to solder copper pipe.
If you are soldering, solder the bend on the pipe before fixing it in place as it’s easier than trying to solder when it’s just poking through the wall. Likewise this is also the case if using compression joints.
With the outside end sorted, push the pipe through the wall and connect it up inside.
The final part of this stage now is to choose how high up from the hole you want your tap is be fixed. A good height is normally somewhere around 800mm from ground level. Once chosen, mark a point on the wall and ensure it is directly vertically up from the pipe through the wall.
Step 7 – Fix Back Plate to Wall
Hold the back plate on the wall in the position you want it and then measure from the base of the collar on the 90° bend up to the collar base on the back plate and cut a piece of pipe to length.
Insert and fix the pipe into the bend coming through the wall. This will either be into a compression joint or soldered.
Next, pop the back plate on top of the pipe and fix it and level the pipe vertically using a spirit level. Mark the wall through the fixing holes, drill them out and insert wall plugs and screw it in place.
If not as you’ve used a compression fitting, ensure everything is vertically level across the front and side of the pipe and then measure the distance from the wall to the back plate.
Cut a piece of timber to this depth and around 75mm wide and fix it to the wall using screws and wall plugs behind the back plate and then screw the back plate to this.
Depending on the length of pipe you will also need to add some pipe clips to hold it firmly to the wall.
Step 8 – Fix Tap In Place and Test
The final task now is to screw the tap mechanism into the back plate. This is simply just a matter of screwing it in and then tightening it up using the correct sized spanner. As with other compression joints, use some PTFE tape around the thread.
Once tightened, turn the water back on at the new isolation valve and check over all the pipework for any leaks. If any are present, then either tighten the joints or turn the water off and make any repairs.
If all is well turn the tap on make sure it runs ok.
The last job to do then is to use a suitable exterior sealant and pump a load of it into the sleeve and around the external hole to seal it up and prevent any draughts or water ingress. Do this on the inside also.
Finally, don’t forget to add an insulated tap cover or jacket after installing or fitting your outside tap as this will prevent it freezing up in the winter.
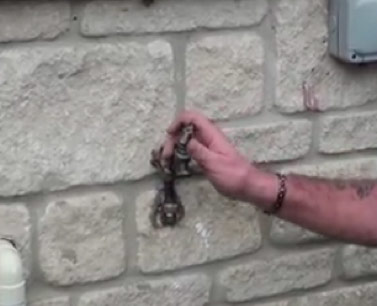
Run the tap to make sure it works and check for any leaks
Seasonal Maintenance for Outside Taps
During the colder months of the year, the chance of the temperature dropping to the point of freezing is quite high and as you probably know, when water freezes it expands.
If it freezes and expands inside a pipe it can very easily cause it to burst which can be a nightmare in terms of leaks and also having to repair it.
To prevent any such issues with your new garden tap it’s a good idea to trun the water off at the isolation valve and then drain the water out of the supply pipe through the drain plug.
As it’s highly unlikely that you’ll use the tap anyway through the winter months, this is certainly the best choice.
Alternatives to Fitting Outside Taps
If it’s not possible to install an outside tap, another way to provide a water source would be to install and use a water-butt. This is a great way to capture and store water, no just because rainwater is pretty readily available in the UK, but also because it is free!
To make sure you have a good supply of water to your water-butt connected system it is a good idea to collect water from any available sources such as gutters and down pipes from your house and any sheds you may have.
The connections are easy to install, as is the installation of gutters and downpipes. In this project on plastic guttering and downpipes you will find information and a video on installing guttering and making joints in downpipes to create a feed for your water butt.
Once the guttering is fitted and water is able to fill your water butt you can use a simple tank connector, available for all plumbers merchants, to join more water butts together, giving you more storage.
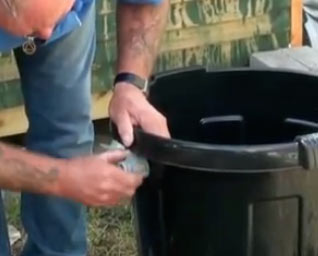
Joining water butts and fitting outside taps to them
There is a video available on our rainwater harvesting project page which DIY Doctor has produced to show how to join several water-butts together to provide a larger reservoir of water.
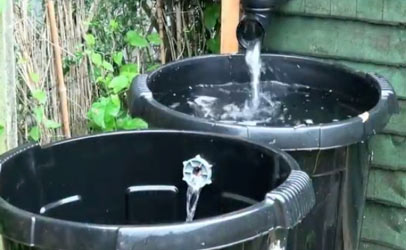
How to connect water butts together for a greater supply of water to the garden
Other Helpful Resources
Each installation is different and as we have mentioned, will allow you to use a range of different fittings and techniques so take a look at our projects on how to join copper pipes by either using compression joints, or you can use soldered joints if you’re handy with a soldering iron or you could even useSPEEDFIT® plastic piping and joints.
You might even want to read our pages on cutting copper pipes and the revolutionary cold copper solderless bonding.
If you would rather bend the copper pipe than simply fix bends to it, then take a look at our page on how to bend copper pipe and learn how to get your bends nice and smooth, without any kinks.
Although quite an in depth undertaking if you are new to plumbing, fitting an outside tap is certainly possible by even a DIY newbie as long as you take your time and work methodically.

