Curtain poles offer a little more variety and style choice in the way you hang your curtains than using a basic curtain rail or curtain track. A curtain rail or track only allows you to clip your curtain to the track itself but with a pole you can do so much more.
Types of Curtain Pole, Finials, Brackets and Headings
Starting with the pole itself – these are available in huge range of styles, from traditional timber, brass or pewter looking poles to the more modern coloured or stainless steel poles, you are certainly not short on choice and are also pretty much guaranteed to find something to match your existing furnishings or to complement your new chosen look.
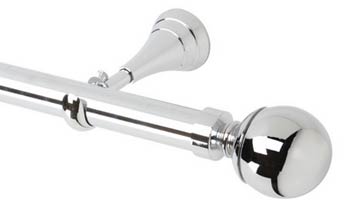
Modern contemporary chrome curtain pole
In almost all cases you will get the finials to match your pole when you purchase, but it is possible for you to also buy these separately, allowing you to “mix and match” styles slightly. You may be asking yourself; what are finials? well, these are the items that fix to the ends of the poles and provide a nice feature rather than just a view of the end of the pole.
Again, they are available in a wide variety of styles and types such as glass, plastic, timber, steel, brass etc…., to either match or contrast your chosen type of pole. In terms of fitting, normally they are screwed on to the pole using a screw (only with timber finials and poles) or screwed on to thread actually cut into the end of the pole (normally for steel, plastic, brass etc….).
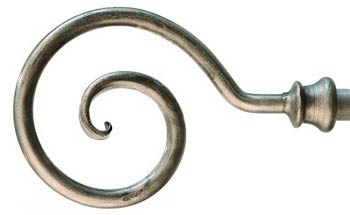
Wrought iron curtain pole finial
When it comes to the actual curtain pole hanger (the part that holds the pole on the wall), these also come in a wide and varied selection of different styles, fixings and materials. The type of pole that you choose can in some cases determine the fixings or brackets that you will need to use, but the correct ones for your poles should be included when you purchase them.
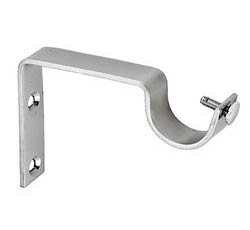
Common steel curtain pole fixing bracket
One final interior design point to cover is that of curtain headings. This is the top section of the curtain that fixes to the pole and holds the curtain up. Actually attaching the curtains is done in a few different ways by either using curtain hooks that clip on to rings that run on the pole or the pole itself is threaded through the actual curtain.
Coming back to the headings, these can really make or break the look you are going for and can also determine what poles, hangers and fixings you use so this is definitely worth spending some time on. Some of the common finishes are as follows:
Pencil Pleat
Pencil pleats are made by sewing in a cord to the top hem of the curtain and pulling it really tight to bunch up the heading of the curtain, This type of finish is very traditional and looks great on a curtain pole.
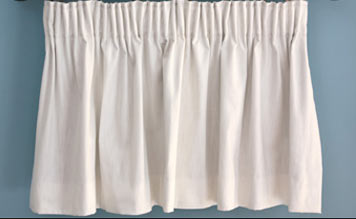
Pencil pleat curtain heading – Image courtesy of John Lewis
There are many different styles that can be created by bunching pleats into two’s or three’s. As you would expect these pleats are called double pleats and triple pleats. This technique is based on the pencil pleat method.
Cottage Pleats
Cottage pleats are created by sewing (usually) a 25mm tape a couple of inches down from the top of the curtains. This gives a type of rural "informal" look which is ideal for a lovely cottagey feel.
Cap: Cottage pleats to a cottage window
Alt: How to create cottage pleats for a curtain pole
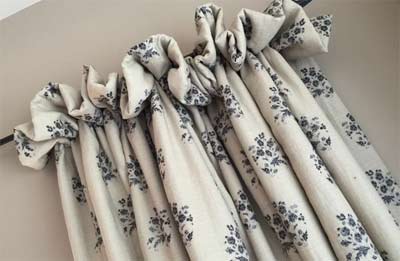
Cottage pleat curtain heading – Image courtesy of Pinterest
Goblet Headings
Goblet headings are quite a formal arrangement which look great in a formal dining, drawing or sitting room. Goblet headings require each curtain pole ring to be set in the centre of each goblet and that the top of the curtain sits below the pole. If it does not the pole forces the top of the curtain heading to push out a little and while this is fine for the pleated headings, it does not work for the goblet.
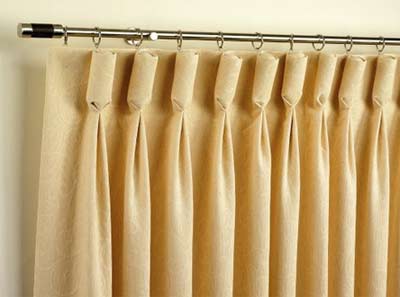
Goblet headings are a formal way of fitting curtains to a pole – Image courtesy drapes.co.uk
Eyelet Headings
Eyelet headings can only really be fitted to a curtain pole and when doing so, unlike many other headings they make the pole itself a feature of the window.
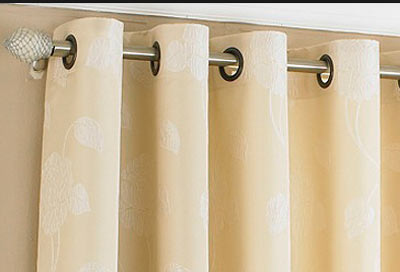
Eyelet headings on curtains specifically for curtain poles to be threaded straight through
Another curtain heading designed specifically for a curtain pole is the tab heading. The tabs can be made from the same material as the curtain or, for a really contemporary feel, made from a different material.
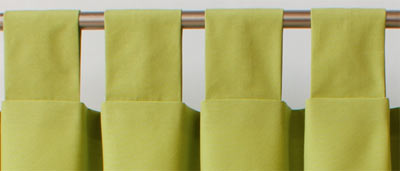
Tab style headings on curtains also allow the pole to be threaded straight through – Image courtesy of curtainscurtainscurtains.co.uk
As mentioned, it’s well worth the time considering what type and style of curtains, poles, finials and fixings you want to use and these choices will determine how and where your curtain pole brackets are fixed e.g. above the window, to either side of the window or within the windows recess.
How to Fit or Fix Curtain Poles to a Window
There are quite a few different ways in which you can fix your curtain pole to the wall and the method you use will very much depend on the material you are fixing to e.g. bricks or blocks, plaster board etc….
With this in mind, we have different projects covering these different methods so please see the list below and click on the link for the type of material you are fixing to. In essence, each process is about the same e.g. you measure and mark the fixing positions, make sure all is level, drill our your holes, fix the brackets to the wall, install you curtain pole and curtains, but depending on the material your fixing to will depend on whether you use rawl plugs, plasterboard fixings etc….:
- For fixing to bricks, blocks, stone etc…. see our fixing to masonry project
- For fixing to Thermalite or light weight blocks see our fixing to Thermalite, Durox or other lightweight types blocks project
- For fixing to steel or concrete lintels that will probably be set into the wall above your window see our fixing to steel or concrete lintels project
- If you are fixing to plaster board, see our fixing to plasterboard project
- We also have pages on fitting Venetian, roman and vertical blinds that you may find useful
You may also want to see our different type of fixings project page for more information of the various types of fixings there are. No two houses are constructed the same way and you may find that you have large gaps between wall coverings and the actual wall behind it, so specialist fixings will be needed.
Tools you will need for fitting a curtain poles
We have put a bundle of tools together for you for fitting a curtain pole (and many other carpentry jobs around the home. Just click on the link to the curtain poles bundle or on the image and you will be taken to our toolstore where you can choose the specific tools you would like from the bundle.
How to Fix a Curtain Pole to a Wall
Step 1: Check the Ceiling and Window Head for Level
Check your ceiling and window head are either level, or parallel with each other. If they are out of level it is often better to put the curtain pole up so it follows the line of the ceiling rather than put the pole in level.
Unless the curtains are likely to slide down the pole on their own due to the fact that they ceiling is way out of level, it is better to get the pole and curtains looking visually correct rather than being 100% level. The ceiling only has to be slightly out of level for this to show very clearly.
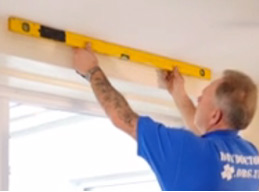
Checking if a ceiling is level
Step 2: Measure to Find Centre of Window
To ensure your curtain pole has the same overlap either side of the window it is important to mark the centre of the window. Measure the full width of the window, divide by two and mark the centre with a pencil. It’s always a good idea to measure this twice, just so you know you are spot on.
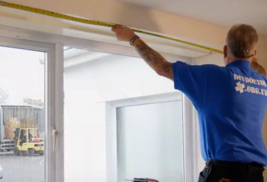
Measuring the centre of a window opening
Step 3: Measure the Height you Want the Curtain Pole Brackets
When hanging curtains on a curtain pole, there should never be too much curtain sticking out over the top of the pole so measure where you want the top of the curtains to finish and then mark the position of the brackets from that.
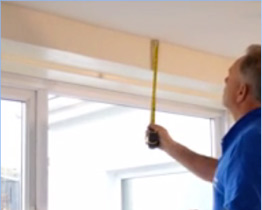
Getting curtain brackets at the correct height
Step 4: Measure Your Curtain Pole Overhang
Put a small piece of insulation tape (watch the video below) on the centre of your curtain pole and hold it up to the mark you have put on the wall in the centre of the window. Check you have enough overhang on each side of the window for the curtains (when they are open) not to take up too much of the window opening and block too much light in the day time.
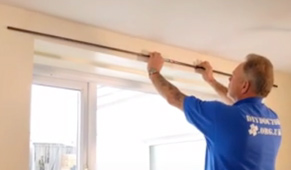
Making sure your curtain pole is the right length
Step 5: Mark the Position of the Curtain Pole Brackets
Using the curtain pole height marks made in step 3, mark the position of your brackets. 1 bracket goes in the dead centre of the window and the others at either side at a distance beyond the window suggested in the preceding step. If your curtain pole has finials that slide on to the end of the pole, remember this when marking out for the brackets.
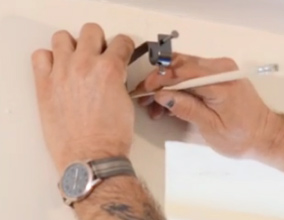
Fitting a curtain pole bracket
Step 6: Drill or Make Holes for the Curtain Pole Brackets
Depending on the type of wall you are drilling into you will need to follow all the links to the relevant pages above. The important thing here is that the brackets are fixed securely to the walls as curtains can be very heavy. In terms of the size of hole you need to drill, this should be around 6mm so use a 6mm masonry drill bit.
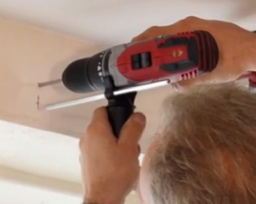
Drill a hole in your wall ready for bracket fixing
Step 7: Fix the Curtain Pole Brackets into Position
When the holes have been made, screw the brackets into position. Make sure you have screws (see our fixings page) which are not to long and hit the lintel or wall as you are screwing in. This has the potential of not allowing the screw to be fully tightened and the bracket will then be loose. Also, make sure that you use the correct wall plug for teh size of hole you have drilled. The red wall plugs should fit tightly in a 6mm hole.
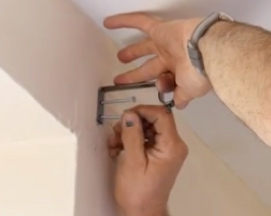
Screwing the pole bracket to the wall
Step 8: Place the Curtain Rings on the Pole
Place all rings, except 2, on the pole. Divide them equally left and right of centre and holding the pole and rings in each hand, offer up to and place in the brackets.
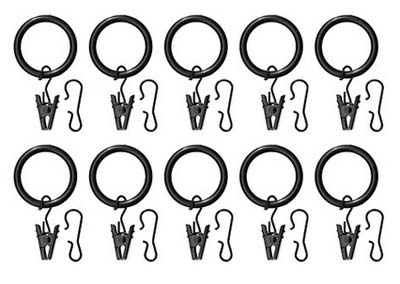
Curtain rings ready for placing on pole
Step 9: Positioning the Curtain Pole in the Brackets
Place the curtain pole in the centre of the brackets using the insulation tape as a guide for the centre bracket. Double check that the overhang at each end is the same and you are happy with the position of the pole. Remove the insulation tape from the pole and tighten up the bracket screws.
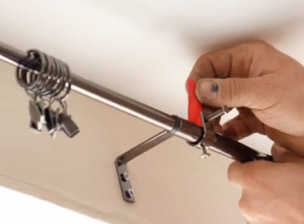
Curtain pole rings either side of centre bracket
Step 10: Add the End Ring and Finial to the Curtain Pole
Slide the last rings onto each end of the curtain pole or if you are using curtains with eyelet headings, thread the pole through and then fix the finials to either end. For those needing a definition of the word finial (also see above), it is an ornamental terminating part.
Finials are used on roofs, fences, curtain poles, fireplaces and even tent poles. They date back thousands of years and all mark the completion of a "project" by attracting attention to it’s end (or final point.
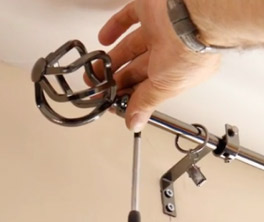
The finial adds the final touch to a curtain pole
Step 11: Finally Hang Your Curtains!
Once you have completed all of the above, the final task is to actually hang your curtains on the rings. As mentioned previously, this will most likely be done with curtain hangers so add these to your curtains and then clip each one to a ring. Once this is done, you are now done!
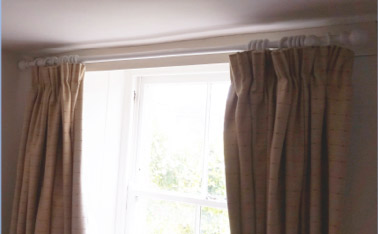
Curtains hung on a curtain pole

