Repairing a failed sealed double glazed unit is quite a job, so before we start, we have to state a few things:
- This is not a job for the faint-hearted and results are certainly not guaranteed! You must be a competent DIY’er and have a decent knowledge of tools and materials and how to use them
- You should have a decent area to work in e.g. a garage or decent sized shed. Sealed glazing units are quite large and cumbersome and glass breaks easily, so a decent bench or table to work on is a must
- You should have decent, safe access to the windows you will be working on
- They should be of a suitable size and weight so that you on your own or along with another person, can lift them out
- It certainly helps to have knowledge and experience of working with windows and how they are put together, what parts make up a uPVC unit, how they come apart and where each part should go when you put it back together
- If it all goes badly wrong then you should also have a backup plan to cover what will now be a large gaping hole in the wall. A large piece of chip or ply board or a spare uPVC unit of the correct size
- If your units are still covered by a warranty or guarantee please do not tamper with the frames or units full stop! By doing so, you will most likely invalidate any guarantees or cover that you have
- Make an early start! One sealed unit is going to take you most of the day to complete so long daylight hours and dry whether are really a must!
- When handling double glazed units, always wear sturdy gloves. The glazed edges are sharp and can easily cut your hands to shreds!
If you haven’t already, please read through the points above! Once you have and decided that you would like to have a go, read on……
After reading the above you don’t feel confident enough to tackle this job, but still want to sort your blown and misted double glazed unit, see our condensation in double glazing project here.
Removing the Sealed Units
The first job is to get the sealed unit out of the frame.
Due to the range of different types and styles of frames, sealed units, seals and beads and also manufacturers, we cannot offer too much help here, you are going to have to do a bit of investigation and experimentation.
In most cases this will just involve a screwdriver and scraper.
Prise out the rubber seal that runs around the inside of the unit and then use a screwdriver and scraper to lever out the bead.
They can be a little tricky to get out so take your time and be careful not to damage it.

Bead and seal used to hold glass in frame and seal it against water ingress in upvc window unit
Once you have figured out how the seals and beads are removed, and which side the beads are on (can be internal or external), the glazed sealed unit should now move freely and you should be able to get it out of the frame.
A second pair of hands here is a good idea to help provide support while you are working and prevent it falling out the frame and smashing.
Whilst removing the seals and beads, take note of how they come part and ultimately go back together as this will help you at the reassembly stage.
If the units are quite small you should be able to handle them yourself but don’t struggle, get help if you need it. Even small units can be very heavy, let alone larger ones!
Take care not to damage the frame or the glass and also wear a pair of sturdy, tough gloves! After all we are dealing with glass.
Further help and advice on removing double glazed units from their frames can be seen in our project here.
Clean the Sealed Glazed Unit up
Lay the glazed unit on your work area with one of the faces flat on the work bench (lay an old towel, duvet or piece of cardboard between the bench/work surface and glass to prevent scratches and damage) and the other facing upwards.
A soft absorbent surface will also help to absorb any stock and minimise the chances of the glass cracking.
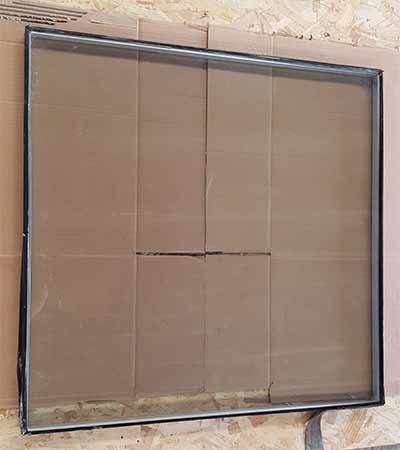
Double glazed unit ready to be taken apart
The edges of the sealed glazed unit should be taped up using duct tape. Pull all the tape off and then use the scraper to remove as much of the adhesive as possible.

Removing old duct tape from around double glazed unit
Be careful not to scratch the glass with the scraper.
To remove the left over tape residue you can use vinegar, nail polish remove (acetone), white spirit or similar.
Note: when using solvent-based solutions ensure that you are in a well ventilated area.
Rub the solution over the remaining adhesive and let it sit for a few minutes and then wipe it off.
Wipe the exposed glass side over with a clean cloth and some glass cleaner to remove any smudges or marks.
Run around the edges also to remove any dirt and grime that may be present.
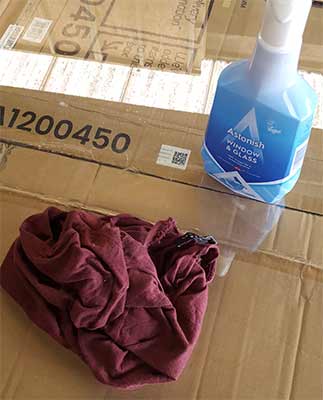
Clean the glass thoroughly while you work to remove any dust, grease and grime
Finally, clean off any other items that may be covering the black sealant that runs around the perimeter of the unit and provides the air tight seal.
Cutting Through the Sealant to Separate the Glazed Panes
Now we get technical! Using a sharp knife such as a Stanley, push the tip into the black sealant, making sure that it goes in below the base of the top glazed pane and the silver spacer bar.
Make sure the blade you are using is as sharp as possible. You should preferably use brand new blades to ensure they are as sharp as possible.
While you are chopping through the sealant, regularly check the blade top make sure it’s still sharp. If it’s starting to blunt change it for a new one.
The spacer bar should be bonded to the glass and depending on how strong the glazing glue or sealant is, this may take quite a bit of effort to cut through it.
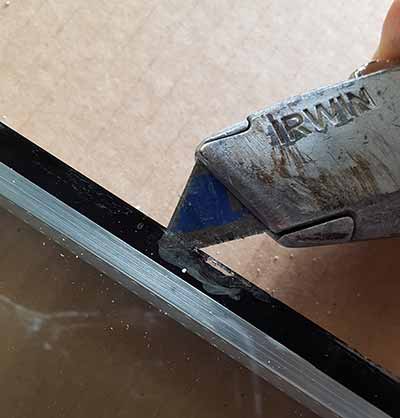
Use a Stanley or utility knife to cut the sealant join between the glazed panes and the spacer bar
Do not put too much pressure on any one area while you are cutting the glazing sealant! We are dealing with glass after all and too much pressure in one place can easily crack it.
With the knife tip now in place, cut along the line between the glass and spacer bar to separate them.
Do this all the way around. Depending on how firm the sealant is, you may find it easier to use a series of shallow “sawing” cuts and passes as this will result in a lot less strain on the glass and less chance of it breaking, as the blade will not always allow a continuous cut.
As we are dealing with the top pane of glass, this is arguably the trickiest one to split away from teh spacer bar.
As the double glazed unit is still in one piece it is heavy and cumbersome so take your time and don’t be tempted to hack away to get the job done quicker, you will only cost yourself time and money in the long run through unwanted damage.
Likewise, with the top pane removed, the remaining bottom glass pane and spacer bar are weakened a fair amount, so as you cut through the sealant holding the top glazed pane in place, also start to cut through the sealant holding the bottom pane in place.
Make sure that you don’t cut all the way through it, just enough to make the job of splitting it away from the spacer bar later a bit easier
Lift off the Top Facing Pane and Clean it
With all the sealant cut off, lift off the top pane carefully and place it next to the rest of the unit, ensuring that it is flat and iun a safe location away from anywhere that it can get damaged.
Take note of which is the glazed face that points down into the frame as it will need to go back together with the glazing facing in its original direction.
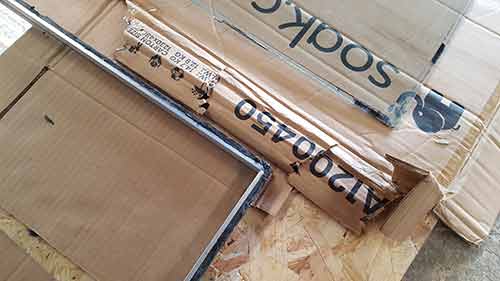
Once the sealant joint has been cut you can then remove the top pane of glass and put it to one side
You can mark the upper face of the top pane using a non-permanent marker.
As we have stated above, without the bonding and support of the frame and the other pane or glass, a single glass pane can break even easier so again, take care.
Now, using a sharp knife or scraper, run around the edges of the single pane and remove any sealant residue.
Take care with the blade as pushing too hard or at too acute an angle can scratch or crack the pane.
If the sealant or glue won’t come off easily you may need to use some sealant remover.
In this example we used some paint thinners, this easily removed any remaining sealant and residue and also any grease and grime.
Note: Paint thinners is pretty nasty stuff and gives off some frankly hideous fumes so make sure you use any such substance in a well ventilated area and also use an appropriate mask that will filter the fumes.
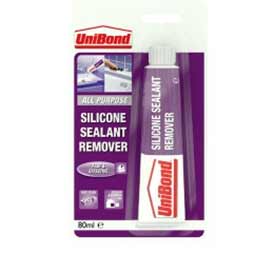
Silicone sealant remover
It is essential that all the sealant is removed to ensure that when the glazed unit is reassembled, there is nothing to affect the seal.
Once the edges are sorted, use a clean cloth and window cleaning spray to thoroughly clean the edges where the space bar was bonded on.
This will also help re-bond the two when we reassemble.
Also, thoroughly clean the glazed face that faces into the frame to remove and marks or smears that may have been created left by the presence of moisture etc.
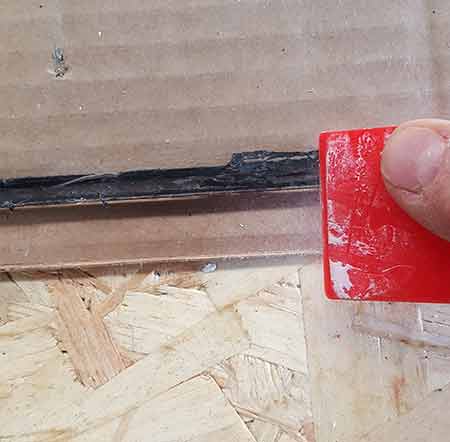
Remove any remaining sealant from glazed window panes using sealant remover or a plastic scraper
Split the Spacer Bars from the Other Glazed Pane
Using the above process, split the other pane away from the spacer bars and remove them.

Spacer bar split away from bottom pane of glass
One of the reasons (despite the leak) that misting and condensation is occurring is that the desiccant (Silica balls that absorb water and moisture) inside the spacer bars can no longer absorb any moisture as it is saturated, so this will need removing from the bars and replacing with new.
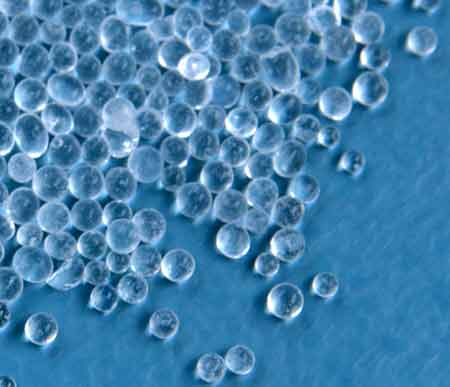
Silica desiccant balls used in double glazed window units
Before you do so, clean the second pane in the same manner as the first.
Remove all old sealant and any remaining residue or marks on the glazed pane left by moisture.
Split the Spacer Bars and Remove Desiccant
Firstly, remove any remaining sealant from the spacer bars, taking care not to damage or scratch them. The aluminium used to construct them is very soft and can easily be cut by the sharp blade of a utility knife.
The sealant used to bond each glass pane to the spacer bars is pretty tough stuff and a bit of a nightmare to remove.
The best way to do this is to again use a sharp knife to cut down into the sealant and separate it from spacer. Once you have removed as much as you possibly can, use a sealant remover to get rid of any remnants.
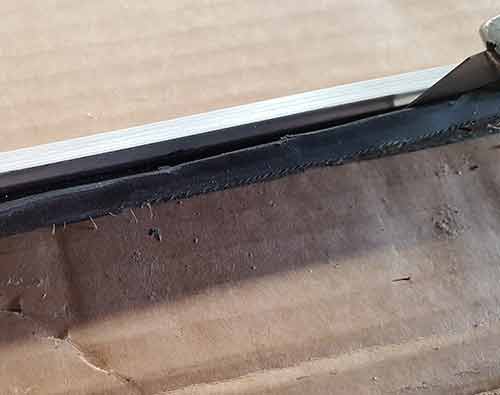
Use a Stanley or utility knife to cut old sealant away from spacer bar
Once all of the old sealant has been removed, hold one bar firmly (but not too much as to damage it) towards one of the corners and gently pull the nearest side outwards, splitting the corner apart.
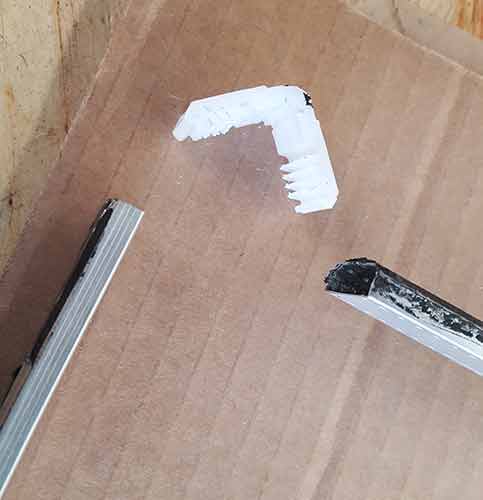
Once the spacer bar is removed and cleaned, split it apart at the corner
The corners are normally joined together using special plastic insert joiners, or keys as they are also known that push into the ends of each bar and hold them all together.
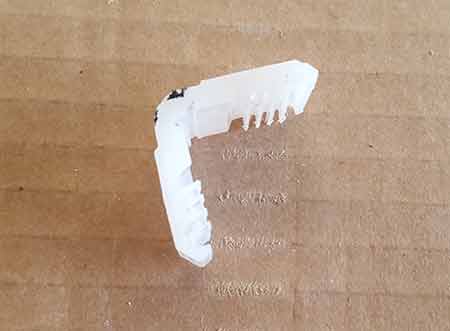
Key or insert used to hold spacer bars together
These should come part pretty easily but take huge care when applying any pressure to any part of any bar. The spacer bars are not strong at all and will easily bend, rendering them useless.
As with the spacer bars themselves the keys are also quite fragile and can easily be damaged so again, be very careful.
Once you have split all the corners of the frame, find yourself a small bowl and pour out all of the old desiccant.
If the desiccant is particularly damp it can form a lump that may get stuck in the bar. If this happens, gently tap the spacer bar to loosen it.
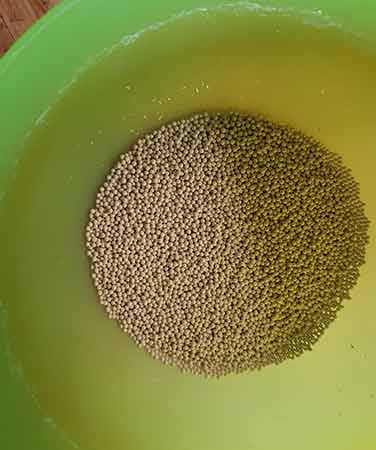
Old silica desiccant removed from double glazed unit
Refill Spacer Bars With new Desiccant
The correct desiccant to use is glazing grade desiccant, use only this type! This can be a little hard to track down, but it is the best stuff. In most cases a quick google search for “glazing desiccant balls” will reveal several vendors, mostly from eBay that sell replacement desiccant balls.
Technically it should be possible to use a silica desiccant substitute but this probably won’t last as long as the proper stuff and as this isn’t the nicest of jobs, you want to be sure that it’s going to last as long as possible!
It is also worth mentioning that you can in fact recondition the old desiccant if you are unable to find any proper glazing desiccant.
You can do this by gently heating it in an oven or microwave to dry it and remove any moisture that it contains.
You can do this by heating them up in an oven or microwave. Do not heat the silica desiccant over 180°C as this will permanently damage it, rendering it useless.
For a full run down on how to recondition silica desiccant see this helpful guide here.
Refill the bars with your new or reconditioned desiccant and reassemble it again taking great care not to bend it or cause any form of damage.
Once you have got one corner back together with an insert key, pour in some more desiccant to ensure the bars are full.
You might find it easier to tape over one of the ends while you fill the other, to prevent all of it coming out.
Remember to leave some room to insert the other corner inserts. Around 20mm should be plenty to allow a good fit.
As you fill each spacer bar, gently tap it to ensure that the desiccant fills the entire bar and that there are no gaps.
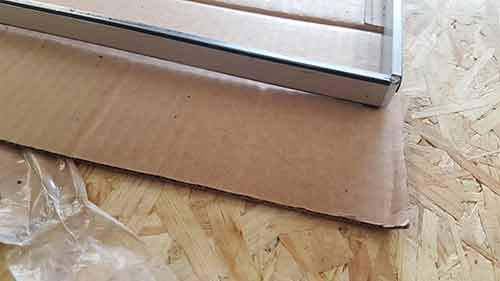
Once cleaned up and filled, reassemble the spacer bar frame
Reassemble the Glazed Unit
With the spacer bar frame reconditioned and back in one piece, it’s now time to put it all back together.
This is best done in an area that contains as little dust and airborne debris as possible as this will help minimize the amount of dust that ends up back inside the sealed glazed unit.
Also make sure you have plenty of space to work in and can easily move around your work surface and glazed unit without tripping over or knocking into anything.
Place the second pane of glass (the bottom pane) out on your work surface and ensure the inner facing section of the pane is facing upwards.
Give it one last, thorough clean, checking that you have left no marks or smears, especially on the upper face of the glazed pane that will be inside the sealed unit.
Once it’s back together it’s too late! Wear some gloves as this should help to avoid finger prints during the reassembly process.
Position the spacer frame onto the glass pane and make sure it is central and that all gaps around the perimeter are equal.
The space between the edge of the glass and the spacer bar should be somewhere in the region of 8-10mm all the way around, but this will depend on how they were manufactured.

Spacer bar set on to bottom pane and then top pane placed on spacer bar ready for sealing up
Take the second pane and again, before you position it on top the spacer bars, give it a thorough clean and ensure that there are absolutely no marks on it whatsoever.
Once you have done this, position it on top of the spacer bars. It’s best to get a second pair of hands at this point to help you lay the pane down flat so that you don’t move the spacer out of position.
Once laid flat on the frame, measure the gaps all around the edge to make sure they are even and that the two panes are aligned above each other exactly.
Seal the Double Glazed Unit Back Together
To seal the unit back together you will need some top quality glazing-grade sealant that needs to be both water proof and temperature resistant and be able to bond the panes and frame together.
You also don’t want to skimp on cost here as the quality and grade of sealant you use will now pretty much determine how good the overall job is and how long the newly sealed glazed unit lasts.
Some of the best stuff to use can be seen below.
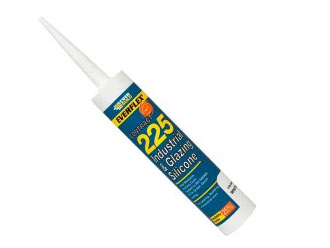
Glazing sealant suitable for double glazed sealed unit re-sealing
The sealant can be applied using a standard sealant or skeleton gun.
Again, it’s best to get a decent, more heavy duty one (normally around £10) as the trigger action is a lot smoother allowing you apply the sealant much easier.
Pop the sealant tube in the gun and chop off the top of tube and then screw on the nozzle.
You will want to get as much sealant into the gaps as you can to ensure that all is filled with no air pockets so cut the nozzle to allow this (about a third of the way down).
A sealant tool or similar is useful at this point! This will allow you to not only trim off the excess sealant but also apply a little pressure as you do so, forcing the sealant into the gaps and ensuring that the void is totally full.
The tool itself should be a gradual convex shape and not too pointed as you don’t want to scoop the sealant out of the gap as you go.
One other item you can use is your plastic scraper to run around the edges. This should also be enough to force the sealant into the void. We used our plastic scraper to smooth the sealant and it worked just fine!
One small tip here is, what ever you choose to use, make sure that you dampen it before running it over the sealant. This will help to prevent the sealant sticking to it and in turn the pulling it out of the joint.

Plastic scraper used to smooth out glazing sealant and force it into the void between spacer bar and glass panes
Starting at one edge, position the sealant nozzle into the gap and squeeze the trigger until you get a decent flow of sealant. Work slowly along the edge, pumping the trigger as you go, whilst thoroughly filling the gap.

Glazing sealant applied to void around glazed panes and spacer bar
Once you have run the full length of one edge, pop the sealant gun down and pick up your smoothing tool. Pop the tool at the top edge of the unit with each edge touching each of the panes and the convex area pointing into the sealant.
Run the tool slowly along the edges, applying a little pressure to force the sealant down into the gap, but do not press too hard and force the sealant out or move anything.

Glazing sealant smoothed out using plastic scraper
Once you reach the end, wipe off the excess with an old rag, being careful not to get too much sealant over any of the glazing panes.
Repeat the above for the remaining three edges, making sure each of the corners are totally filled.
Once you’re done, leave the sealant to set for the required manufacturers time plus a little more just to make sure.
If you go to move it and the sealant hasn’t cured and it all moves you will have to start all over again!
Refit the Sealed Unit
Once you have made sure that all has cured correctly and the unit can be moved, you can now refit it.
Just before you fit it back in your upvc window frame, re-tape all of the edges with some duct tape.
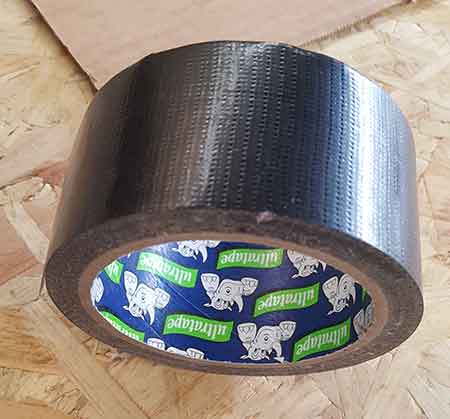
Once the glazing sealant has cured and dried, apply new duct tape all around the edge to protect the sealant and also the edges of each glazed pane
With some help if needed, slide the sealed unit back in the frame and ask your help to support it while you refit the beads.
Once the beads are in place it should then held in place correctly so the final job is to fit the seals correctly.
As we have stated, repairing a blown sealed double glazed unit is not really a job for anyone new to DIY so if you have any doubts about your ability to complete this task, do not attempt it, get the professionals in!

