To fit replacement doors and windows FENSA registration is required. However the basic process of what’s involved is described below.
Double-glazing generally comes in three parts, the frames, the sill and the glass. When you order, they will arrive separately with the beads in the frame so you can pretty much see how the glazing beads fit in. See also our project on Upvc conservatories for more information on windows and doors.
Remove your existing windows carefully. The less mess you make of the walls the less work you will have to do later on. Check you have not damaged any vertical damp proof courses or that they have not pulled out with the old frame. If they have, slide them, or new lengths, back into position. Take a look at our projects on replacement windows and how to remove window and door frames.
Most modern windows come with trickle vents in the top section of the frame. These vents allow warm air that has built up in the window recess, to flow out rather than hitting the cold glass or frame and condensing. See our condensation project for more information on this.
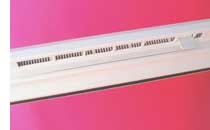
Trickle vent for double glazed window
Frame and Beads
Sealed units (the glass) are two panes of glass kept apart by a coloured spacer bar (mostly silver or brown). This is filled with silica crystals. These crystals soak up the moisture to keep the air gap between the panes clear. You should be given a 10-year guarantee on these units. The glass will be cut to fit the frame you order so you only have to worry about getting the right size frame. The glass will also be cut to allow room for the heads of the frame fixing screws at the side of it.
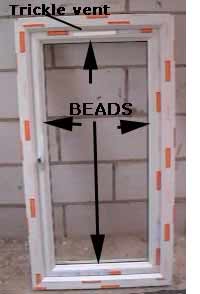
Upvc window and beads
When you insert the glass you will need to space it out so the borders are equidistant in the frame. In the case of a "barred" unit, which is a sealed unit with inbuilt glazing bars to make it look as if it is lots of small sections, you will need to make sure the glazing bars look absolutely horizontal and vertical. This can also be done using the spacers.
The beads, if installed when you take delivery of the frame, can be removed using a sharp scraper or chisel, this will give you a clear view of the rebates that will receive the glass.
Window Sill and End Caps
The frame will come separately to the sill and the sill will probably have to be cut to length on site as normally you get a little extra to play with. The sill in most cases will also come with some end caps which need to be glued on to each end of the sill with a special PVC superglue. Occationally the sill and window will come with the glue but in most instances you will have to purchase this seperatley. The glue can be purchased from most window and glazing suppliers.
The sill sits on the top of the outside skin of the wall, on a mastic, or sand and cement bed. A bead of silicone is applied to the top of the sill and the frame then sits on that. The back edge of the sill will have a little upstand against which the window will butt and this is where you put the silicone. Do not seal the gap which will be between the bottom front edge of the window frame and the top of the sill. There are drainage holes in the bottom of the frame and any water that does get into the frame can run out of these holes and run off the sill.
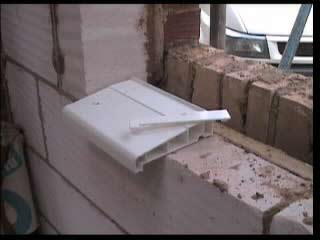
Window sill and End Cap
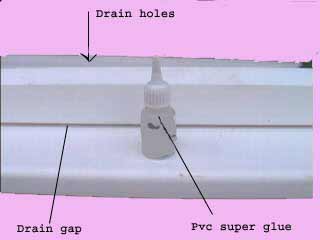
Drain Holes, Drain Gap and Pvc Glue
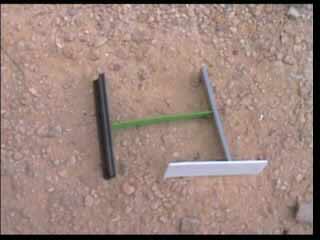
Types of different thickness spacers
The fixing holes are drilled once the beads are out and the screw heads are covered by the sealed unit when it is placed in the frame.
Put the frame in and square it up within the opening using the plastic spacers. You can ask to have a variety of spacers sent with the windows you order.
Choose a solid area of wall and drill through the frame and wall. Countersink the fixing hole gently, the pvc section here is not very thick and you just want to be able to lose some of the heel of the fixing.
Insert the correct length "frame fix" screws, which come complete with plug. Take the screw from the plug and push the plug in first, (you may have to give the plug some help to get it through the frame and firmly into the hole in the wall) then push the screw in as far as you can by hand, then tap it in a bit further with a hammer and finish it off with the battery screwdriver. See our video on the bottom of our page on a complete guide to fixings.
Try and get your fixings either near the spacers you have used, or in positions where the frame is touching the reveal. This will make sure you do not bow the frame when you tighten up. With opening windows the fixing goes in the rebate that does not foul the closing of the window.
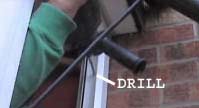
Drilling and fixing window frame

Countersinking screw heads into window frame
Place the glass square in the frame, using spacers to ensure it is square.
Insert the beads pushing the shorter sections in first.
A little tip here is to put a tiny drop of washing up liquid on the rubber of the bead to allow you to slide the bead up the glass as you push it into place.
Clean glass and Upvc and enjoy your handywork.
There is a huge range of window types and styles available on the market today to cover the ever-changing tastes in design, fashion, security, technology and efficiency. Although we would like to list them all here for to view there are simply too many.

