A home that doesn’t have sufficient ventilation is a building waiting for condensation and mould problems to occur. The most obvious sign of condensation problems due to no trickle vents is condensation around the internal, head and sides (reveals) of window frames.
These problems will normally manifest themselves in the form of damp wall or ceiling areas with the surface area turning black with mould growth. To fix this ventilation is required and a great solution is trickle vents so in this guide we look at how to fit trickle vents to your windows and doors to prevent condensation.
What are Trickle Vents?
A trickle vent is a vent that is fitted to the top of a window or door that penetrates the frame and allows consistent ventilation into a room, without the need to open a window. As they are very small, only a tindy amount of air can enter but at the same time only a tiny amount of heat can escape.
To ensure that you have a healthy environment to live in, changing the air in a room regularly through ventilation is absolutely essential. Bad or stale air is not good for you or your children to continuously breathe in as it can lead to a whole host of repertory issues and illnesses.
Over time the act of breathing releases a fair amount of moisture into the air and without decent ventilation you will find that walls, wallpaper, carpets and other materials will start to feel damp as they absorb the moisture held in the air.
Installing or fitting trickle vents in your doors and windows is an easy and safe way of dealing with the problem. The hot air gathers inside your home and gravitates towards the cooler surfaces. These are often windows and doors. The windows and doors are usually in a recesses so the warm air is trapped. It rises to the head of the window or door where (if there is an open trickle vent) it can escape.
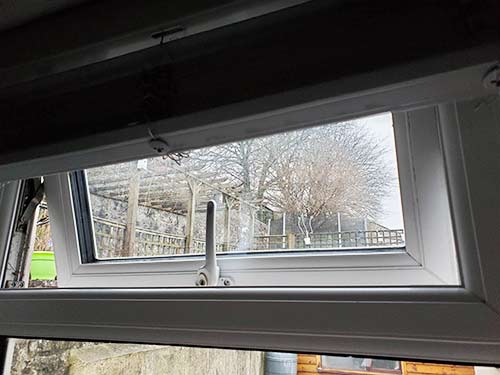
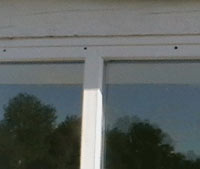
Trickle vent fitted to a double glazed window
For more information on the causes and effects of condensation, see our projects on condensation here.
Should Trickle Vents be Open all the Time?
To achieve the correct consistent levels of ventilation, you should definitely leave a trickle vent open all of the time, even during the colder winter months as this is typically when most condensation issues occur.
Although, as you’d imagine, you will loose some heating through the vents, but this will be minimal. However, the benefits of having fresh air in your home will far out-weigh this as it will massively reduce the chances of anyone developing any repertory illnesses.
Opening additional windows can also improve ventilation within a home
Are Trickle Vents a Good Idea?
The question as to whether trickle vents are a good idea is somewhat of a controversial one. There are many that argue that as ventilation is essential in the home to ensure air is regularly swapped, they should always feature on a window as this will ensure ventilation is consistent whereas without any it’s up to an individual to create the ventilation by opening a window.
On the other side to this there are many that argue that they are totally pointless and can in fact destroy the U-value of an otherwise solid window frame and to provide any required ventilation, all you need to do is open a window.
Another factor is cost. Considering the cost of windows in the first place and the fact that most houses have at least 8, when it’s time to replace them, the amount of money can be massive and as most decent quality trickle vents are £20 or more each, this can add up to a substantial additional cost, if you’re looking to fit to each and every window.
One final point is that as they effectively create a hole right through a window frame, they can allow outside noise in and also any small insects that can get through any mesh.
Despite these small issues, on newer more energy efficient properties that don’t have any of the natural ventilation of an older property, to reduce any potential condensation and mould issues they are pretty essential.
Additionally, if you are suffering from condensation and mould on window frames and within window reveals then fitting window trickle vents is a great idea.
Are Trickle Vents a Requirement?
At present, according to Part F of the Building Regulations, it is not a requirement to fit trickle vents to an existing window, however if you are replacing a window and it already has a trickle vent fitted then you must fit one to the new window.
As of the 15th June 2022, an update was made to Part F of the Building Regulations that now states any newly installed windows or doors must be fitted with trickle vents. This is in respect to new build properties and newly constructed extensions.
Types of Trickle Vent
There are 4 different types of trickle vent available for windows and doors and they are:
- In Glazing: The trickle vent is built into the glazed or sealed unit itself at the top
- Through Window Frame: Arguably the most common type and can be DIY retrofitted. In terms of how they work, they are as they sound, they are fitted through the actual window frame
- Over Window Frame: In some cases it’s not possible to fit a trickle vent through a window frame, when this is the case they can be fitted over and around the frame
- Built into Frame: With some specialist windows or doors, particularly bi-fold where they need to fold flat, the trickle vent is built into the actual frame
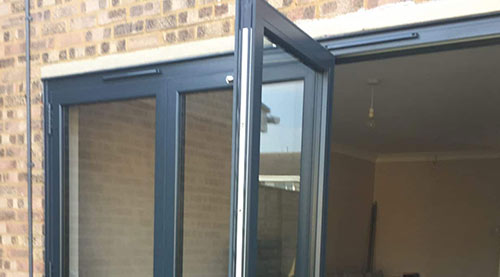
Trickle vents built into frame of bi-fold doors – Image courtesy of aspirebifolds.co.uk
Tools and Products Needed to Fit Trickle Vents
As the through the frame-type trickle vent is the easiest to fit on a DIY-basis, these are the tools and products needed to fit one:
- Chosen type of through-frame trickle vent
- Pen/pencil for marking vent position
- Tape measure
- Spirit level
- Selection of HSS drill bits
- Drill/driver
- Fine 240 grit sandpaper
- Insulation tape
How to Fit Trickle Vents
As mentioned above, the through the frame type of trickle vent is the easiest and most accessible to fit on a DIY basis, that is what we will be working through in the steps below.
Step 1 – Select the Right Type of Trickle Vent
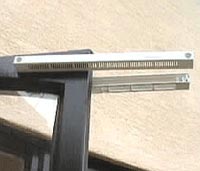
As mentioned, there are many different types of trickle vent on the market but ensure you select one that is fitted through the actual window frame such as the one in the image below.
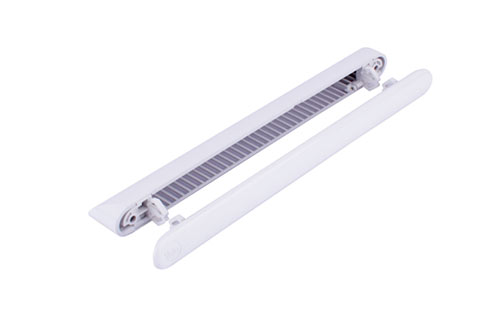
Through the frame type trickle vent
Once you know exactly what type to go for, it’s also a very good idea to choose one that matches the colour and style or your actual windows so that, once fitted, it blends perfectly in.
Also make sure that you go for a good quality make as this will ensure it lasts and operates correctly for a good long time.
The size of window and room it’s in is also a factor. Typically, a small room with a small window will only require 1 small trickle vent fitted, whereas a large window in a large regularly inhabited room will probably require 2 larger trickle vents per window.
When it comes to exactly what size and amount of vents you will need, this really depends and is quite complex to work out but in short, you need to ensure a certain amount of ventilation per room so in turn need a certain size and number of vents. More information on this can be found here.
In some cases the type of building the vent is being installed in will have an effect on the type of through vent you go for.
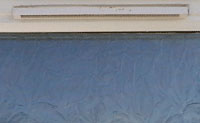
The window shown in the image below is an office window and a continuous trickle vent is being placed on the frame. This is a grid vent which cannot be closed so the owners of the building know that the rooms are being continuously vented.
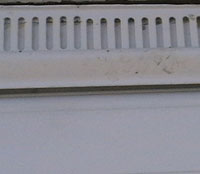
Continuous vent strip
Step 2 – Mark Position of Trickle Vent
In terms of where to fit your vent, so that everything is uniform it’s best for it to go at the centre of the frame and above the centre of a sealed unit.
Using a tape measure, measure and mark the centre of the frame above a sealed unit and then the vertical centre of the frame itself
Position and level a spirit level on the mark and then draw a horizontal line using a pen or pencil. Ensure the centre line mark you made is still nice and visible.
Take your trickle vent and select one section with fitting holes and measure from the centre of one fixing to the other. This will give your fixing centre measurement. Additionally, this should also be stated on the packaging.
Divide this measurement in 2 and draw out your tape measure. Position the centre measurement on the centre line you marked on the frame and then mark the beginning and end of the fixing hole measurement along the line.
For example if the fixing centres are 300mm, once divided in 2 that’s 150mm. Draw the tape to around 350mm and then place the tape at 150mm on the frame centre mark and then mark at 0 and then 300mm.
If your vent has any additional clips then use the same technique to mark these.
This should now mark the fixing position (and any clip points) of your trickle vent in the vertical centre of the frame above the centre of the sealed double glazed unit.
Finally, move inside and repeat this stage so that you also have identical markings on the inside of the frame.
Step 3 – Drill Fixing Pilot Holes
Next, you will have to drill a small pilot hole at each of the fixing holes and any additional clip holes so use a 2mm drill bit to drill through the frame. Make sure you hold the drill perfectly horizontally and vertically level so the hole is dead straight.
When drilling PVCu windows you will need to use a high speed bit (HSS) designed for drilling metal. All PVCu windows should have a metal reinforcing strip within the frame. This strip is not very thick and quite easy to drill through. For help drilling pilot holes, see our project here.
For timber window frame you can use an HSS drill bit or a specialist wood drill bit.
Once pilot holes are drilled, check they all line up on the inside and then swap for a larger drill bit that’s the size of the screw, clip or fixing point that runs through the frame. Again, this should be stated with the instructions, if not simply measure the diameter. Again when drilling, ensure the hole is drilled dead straight.
When drilled out, gently sand off any burrs using your sandpaper but take care not to mark the frame too much.
Step 4 – Drill Trickle Vent Holes
Next, measure and mark 4 or so evenly spaced points along the line between your fixing holes and then use the same pilot drill bit to drill through the frame, again ensuring that the drill is held completely vertically and horizontally level.
As most windows frames are around 50mm thick, ensure the drill bit makes it through the entire frame. When drilling, don’t force the drill through as you could cause damage to the frame on the inside, let the drill do the work.
When completed, move inside and check that everything lines up correctly and then swap the pilot drill for a larger drill bit, around 5.5 – 6mm and re-drill all of the holes out so they are larger. Again, drill hole dimensions should be stated in the manufacturers instructions.
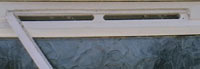
Holes in windows for trickle, or continuous vents
Alternatively, to be absolutely sure your vent is operating at maximum efficiency, it is possible to remove a casement window and, using a router, you can rout out a groove for the vent which is much tidier.
Routed out groove or slot for trickle vent
Step 5 – Fix Trickle Vent in Place
Lastly you can now fix the two sections of your trickle vent to the window frame, making sure you place the sections of your trickle vent to the correct side of window frame. They will be labeled internal section and external section and the small mesh, called an insect grill, always goes on the outside.
When it comes to fixing, the outer and inner sections are either screwed together or clipped together.
Once fully secured you have now successfully fitted a trickle vent, top job!
Position of trickle vents either side of window frame