Damp is a real problem for many homes in the UK, especially when it gets into and on an internal walls surface as it can quickly cause condensation and even worse, black mould which can be extremely harmful to your health.
In some instances it’s almost impossible to keep damp and moisture away from the surface of an internal wall due to where the wall is so in these instances it’s best to let it in and then deal with the consequences and this is where tanking comes in, so read on and find out all you need to know.
What is Tanking?
Tanking is a construction technique where by a barrier membrane or liquid slurry is placed over the internal surface of a wall to prevent water and moisture that’s penetrating the wall from behind accessing the inner surface and causing the afore mentioned condensation, mould and other damp-related issues.
In some situations where preventing water and moisture penetrating a wall is going to incur too much cost or inconvenience, tanking can be used to provide a cost effective solution and impenetrable barrier to keep it safely out of the way.
Tanking is more often than not used to waterproof shower rooms, wet rooms, cellars and other similar areas and either keep water and moisture out or contain it.
The traditional method of tanking was to batten the inner wall surface out and panel over the top of it with plasterboard. This would be ok for a while but due to the moisture presence, eventually the wooden paneling would itself become damp and then rot.
As technology has evolved, this eventually gave birth to the tanking systems that we know today, the 2 most common and effective being a liquid coating or slurry as it’s known or a plastic-based sheet membrane, both work to form a water proof barrier that keeps water and moisture at bay.

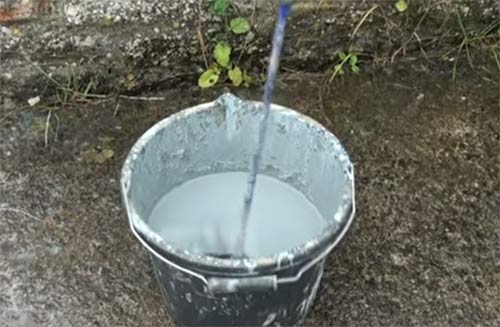
Mixing and applying cement-based tanking slurry
Why do Walls Need Tanking?
When it comes to how water and moisture cause damp and its associated issues, damp walls are cold walls, fact! Water and moisture that is allowed to pass through a wall onto its inner surface will inherently maintain that area at a cooler temperature than it’s surroundings. When this this allowed to happen it can cause condensation build up and black mould growth.
Also, when moisture passes through a wall it can carry salts and minerals with it. When these salts reach the inner decorated surface that’s normally covered with plaster or paint, the salts penetrate it and as most are hygroscopic they will suck moisture from the atmosphere, create their own damp spots and as the salts grow, will completely ruin painted and wallpapered surfaces and also eventually blow the plaster off the wall.
With the above in mind, to prevent any damage to internal surfaces and also the potential health risks that come with black mould, it is essential that a layer of tanking of some type is applied to keep the water and moisture at bay.
When it comes to what actually causes damp and it’s associated issues, it can be caused by a huge number of different things including cracks and damage to bricks, blocks and render, leaking gutters, damaged roof tiles, cracked flashing and a great many other things.
The resulting damp problems caused by this are generally divided into 2 types, either penetrating damp e.g. damp that penetrates through a wall or rising damp, damp that rises up a wall from ground level.
Additionally, when a walls surface is below the damp proof course, partially below ground or is used to retain earth, it will always be damp due to the fact that it’s surroundings naturally contain water and moisture.
Salts on wall due to damp
What Different Methods of Tanking are There?
There are essentially 3 different types of tanking, traditional liquid bitumen or sheet tanking, todays more modern slurry tanking and also 2 different variations of membrane tanking, one with an air gap and one without.
Each has it’s own advantages and disadvantages and situations where it may work better or be more effective than another option.
Liquid bitumen coating
Bitumen tanking was traditionally the go-to method of solving damp issues with a variety or surfaces and materials including walls, timber and many others.
In terms of application it’s normally painted onto the cleaned brickwork, stone, block or render, or what ever surface you are aiming to protect or it can come in rolled bitumen sheets that are spread and fixed over a given surface.
On the whole it’s rather difficult to apply to old, damp salty masonry as it’s prone to separation from the wall and render coats due to incomplete curing. Additionally it also struggles with loose and dusty surfaces as it’s thick to apply and doesn’t stick to the surface too well.
Generally it’s best for non-critical small jobs, or external coating below the damp proof course if you do want to use it but on the whole it’s probably better to opt for one of the other more modern solutions below.
Bitumen tanking sheet
Cement based slurry
This is probably the best solution to go for if you want to create a complete waterproof barrier that prevents any form of water or moisture finding its way on to any internal surfaces. Once on the wall and cured it forms a water proof skin that keeps water and moisture where you want it.
To give the best results the surface it’s being applied to needs to be free of any loose material, dust and debris.
To get it on the surface the best way is to brush it on with a masonry brush. It goes on very easily as the cement base wants to amalgamate with the masonry and mortar.
It can be used on a variety of different surfaces including brick, block, stone, concrete and even over solid floors.
Not a true vapor barrier, so needs to be finished with ‘breathing’ materials. Ideal for below ground situations or exterior coating on foundation walls.
Mixing up tanking slurry to apply to walls surface
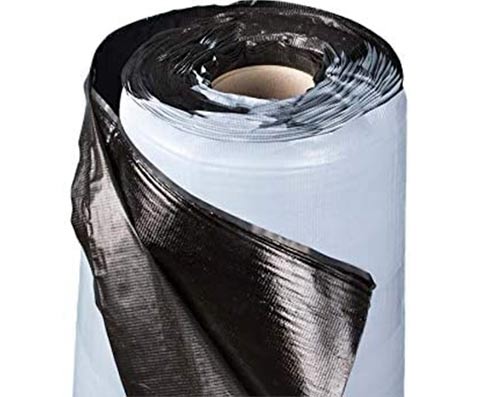
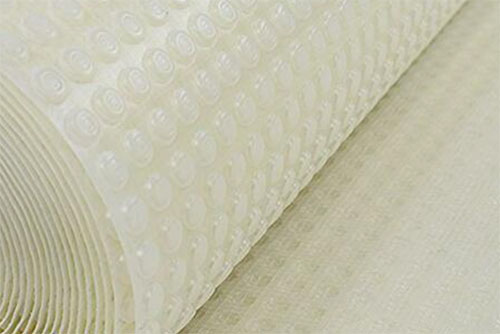
Air gap membranes
Unlike the slurry tanking above, membranes are applied over the problem surface which are then boarded or decorated over, keeping the damp away from any inner surfaces.
In terms of appearance, membranes generally have a dimpled plastic rear that’s fixed over the surface. The dimples allow water and moisture to trickle down where it can then be channeled to a sump pump and disposed of correctly.
In terms of fixing, each sheet is fixed onto brick, stone, block or render with plastic plugs to help form an additional air gap cavity.
These Membranes can have a plain surface for battening or a mesh surface for direct plastering or plaster boarding. Ideal for cold, single leaf walls and for lining rooms with cold solid 9 inch walls.
Damp proof membrane for fixing to walls
When to use Membrane or Slurry for Tanking
As both slurry and membrane tanking’s are quite different in how they are applied and how they protect the surfaces they’re covering it’s important that the correct type of tanking is used for the specific situation it needs to be used for.
In light of this, starting with tanking slurry, it’s quite versatile and can be used in a variety of situations including the coating of both above ground and below ground surfaces as it is a complete water barrier.
However, if the water or moisture causing the issue is a continuous flow then blocking its passage may cause many other issues so in this case it’s better to use a membrane so that the water can then be channeled and controlled.
When it comes to membranes, these are ideally used for lining rooms such as wet rooms, shower rooms and the similar.
They are also ideal for use in below ground situations such as basements and cellars. As said, this is due to the fact that where there is a constant flow of moisture into a space, instead of keeping it pushed back, sometimes it’s best to let it flow naturally and then drain it away correctly and the air gaps allow this to happen.
How Long Does Tanking Last?
The components used to create both slurry and membrane tanking systems are designed to last many years, at the very minimum 10 years, as long as they’re installed correctly and to the manufacturers specifications.
The overall success and longevity of a tanking job solely depends on whether it’s installed correctly. For a slurry-based system to work, every single millimeter of the surface your treating needs to be covered.
If there is even the smallest of gaps or holes then water will find it’s way out and when this happens the it’s totally compromised.
Similarly, if a plastic membrane system is not installed correctly and there are any gaps then water and moisture will find its way out and again it’s then failed.
How to Tank Walls
Now that you know about the different types of tanking systems, how they work and when each should be used it’s time to look at how they are installed.
How to Tank Walls Using Cementitious Slurry
One of the easiest and most effective methods of tanking is to use a cement-based slurry. It’s fairly cheap to mix up and create and can be spread on very easily.
For the purposes of this example we are treating an already damp proofed surface that was not done correctly. The previous installers neglected to treat the surfaces with a salt inhibitor and eventually salts penetrated and pulled moisture out of the air and just made everything damp again!
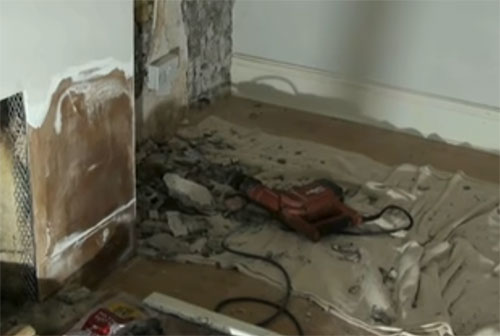
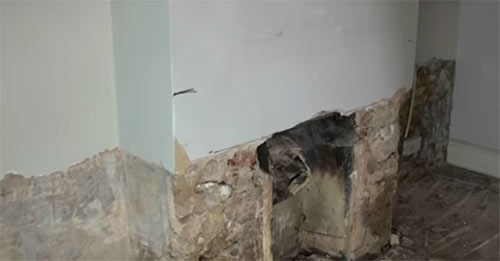
Step 1 – Remove Old Damp Plaster
Before any damp proofing can take place, the first job is to hack off all of the damp plaster from the walls surface. The best tool to use for this is a small breaker. If you haven’t got one, hire one from your local hire shop.
Along with any damp plaster you should also remove any loose debris, dust, paint or render. Additionally remove any other items that shouldn’t be there, old screws or nails etc.
Remove all the old damp plaster using a small breaker
Step 2 – Check for Active Water
With all the plaster removed the next job is to check the surface over very carefully for any signs of active water. By this we mean water or moisture coming through the wall consistently.
If there is then you will need to create some relief holes and also a drainage solution. This can be a tricky job and will probably require expert advice to ensure it’s done properly.
If it isn’t drained correctly then it will either build up behind your water proof tanking layer, applying pressure that could cause it to fail in time or will flow somewhere else, causing issues in another part of your home.
Step 3 – Fill all Holes
During removing the old plaster it’s inevitable that some sections of the wall e.g. bricks, stone or mortar will come away and cause holes and depressions. To ensure that your tanking slurry has a nice flat surface to be laid on to all of these holes need to be filled.
Mix up some sand and cement mortar to a ratio of 4x sharp sand, 0.5 soft sand and 1x cement and trowel it into any holes. Smooth it over using your trowel to give as flat and uniform a surface as possible.
It is also a good idea to add a waterproofer or plasticiser product to the cement mix as this will aid in the cement bonding with the sand and prevent moisture passing through.
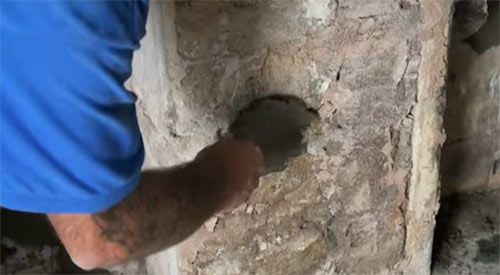
Fill all holes and depressions in walls surface
Step 4 – Apply Salt Neutraliser
The next job is to apply the salt neutraliser to the entire walls surface to prevent any salts from compromising your new tanking layer.
Salt neutraliser is typically a clear liquid that is painted on to a walls surface, soaks down in and then kills of any salts present in the masonry, plaster or render. Once cured it then also provides a barrier to any future salt growth.
To apply it, first wash down the entire walls surface with clean, fresh water, ensuring it’s wet. Once done you can then brush or roller it on, ensuring you give it a full coating.
Once the first coat has cured, wet the surface down again and apply a second coat and again leave it to fully cure.
Step 5 – Mix Tanking Slurry
To mix up the tanking slurry we use SBR. This is essentially special PVA for builders. Fill roughly a quarter of a 14 litre bucket with SBR and then using a scoop, apply cement to the SBR, one scoop at a time whilst mixing.
Add the cement and keep mixing until you get a nice creamy slurry consistency. At this point it’s then ready to get on the wall.
Only mix up a little at a time as the cement will sink to the bottom of the mix, so you will need to periodically keep mixing it to ensure the cement is fully mixed in.
As soon as you’ve finished mixing make sure you wash your tools off straight away as the SBR will dry fairly quickly.

Mix up tanking slurry using SBR and cement
Step 6 – Apply Slurry to Wall
Before applying the slurry, brush clean fresh water over the wall to dampen it down.
Using a large masonry brush, paint the slurry on to the wall in horizontal layers, making sure you get plenty on the wall and leave a good uniform coating.
As mentioned, keep mixing the solution up to ensure that the cement hasn’t sunk too much.
Once the first coat is on the wall, leave it for 2 hours and then the second coat can then be applied.
Apply first coat of tanking slurry
Step 6 – Apply Second Coat of Slurry
Once the first coat has been left for 2 hours or is tack free you can then get the second coat on the wall. This time it’s applied at 90° to the first coat so vertically up and down.
The idea of this is that if there are any minute holes or gaps in the first coat, applying the second at a different angle will cover them in.
Again use a large masonry brush and get plenty on the wall.
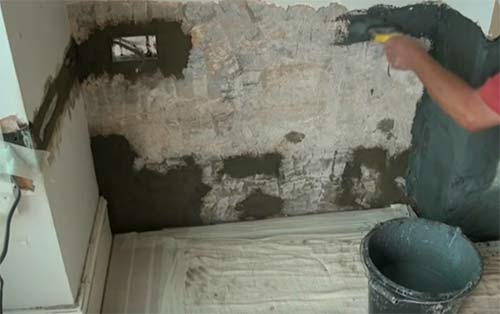
Step 7 – Replaster or Render
Once your second coat is totally dry the surface can then be replastered with a renovating plaster, painted over with a microporous paint or traditionally rendered with sand and cement. We generally prefer the latter, but this can sometimes depend on the situation.
In this instance it was rendered. A render mix was created using 5x sharp sand, 1x soft sand and 1x cement. It was then trowelled on to the wall covering the repair area.
The finished level should be roughly 3mm below the existing finished level as once cured, the render is then skim plastered over.
The rendering process is very much like base coat plastering so for full details, see our base coat plastering project here.
Once the render is on the wall and has been allowed to cure fully it can then be plastered. For full details on how to skim plaster see our project here.

Wall surface rendered ready for skim plaster
How to Tank Walls Using a Membrane
Here follows a brief explanation on how to install a damp proof membrane but for a full run down on the process see our lining damp walls project here.
Step 1 – Clean Surface Down
Firstly remove any gypsum plaster that may be left on the walls surface by gently chiseling it off using a hammer and bolster (cement and sand render is ok to stay).
Also remove any other items that shouldn’t be there such as wall plugs, wooden plugs, timbers, screws etc.
Step 2 – Check for Water Presence
Check if you have any water seepage coming through the wall. Also check if there has been a history of any flood damage.
If you do have water penetrating the walls surface you will need to install a drainage solution such as a traditional drain or a sump and pump to remove the excess water and channel it away safely.
As we have stated if the water and moisture present is a continuous flow, no matter how small, it will need to be gotten rid of properly as if left it could cause untold damage.
Step 3 – Fix Membrane to Surface
The next task is then to fix your chosen lining membrane to the walls surface. Depending on exactly what solution you go for will depend on how this is done, there are many options available on the market today.
As we have explained above, there are two main types available, one is for use if you are battening and boarding over the top to create a surface to decorate on to and the other is a mesh membrane that features a fine mesh that can be directly plastered onto or can take plasterboard adhesive for dot and dab plasterboard fixing.
Which ever option you go for, fix the membrane onto the walls surface. Most manufacturers supply special plugs or fixings with the kit you purchase designed to work with the particular membrane you have.
There will be full instructions supplied with the kit you are using so follow these precisely and to the letter!

Fixing damp proofing membrane to surface of wall
If you are also experiencing damp and moisture issues on the floor then this may also need covering with a membrane. Once it has been lined you can then cover and finish using floating tongue and groove chipboard or you can also apply a concrete screed.
When there is physical water seeping up from floor level you will need to bond the wall and floor membranes together to create a ″sealed system″. Note: When water is present you will also have to incorporate a drain or sump and pump.
The exact specifications of this setup will vary greatly and if you are experiencing such issues then you will need to speak to a damp solutions expert.
Step 4 – Finish Surfaces
Once all surfaces are covered with membrane and you’ve confirmed that it’s fixed in place correctly the final job now is to finish all surfaces.
This will either involve timber battening or dot and dab plaster boarding and boarding over it and then decorating the resulting surface or plastering straight over it and finishing this way.
Which finish you use is mostly up to you but under no circumstances should you breach the membrane itself as this will render any water proofing abilities null and void.
If you have a damp issue in walls or floors, then tanking is a great option to go for to stop any further damage to any surfaces. One of the best features of any of the tanking options is that they can easily be done on a DIY basis.