When building a new wall against an existing one, such as for an extension, you need to securely tie the two walls together. This can be a little challenging for beginners, but there are several simple and effective methods to do it.
Below we run through the various options available to you for connecting new brick or blockwork walls properly.
What is Tying in Brickwork?
Tying in brickwork is the method used to connect a new wall to an existing wall so they become one solid, stable structure.
Instead of the new wall simply butting up against the old brickwork, tying ensures both walls lock together and support each other.
This stops movement, prevents cracks and keeps the new work straight and secure over time.
Without a proper tie, new brickwork can pull away, allow water to penetrate and fail to carry weight safely, leading to inevitable failure. By bonding the bricks or using mechanical wall ties, you create a strong and long-lasting join that also meets the essential standards set by the building regulations.
Why do You Need to Tie Walls and Brickwork Together?
Brickwork must be tied together to stay strong, safe and stable. When two walls meet, they should act as one solid structure, not two separate sections sitting side-by-side. Without a proper tie, the join becomes a weak spot that can shift, crack and eventually fail.
In UK construction, cavity walls use metal wall ties every few courses to link inner and outer brickwork skins. The same principle applies when adding a new wall to an existing one, such as for an extension, garden boundary or retaining wall. Tying the walls ensures they move together and spread weight evenly, rather than pulling apart over time.
Mortar alone is not enough to hold two independent walls securely. By using the correct tying method, you create a single, durable structure that resists movement, weather and everyday loads. Simply put: if you want your new brickwork to last, always tie it firmly into the existing wall.
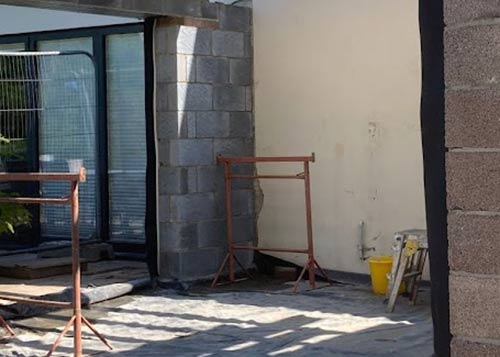
Newly constructed wall bonded to an existing structure
Methods for Tying Walls and Brickwork Together
There are four main ways to tie new brickwork into an existing wall. The traditional approach is toothing out, where bricks are staggered into the old wall.
Modern options include frame cramps, screw-in wall ties and wall starter kits. Each method has its own benefits depending on the job, your skill level, and how strong the finished connection needs to be.
Toothing Out
Toothing out is the traditional way to join two brick walls. It involves removing, or leaving out, half bricks on every other course of the existing wall, then building the new wall so its bricks slot into these gaps. The staggered pattern creates interlocking “teeth”, keeping the brickwork in bond and maintaining full strength.
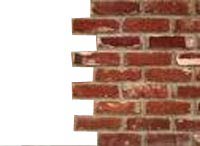
Toothed out brickwork
A similar approach is block bonding, where only full blocks are used in a continuous pattern around the structure. This creates a strong running bond over openings like doors and windows, helping the wall stay rigid and stable.
While both methods produce a very secure join, they are labour-intensive and more expensive than modern mechanical wall-tie systems.
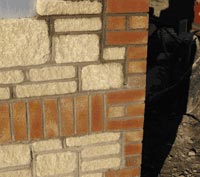
Block bonding
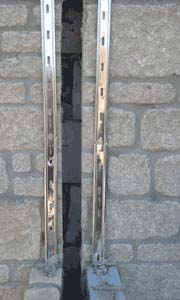
Wall Starter Kit
A wall starter kit is a modern, quick and cost-effective way to tie a new wall into an existing one. Thanks to its speed and reliability, it has become the go-to method for most builders, replacing the slower, more complex toothing technique in many situations.
In some builds, traditional bonding isn’t practical. A wall starter kit solves this by providing a secure mechanical fixing. A vertical metal rail is fixed plumb to the existing wall, and adjustable wall ties are clipped into the rail to connect the new brickwork as you build.
Fixings are usually placed every 225 mm for brickwork (every three courses) and every 450 mm for blockwork.
When installed correctly and kept perfectly upright, a starter kit creates a strong, long-lasting bond between old and new walls—while saving significant time and labour on site.
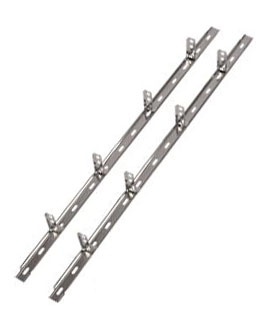
Wall starter kit – used to tie new blockwork into existing bbrick and blockwork
Frame Cramps
Frame cramps work in a similar way to a wall starter kit, but instead of a metal rail fixed to the wall, each tie is fitted individually. This makes them flexible and easy to use in tight spaces or awkward junctions.
Unlike traditional toothing, frame cramps can be fixed to many surfaces, including brick, blockwork, concrete and steel, making them ideal for extensions, conversions and mixed-material builds.
To install, simply fix each cramp directly to the existing wall using the right fastener for the material e.g. wall plugs and screws for masonry, concrete bolts for concrete or self-tapping screws for steel. As long as spacing and alignment are correct, frame cramps create a strong, secure connection between the old and new walls.
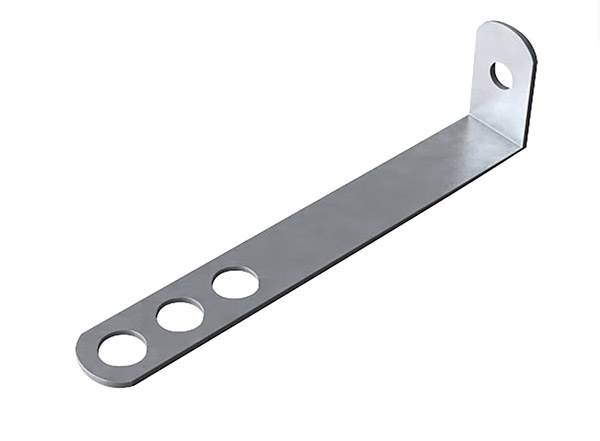
Frame cramp that can be used to tie new walls to existing walls
Screw-in Wall Starter Ties
Screw-in wall starter ties are a modern, easy way to tie new walls into existing ones. As the name suggests, each tie screws directly into the existing wall to connect with the new brick or block course.
To install, drill a hole in the mortar of the existing wall, insert the supplied nylon wall plug, then screw the tie into place. Once positioned, the tie extends to the new wall, creating a strong, secure bond quickly and efficiently.
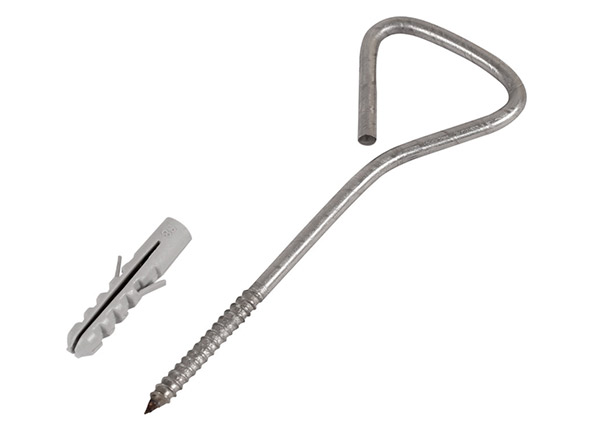
Screw-in wall ties can be used to bond new walls to existing walls
What to Consider When Tying Walls Together
Before tying new walls to existing structures, there are important points to consider.
First, check with your building inspector to see if a vertical damp proof course is needed and whether existing wall cavities must continue into the new construction.
Maintaining the cavity is essential when adding extensions. This ensures insulation continuity, prevents cold spots and allows proper airflow if no insulation is present. The diagram below shows how to cut into the existing wall while preserving the cavity.
Always follow building regulations to ensure structural integrity, effective damp resistance, and energy efficiency for both current and future occupants.
Maintaining a cavity
Essential Tools and Materials for Tying Brick and Block Work
To tie a new wall or structure into an existing one, you will need the following tools and materials:
- Suitable wall tie system – wall starter kit, frame cramps, screw-in ties
- Suitable screws if fixing to masonry – 8 x 40mm
- M6 concrete bolts or coach screws for concrete
- Suitable self tapping screws for steelwork
- Wall plugs
- SDS drill or power drill
- Drill/driver
- Suitable drill bits 6 – 10mm
- Spirit level
- Pen/pencil
How to Tie Walls and Brickwork Together
In the guide below, we’ll use a wall starter kit to tie a new extension wall into an existing external wall, as it is the simplest and most efficient of the available options.
Before starting, ensure you have checked with your local Building Control to confirm cavity preservation and any required vertical DPCs.
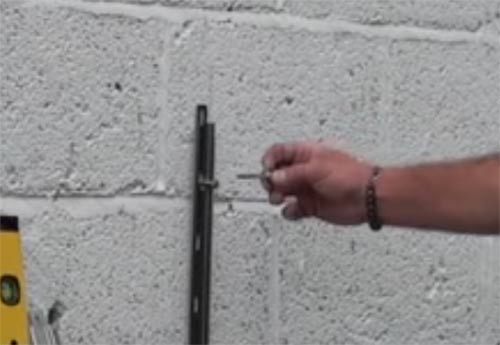
Step 1 – Level and Mark Starter Kit
Begin by positioning the wall starter kit rail where the new wall will be built, aligning it with the centre of the bricks or blocks.
Use a spirit level to make the rail perfectly vertical, then mark the fixing holes with a pen on to the wall. Ensure at least four fixings for every 1.2m of rail.
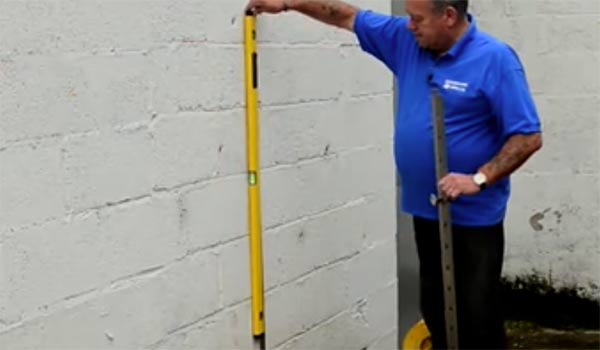
Position rail, level it and mark fixing holes
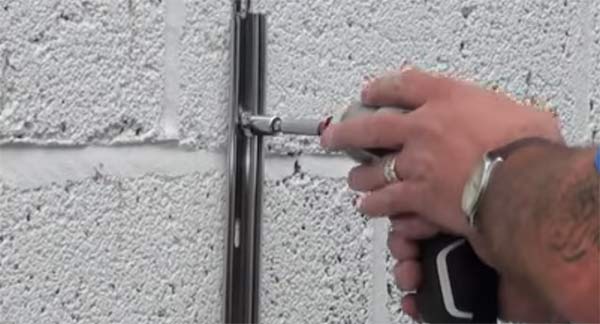
Step 2 – Drill Fixing Holes
After marking the fixing points, set the rail aside.
Using a power drill with hammer action and the correct drill bit for your fixings (usually 10mm for wall plugs), drill each hole and insert the wall plugs.
Drill out holes and insert wall plugs
Step 3 – Secure the Starter Kit
Position the rail over the drilled holes and secure it with coach screws or your chosen fixings, tightening each one to hold the rail firmly in place.
Fix rail firmly to walls surface
Step 4 – Build the Wall
With the starter rail in place you can now begin laying your bricks or blocks. For guidance, see our project on laying bricks and blocks.
Install wall ties as you build. For bricks, every 225mm (3 courses) and for blocks, every 450mm (2 courses). Slide each tie down the rail into the mortar bed, tapping it gently to ensure full engagement.
Continue this process along the entire wall. Once cured, the result will be a strong, long-lasting structure.
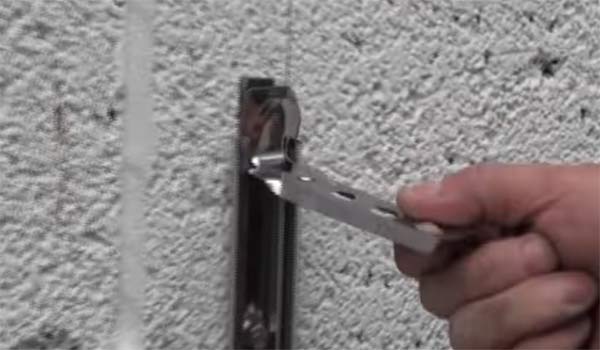
Slide tie on to rail at desired courses
Repairing Failed Wall Ties Using Helical Ties
Over time, wall ties can corrode, fail or become loose, compromising the strength of a brick or block wall. When this happens, the connection between the new and existing walls weakens, which can lead to cracks, movement or even structural issues. Repairing failed ties promptly is essential to maintain the safety and stability of your property.
Helical ties provide a modern and effective solution for repairing failed wall ties.
These stainless steel, screw-in ties are designed to be installed with minimal disruption to the existing brickwork. Unlike traditional ties, they can be inserted through small holes drilled in the mortar joints, meaning you don’t need to dismantle large sections of the wall.
The installation process is straightforward. First, the area around the failed tie is prepared by drilling a small hole in the mortar at the correct angle. The helical tie is then screwed into the wall using a suitable insertion tool, connecting the inner and outer leaves securely.
Once in place, the hole is filled with matching mortar to maintain the wall’s appearance and prevent moisture ingress.
Helical ties are particularly effective because they create a strong, lasting bond that restores the wall’s structural integrity. They are ideal for cavity walls, extensions, and areas where traditional ties are difficult to replace. Using helical ties ensures your repaired walls remain stable, safe, and compliant with UK building standards.
When building a new wall off of an existing one, it’s essential to tie it in properly. This ensures the structure is strong, safe and long-lasting for any and all present and future occupants.