A hot glue gun is an electrical device that uses a heating element to heat up and melt specially made solid glue gun sticks. Once melted, the glue is then directed out of the nozzle of the gun on to a given object to either stick and hold it in place or repair it.
Originally created for use in bonding soles on to shoes, most avid DIY’ers, tradesmen, craft workers, upholsterers and many other professions now feature one as a staple in their toolkits due to their versatility and easy of use.
Coupled with the correct type of glue stick for the work you’re doing, the glue gun will allow you to create a strong and lasting bond between a wide range of different objects and materials.
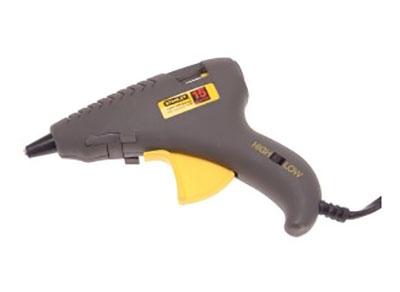
Standard type hot melt glue gun
What Different Types of Glue Gun are There?
Essentially, standard glue guns come in two different formats; high temperature hot melt and low temperature cool melt.
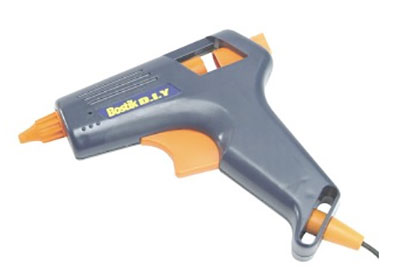
Sturdy DIY grade hot melt glue gun
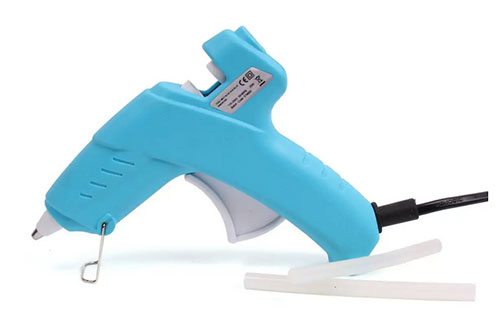
Small arts and crafts cool melt glue gun – Image courtesy of hobbycraft.co.uk
It is also possible to get dual option guns that allow you to switch between two different temperature settings (high and low temperature) so that you can use either high melt or cool melt glue sticks.
With these guns you get the best of both worlds, but this feature does come with an additional cost.
In reality the type of glue gun for you will be dictated to you by the type of job you need it for.
The higher temperature high melt glue guns tend to be used for more heavy duty applications such as sticking and joining timber, metal etc making them ideal for carpenters, joiners and tradesmen.
The lower temperature glue guns are more suitable for more delicate items such cloth/material, paper, card etc. These guns tend to be used more by hobbyists and those involved with arts and crafts.
Although a little outside of the scope of this DIY project, the third type is the heavy duty and pneumatic glue guns. These are mainly used for industrial purposes such as in factories and distribution warehouses.
As these types of guns are more industrial, this is reflected in their price.
What Different Types of Glue Stick are There?
Glue sticks are manufactured in many different sizes (different glue stick diameters) and also in many different colours for all types of glue guns.
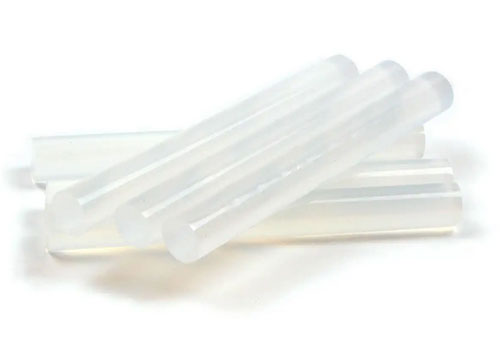
On looking at a standard transparent glue stick it typically looks just like a solid cylindrical perspex rod and feels fairly soft to the touch.
In terms of sizes, in particular diameters, the most common sizes of glue stick tends to be 11mm and 15mm in diameter. The size of glue stick needed for your particular gun will very much depend on the type of gun you have. Refer to the manufacturers instructions for the correct size to use.
11mm glue sticks
When it comes to lengths these can vary greatly and can range from 10cm all the way up to 38cm, but again, the length of glue stick you can use will depend on the type of gun you have.
One other deciding factor determining which glue is used in a glue gun is whether it’s a low temperature or high temperature stick and indeed gun.
The general rule is to only use high temperature sticks with high temperature guns and vice versa for low temperature sticks and guns.
Despite the above, it is possible to use some low temperature glue stick with high temperature guns, but unfortunately not the other way around e.g. high temp sticks with low temp guns. You can also get dual purpose glue sticks that work hot and lower temperatures.
On the whole, it’s best to use the correct type of stick for the gun you have. The type of glue you can use for the gun that you have should be stated in your manufacturers user guide.
For the lower temperature, more arts and crafts-geared guns, glue sticks are available in a range of different colours to suit their more “arty” usage, but for the higher tempertaure sticks, these all tend to be transparent in colour.

Selection of different coloured glue sticks
One final point to mention is when it comes to storing your glue sticks. To avoid any form or storage-related damage it’s essential you keep your unused glue sticks in a cool, dry place.
As a summary, unless you are going to be working consistantly with fine fabrics and materials that damage easily, the best glue gun to go for is the higher temperature, hot melt glue guns. The glue sticks themselves are available in a much wider range and once cured, do not shrink whilst setting, are resistant to most chemicals, weathering and UV damage.
How do you Remove a Glue Stick From a Glue Gun?
This is in fact a little bit of a trick question as once you have inserted a glue stick into a glue gun and started using it, you should never remove it as it can cause damage to the gun itself, especially if it has been left and solidified.
If you have inserted a glue stick into your gun and completed your task successfully, gently pull on the trigger to empty the nozzle of any excess glue that’s sitting in there
Pop the gun upright on the stand that was provided and then turn it off at the mains and (wearing gloves as the nozzle is hot), wipe it over with a paper towel to remove any and all surface glue.
Once sat on it’s stand, wait until the gun has fully cooled down. Once cooled, it can then be safely packed away, part used glue stick included.
Retaining the stick within the gun until it’s next needed will not cause any damage whatsoever.
How Long do Glue Guns Take to Heat up?
Before you can start using your glue gun you will first need to get it up to temperature so that when you pull the trigger the glue flows freely through the nozzle.
To ensure this happens the glue gun needs to be plugged into the mains and switched on, if it has a power switch, some just rely on the mains supply.
Glue gun plugged into mains to heat up to temperature
If you are using a low temperature cool melt glue gun it should take around 2 minutes to warm up and be ready to use.
If you are using a high temperature, hot melt gun or a heavy duty gun then this can take anywhere from 5 – 8 minutes.
Most glue guns heat up at the tip so you’ll know it’s up to temperature and ready when you squeeze the trigger and the glue starts to flow.
How to Use a Glue Gun – A Step by Step Guide
Now that we know what exactly a glue gun is and how in principle they work, what types of glue are available and what types can be used with what particular glue guns it’s time to get sticking!
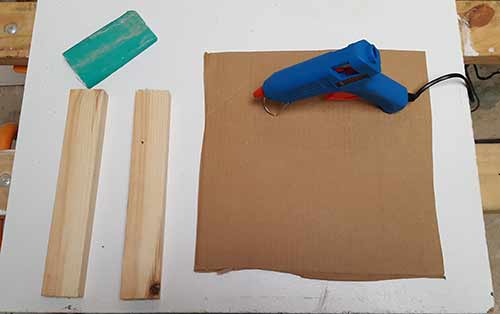
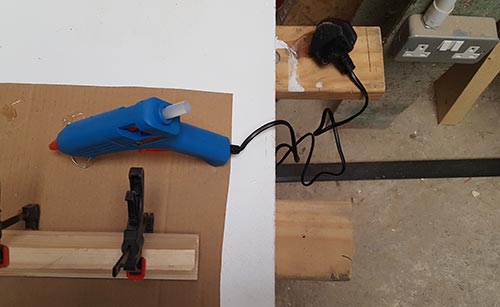
Step 1 – Prepare Your Working Area
Before you get started, the first job is to prepare your working area.
Always work in a well lit area free from any obstructions and clutter so that you can see what you are doing and won’t be constantly tripping over or working around objects that are in the way.
Working in a well ventilated area is also very important. Under normal operating conditions both hot and cool melt glue should not be dangerous, but if overheated then toxic vapours can be released.
Also, ensure that your work surface is flat and level. The support stands that come with most off the shelf glue guns aren’t that great and can easily topple over if not resting on a level surface, and you certainly don’t want that happening when it’s turned on and up to temperature.
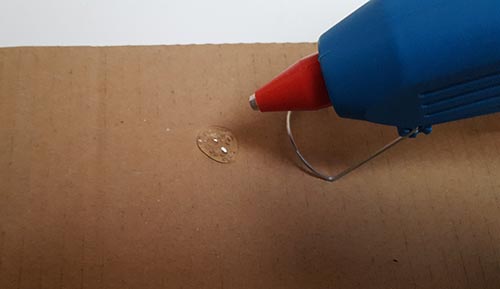
One other key requirement is to rest your gun on it’s stand on a drip mat. When you have used your gun and placed it down on it’s stand, excess glue can easily drip out of the nozzle. For this example we have used a scrap piece of thick cardboard.
Using a drip mat will prevent this excess glue from accidentally damaging any surfaces.
Working area all ready to use glue gun
Step 2 – Plugin Your Glue Gun and get it up to Temperature
With your work area now prepared and ready, the next job is to turn on your glue gun and get it up to temperature so it’s ready to use.
Before you turn it on, first check that there is a glue stick inserted and ready to use. A new stick will be fairly obvious to spot as a good portion of it will hanging out of the back of the gun, but if it’s a well used stick then any remaining glue will be hidden within the body of the gun.
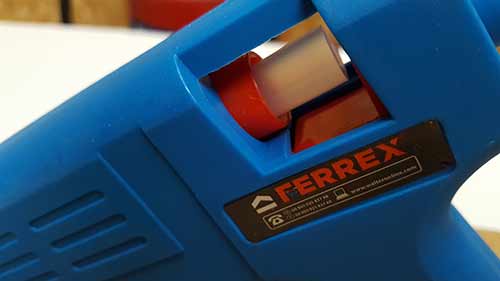
Glue stick inserted and ready to use
If you pear through the glue slot in the back you should be able to see any remnants, but if you do have to actively hunt for it, it’s safe to say that it’s nearly run out, in which case it’s a good idea to pop a new stick in.
Gently push it down into the gun and then feather the trigger lightly to ensure that it butts up to the existing stick.
As mentioned above, to turn on your glue gun this is normally just a matter of plugging it into the mains and leaving it to get up to temperature.
In the case for the gun we are using in this example, the manufacturer states to leave the gun for 5 minutes, but as mentioned, refer to your manufactures user manual for specific times.
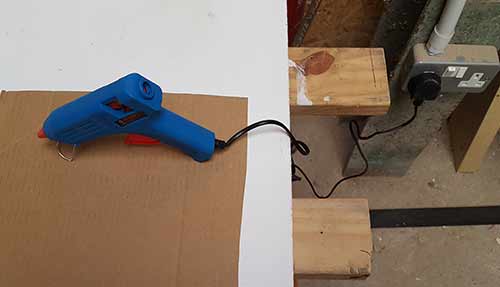
Glue gun plugged in and heating up to temperature
Step 3 – Prepare Items to be Glued
Whilst waiting for your glue gun to get up to temperature, now is a good time to do any prep work needed to the items you’re gluing.
Any and all surfaces being glued should be free from any grease, dust or other debris and also dry.
If any grease is present, wipe over with a slightly damp rag and then dry it off.
Additionally, if the surfaces you are gluing are polished or very shiny, gluing them together as-is may not be that effective as the glue will have very little to bond to.
For surfaces of this type they will need to be roughed up first to provide a key for the glue to bond to. Use some 120 – 160 grit sandpaper and gently rub over the gluing area.
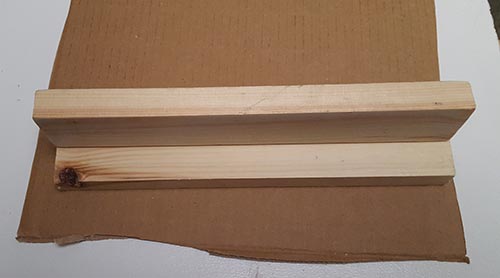
This is also the case if you are gluing timber, give it a quick rub over with some sandpaper before applying any glue.
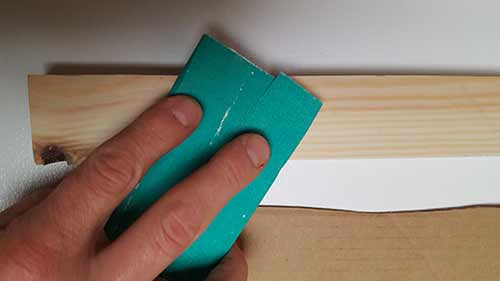
Sanding over timber surface to clean it up ready for glueing
Wipe off any dust or debris produced by the sanding and you should now be ready to go.
Step 4 – Start Gluing
With everything now prepared it’s time to apply some glue. Before applying the glue straight on to any surfaces it’s a good idea to do a test first.
With the nozzle hovering over your drip mat, gently squeeze the trigger until glue starts to flow. The flow should be smooth and consistent, if not, there may be an issue with your gun.
Test squeeze on drip mat to make sure gun is working correctly
Once you have confirmed all is well and the glue is flowing freely you can now apply some glue.
Lay your surfaces to be glued down flat on your work surface and position the nozzle of the gun at the start of your first surface.
Apply some gentle pressure to the trigger until the glue starts to flow freely, at which point move the gun along the length of the surface, easing the trigger off as you approach the end.
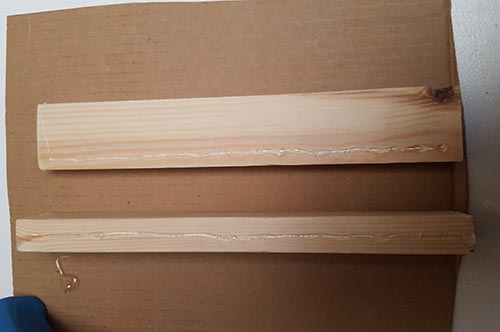
Glue applied to timber surfaces ready for sticking together
With the first surface coated, move on to the next, using the techniques above to apply the glue to the surface.
With the glue applied, position the surfaces together firmly making sure everything is lined up correctly.
If needed, you can also clamp the items together. This will prevent any movement and also ensure the surfaces are fully engaged with each other.
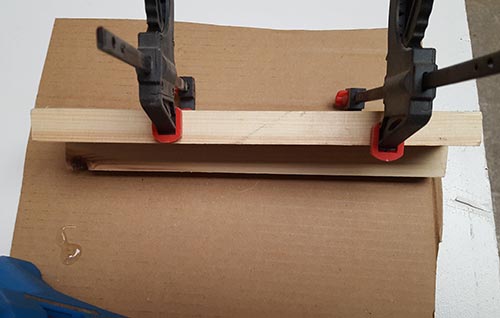
Timber surfaces pushed together and clamped until glue has dried
If there is any surplus glue then it’s best to leave this until it’s hardened off at which point you can scrape it off with a knife or scraper.
Note: The temperature of your surroundings will play a part in the speed that the glue starts to dry. As we were working through this demo in our workshop at the end of October it was cold, which in turn cooled the glue and allowed it to set quicker. In this case we only had about 10 seconds before it started to go hard!
With the above in mind, your initial test squeeze will give you a good idea of how fast the glue will set. Obviously don’t poke it with your finger as it’s hot, but poke the dollop it with a small stick every few seconds until it goes hard and this will tell you how much time you’ve got.s
Step 5 – Allow Everything to dry
In terms of drying time, you might be asking yourself; How long does it take hot glue to dry? In answer, allow at least 5 minutes before moving anything to ensure the glue has time to set.
Most glues should have set enough to allow you to move the object you’re working on, but if you can, allow 12 hours for the glue to really harden off.
Pieces of timber successfully joined together and left until glue has fully cured
Step 6 – Finishing up
Once you have finished applying any glue, pop your glue gun back on its stand ensuring it’s in an upright position over your drip mat to catch any escaping glue.
If you’re not going to be using it again or certainly for 30 minutes or so turn it off at the mains.
Glue gun propped back on stand and turned off at mains
Once the glue has set you’ve now successfully applied glue using a glue gun! Good job!
After use, on some occasions, excess glue can collect on and around the nozzle. In most cases when you next use it, the heating up process will melt this glue so it shouldn’t cause an issue, but if large amounts are present, wear some sturdy protective gloves and use a damp cloth to wipe the excess away.
Leave the glue gun for at least 40 minutes or so after you have turned it off to cool down and once cool, pack it away safely.
Further Tips and Advice on Using Hot Melt Glue Guns
If you have worked through the above steps, these should cover pretty much everything you need to know about how to use a glue gun to glue two items together, but just in case here follows a few quick tips and pointers on using, storing and maintaining them:
- When in use and cooling down, always ensurethe glue gun is resting on its stand, with the nozzle pointing downwards
- Before packing away always make sure the nozzle has cooled down
- Never rest a glue gun on its side or tilt it upwards to use it overhead. Hot melted glue can easily run back into the body of the gun and cause damage
- Before use, check the glue gun over to ensure there is no damage present
- When using a glue gun always wear old clothing, protective gloves, eye protection and a mask
- Never allow a glue gun to overheat to the point that glue starts to burn
- Always work in a clear, solid, level and well ventilated work area
- Never leave a glue gun unattended when it’s turned on
- Never try to remove a glue stick that been inserted into a glue gun. Once inserted and used and the gun has cooled, leave it in there for the next time its used
- Never touch the nozzle when it’s hot! The nozzle of some guns can reach temperatures of up to and over 350 degrees!
At DIY Doctor we always say you usually get what you pay for so we recommend that you consider what you want this tool to achieve and spend the appropriate amount of money on your glue gun.