Fitting worktop edge strip is a fairly straightforward job, but if you’ve never done it before or are new to the DIY world then it may seem fairly tricky.
Essentially fitting worktop edge strip involves applying a contact adhesive to the edge strip and work top, fitting it in place and clamping it until the adhesive dries. Once dried you can then trim off any addition trim and then file and sand for a perfect matching finish.
It’s important to fit any edge strips after the worktop has itself been fitted as this will avoid the possibility of any damage to the edge strip itself.
As with many things however it’s often not quite as simple as that! To find out all about how to fit worktop edge strip like a pro, read on below.
How to Fit Kitchen Worktop Edge Strip
If you have just purchased a kitchen work surface and want to know how to fit it correctly, see our project on how to mitre worktops here.
Pretty much all worktops are supplied with the correct edging strip to finish it (e.g. same colour and design) but if not you will have to purchase one. Most DIY stores sell edging strip in a variety of designs and styles and if you can’t find an exact match for your particular surface you will have to go with the closest match you can get.
Sealing worktop edges is an essential job due to the amount of water and moisture in a kitchen. If water is allowed to soak into the inner core then it won’t be long before it blows and starts to fall apart and will then need replacing.
As the worktop we’re finishing in this guide did not have the correct laminate edge strip supplied with it we’re going to use one of a similar style that’s supplied on a roll that we bought from a DIY store.
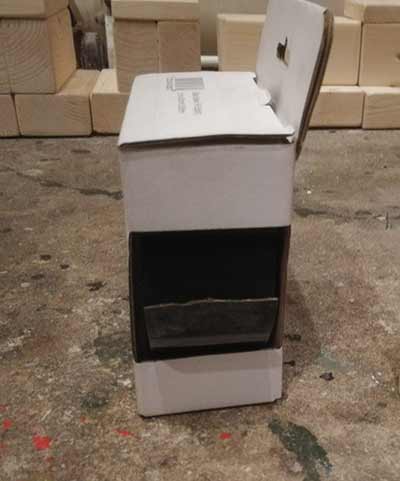
Laminate worktop edging strip supplied on a roll
Step 1 – Cut Edging Strip to Length and Square off
If your worktop has been supplied with its own edge strip then this should already be cut to the correct length and square so you can move on to step 3 below.
If you’ve bought your own edge strip, the first step is to measure the length of the worktop edge you want to cover. In most cases this will be somewhere around 600mm. Measure the edge from the back to the front and then add on 15-20mm.
This will give you a little overhang at the front and allow a little play in terms of getting a nice finish to the front edge.
Once cut you will need to ensure that the back edge is totally square. Using a carpenter’s square, position it about 5mm in from the edge and mark with a pencil. Use a sharp blade such as a utility knife to trim the back edge off and you will be left with a totally square edge to work with.
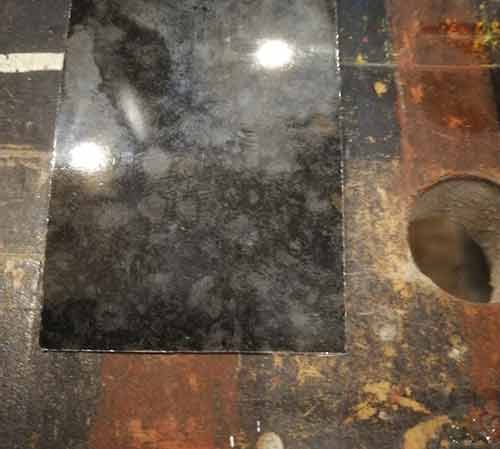
Square up back edge of worktop strip giving a dead-square edge to work with
Step 2 – Flatten Edging Strip out
If you’re working with laminate strip off of a roll, once you have cut and squared it off it’s a good idea to flatten it as much as possible.
Due to the time its spent coiled up on a roll, once cut it does have a tendency to roll itself back up again making it tricky to work with. The flatter you can get it, the easier it is to fix and get a good finish.
Lay the laminate strip out on a flat surface and pop some reasonably heavy items on top, but too heavy as to damage it. Some pieces of timber are ideal.
Ideally you will want to leave this for as long as you can, preferably over night.
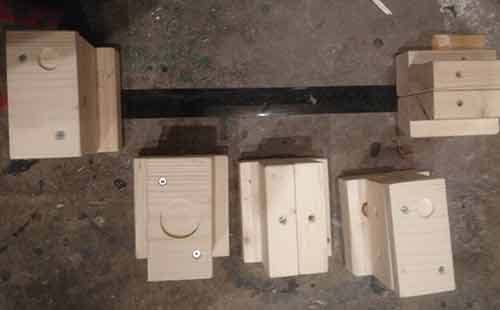
Use some pieces of timber to flatten the laminate strip as much as possible
Step 3 – Clean up Worktop Edge and Laminate Strip
Before applying any adhesive to either your laminate worktop strip or work surface edge you have to ensure that both surfaces are clean and free from dust or debris.
Wipe both surfaces over with a clean and lint-free cloth. Once totally clean, you’re ready to get some masking tape on and apply some adhesive.
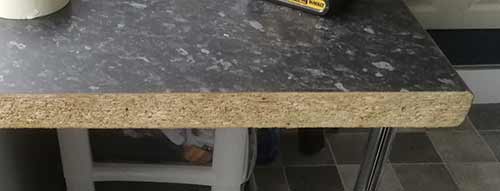
Clean any dust and debris off of your worktop edge and laminate strip
Step 4 – Mask up Worktop
Before applying any glue it’s a great idea to fix some masking tape to the top edge of the worktop. This will prevent any excess adhesive from damaged the finished laminate surface.
Run your tape right up to the edge as close as you can get it.
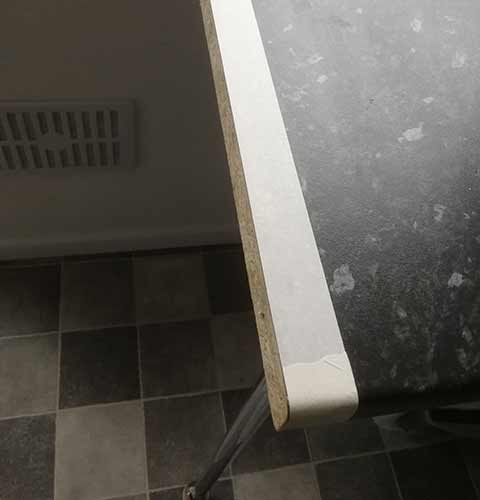
Add some masking tape to the edge of the worktop to prevent adhesive damage
Step 5 – Apply Adhesive
Now comes the messy part, getting some adhesive on to both the laminate strip and worktop edge.
When it comes to what’s the best worktop edge strip adhesive, the stuff to use is a decent contact adhesive such as Evo-stik, Everbuild Contact Adhesive, Soudal etc. In this example we’re using a specialist edge strip contact adhesive by Unika, but in all honesty any decent one will do.
Start by spreading the adhesive over the worktop edge and also over the rear side of the strip. Once covered use a small paint brush to spread the adhesive evenly over both surfaces ensuring that it runs right up to any edges.
When applying adhesive to the strip, ensure you have some newspaper or an old sheet or similar to rest it on.
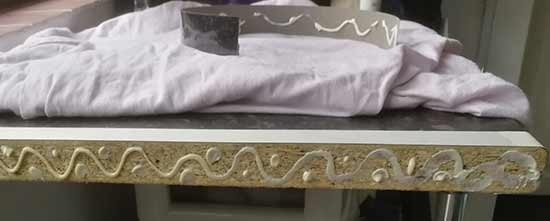
Apply a decent amount of adhesive to both the worktop edge and laminate strip
Pay particular attention to the front and top edges as these areas are going to get the most wear and tear so you need to be sure their bonded as well and possible.
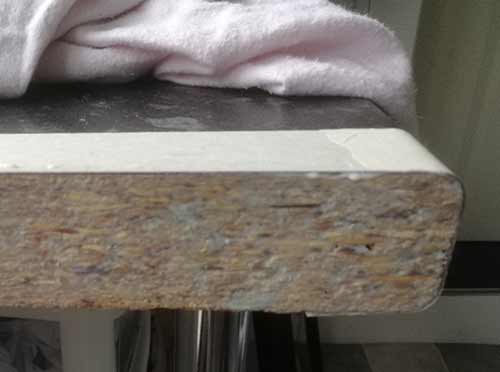
Evenly spread out the adhesive on the worktop edge using a small paint brush
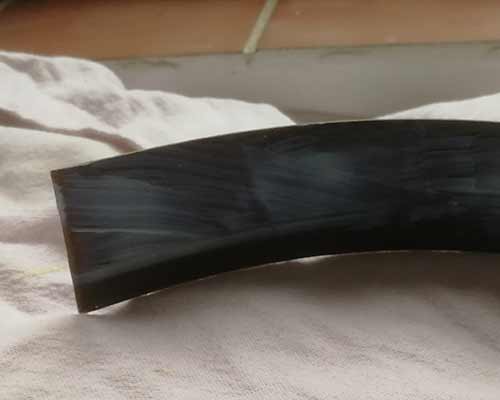
Evenly spread out the adhesive on the laminate strip using a small paint brush
With most contact adhesives, once applied you will then need to leave them until both surfaces are pretty much touch dry before fitting, but this may depend on the type of glue you’re using. Refer to your particular glue manufacturers instructions on the packaging.
Step 6 – Fix Worktop Strip in Place and Secure
Once both surfaces are touch dry (or in the state recommended by the manufacturer), take your strip and place it on the work surface edge. Ensure the back edge of the strip is butted right up to the back edge of the worktop itself.
Also, make sure that the top edge is totally flush with the top edge of the worktop.
Once correctly aligned, clamp the laminate worktop strip in place to allow the adhesive to fully cure.
To hold the strip fully in place and ensure it doesn’t move while you clamp it up you can use some masking tape (as in the image below). Pull the tape as tight as you can as this will also help to apply pressure and get a good bond between the two surfaces.
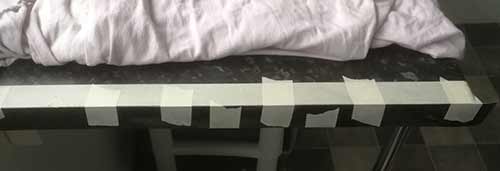
Apply some tape to the laminate worktop strip to hold it firmly in place
The best clamp to use for this is a 3-way clamp, but if you don’t have one a piece of timber and standard clamp can be used, just make sure you apply inward pressure to the clamp before clamping it up so that the clamp bar in turn applies pressure down onto the timber
Wrap the timber in newspaper or an old cloth before clamping to make sure that it does not damage the visible surface of the laminate strip.
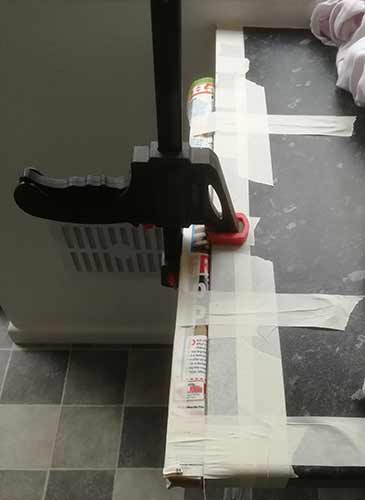
Clamp laminate worktop strip in place to allow adhesive to cure
Step 7 – Allow Adhesive to Cure
Depending on the adhesive you’re using will depend on how long it needs to be left to fully cure. Some contact adhesives cure in 6 hours while others need to be left for at least 12 hours.
Refer to your chosen adhesive manufacturers packaging for details of drying times.
As you want to get the best bond possible, we would recommend that you leave it clamped for at least 12 hours (or overnight). This way you can be sure the glue has fully cured.

Leave the worktop edging strip clamped up for as long as possible until the adhesive has fully cured
Step 8 – Trim up Excess Edge
Once the adhesive has fully cured you can now remove the clamp and all the tape, except the strip that’s running up the very edge of the work surface. This will be needed to protect the work surface from damage while your tidying up the rough edges (more on this below).
The next task is to trim off and tidy up the front edge and shape it so that it follows perfectly the contour of the work surface itself.
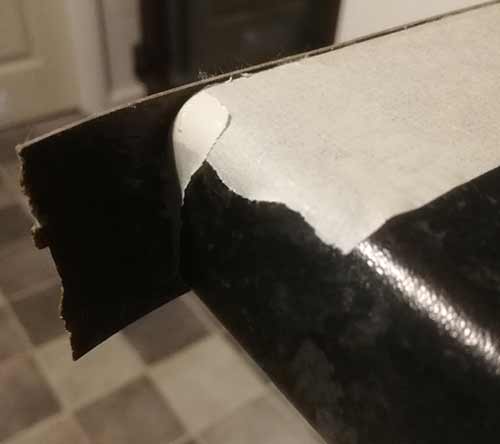
Front edge of laminate worktop strip that needs trimming up
Using a sharp pair of scissors, trim the excess away. Use short snips at the very back of the scissors. Laminate strip can easy crack and splinter when you’re cutting it causing damage so just be careful. You can also use a junior hacksaw if you have one but again, just take care and take your time.
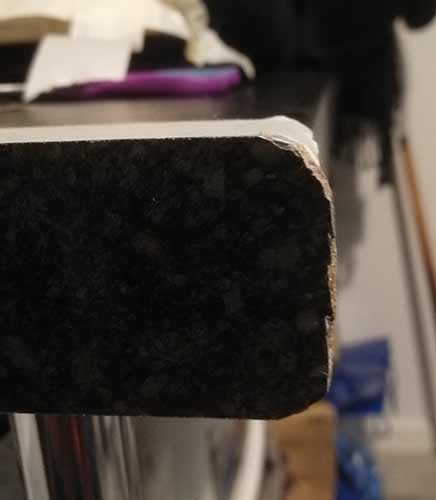
Trim off as much of the excess laminate worktop strip as possible
Step 9 – Finish off Rough Edge
Once you have trimmed off and shaped the front edge of the worktop strip as much as possible the final job is to smooth off any rough edges and shape to fit the contoured front edge of the work surface itself.
The best tool to use to trim up laminate edging strip is a specialist laminate trimmer, but as these are only usually found in a kitchen fitters tool kit, you can use a fine-tooth file and some fine grit sandpaper.
Starting with the file, run back towards the front edge, not away from it. Filing away can easily break the edge of the strip off causing chips and break-out.
Take your time and only run the file lightly over the surface, don’t apply too much pressure, let the file do the work.
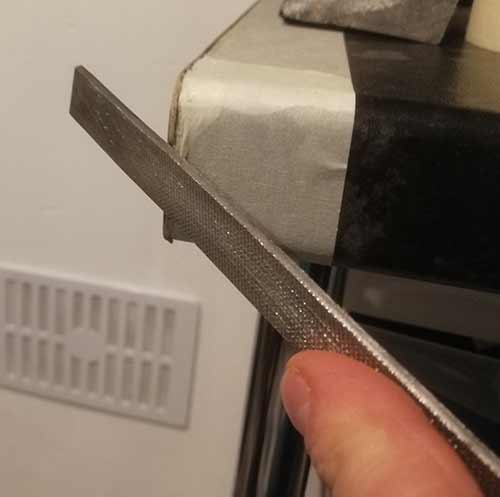
File laminate worktop strip to match worktop front edge contour
Once you have filed off as much as possible and you have pretty much matched the shape of the edge of the worktop you can do any final fine tuning using sandpaper.
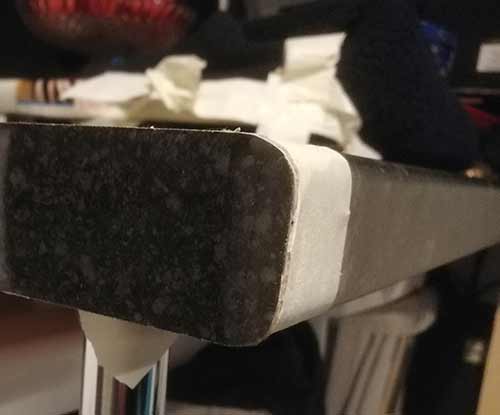
Front edge of laminate strip shaped and filed off to match worktop front edge
To get a totally smooth and perfect finish, use some fairly fine grit sandpaper such as 180 or 220 grit and lightly run this over the edge to smooth any remaining imperfections and get the laminate strip to perfectly match the shape of the worktop.
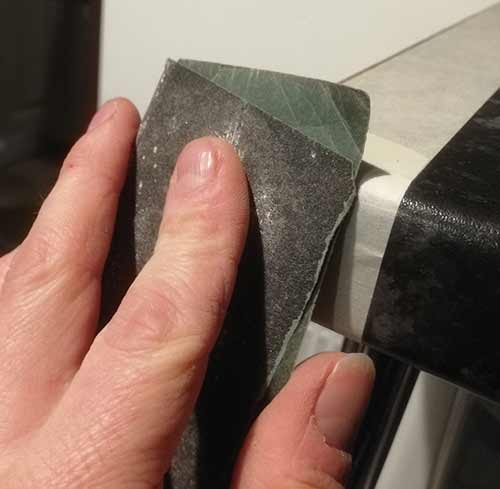
Use sandpaper to fine-tune the shape of your laminate worktop strip and get it to match perfectly
Once you have finished sanding you should now be left with a perfectly fitted and shaped laminate worktop strip covering what was athe bare open edge of your kitchen worktop. Good job!
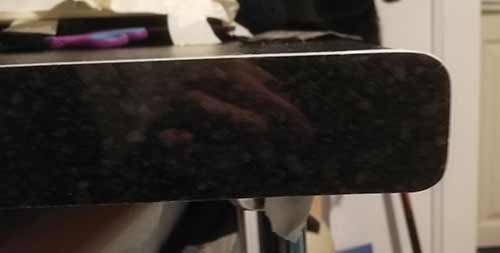
Worktop edging strip successfully fitted and shaped to worksurface
Repairing Imperfections and Damage to Worktops and Worktop Edges
Unfortunately accidents happen and this is no different when fitting worktop edging strips; a slight slip with the scissors or draw on the file in the wrong direction and a scratch or chip can easily happen.
Fortunately as incidents such as these are a regular occurrence, even for the pros, there are a fair few products on the market specifically for repairing damage to worktops and most if used correctly do a pretty good job.
One of the best laminate worktop repair pastes that we have used is ColourFill (there are others available).
Repair pastes such as these are essentially fillers that set hard over a given period, sealing the damaged area. Once set they are water proof so prevent any water ingress that can easily destroy the inner core of a worktop.
Worktop repair fillers can also be used to help fill and protect the joint between 2 worktops, helping disguise any joints making them seamless.
To use a laminate worktop repair paste you will first need to find the closest colour match to your particular worktop that you can. Most manufacturers offer a range of different colours.
Once you’ve found the correct colour, work through the following steps:
- Step 1: Fully clean the damaged area of any dust and grime using a suitable cleaner. Be careful not to get any fuid dwn into the damaged area
- Step 2: Apply the repair paste over the damage ensuring that it fully fills any depressions
- Step 3: Use the plastic filling knife (or plastic scraper if none supplied) and drag it over the filler ensuring the edge is flush with the surface and remove any excess filler plus at the same time, force filler down into the damage
- Step 4: Use the filling knife or spatula to then scrape off any excess from the surrounding area and then wipe off with a damp rag
- Step 5: Once fully cleaned up leave to cure for the manufacturers stated time but if you can, leave it for at least 24 hours
Once repaired, your worktop surface should now be as good as new!
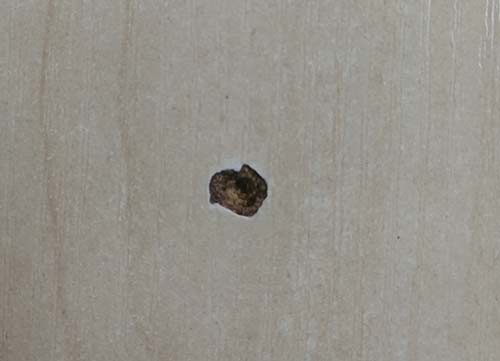
Impact damage to worktop that can be filled and repaired
Other Solutions for Finishing off a Worktop Edge
If after reading through the above you don’t fancy going down the laminate edge strip route, there is another option in the form of worktop metal edge strips.
Metal edge strips, or hob edge sealing strips as they are also known, as I’m sure you can imagine as essentially the same as laminate strips, only they’re made out of metal and as opposed to sticking them on you simply screw them on.
Due to this they are much less tricky to fit and as long as you have a hacksaw, file, drill/driver or at least a screwdriver, can be fitted by anyone.
To fit a metal edge strip to a worktop you simply measure the depth of your work surface, mark this on the edge strip at the rear and cut it off with a hacksaw, use a file to remove any burrs and then screw it in place through the screw holes on the side.
Although they do the job, they don’t look quite as professional as a nicely fitted laminate edge strip, but if you’re not too worried about it then that’s totally fine.
Although metal edge strips can be fitted at the ends of laminate work surfaces their primary job (as you may guess form their alternate name; hob edge strips) is to cover the end of a worktop where it butts up to a hob, oven or other heat source.
Laminate strips can easily melt potentially causing fires but metals strips resist the heat, protecting both the inner core of the worktop and it’s laminate coating.
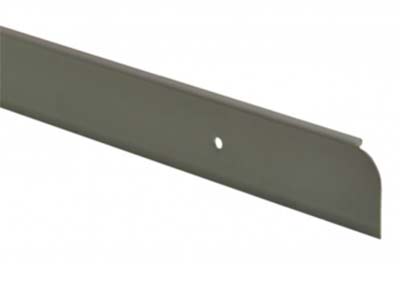
Metal worktop edging strip or hob edge strip

