Fitting a wood burning stove or fire carries no stipulation that the work cannot be carried out by a DIY enthusiast. All work however does have to comply with part J of the building regulations. These regulations can be seen in our projects section. Such work shouldn’t be carried out without a building notice having been applied for through a local authority building control office or such work signed off and certificated by a ″competent person″.
If this work is not carried out by a competant person (E.G a HETAS installer) it must be inspected by someone from your local councils Building Control Department. Solid fuel produces carbon monoxide.
This gas, if unchecked is deadly!
A wood burning stove should be fitted at the same time, or soon after a flue liner has been installed if one is required. To see how to install a flexible flue liner to an existing chimney, see our flue liner project.
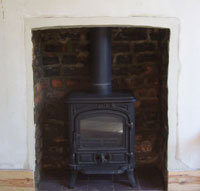
Finished and installed woodburner
Talk to your supplier about the type of wood burner you need and about the flue liner you need to serve it. The efficiency of the fire will depend on putting the right wood burner into the right opening and using the correct flue. If they do not all match up you could be wasting a great deal of energy.
Wood burning stoves and fires are, in themselves, fairly simple. The wood, or solid fuel is fed into the chamber, set light to, and the smoke and exhaust fumes escape up a flue to outside air. It is however, absolutely vital, that during this process no heat escapes through any gaps or cracks.
Wood burners and other solid fuel fires, including open coal fires, created an immense amount of heat. If this heat is allowed to escape before it gets to open air it can very easily cause a fire and it is imperative you have any existing flue checked by a qualified engineer before attempting to fit a wood burning stove or fire.
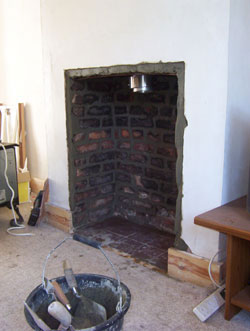
Fireplace opening
The first job after having the flue checked is to have your chimney swept. You will most certainly regret it if you do not. This project is about connecting a wood burning fire to a flexible flue and the first thing we did after opening up the old fireplace and checking the flue was to chop out and repoint the brickwork in the fireplace with a lime mortar. The proper mortar mix can be found here.
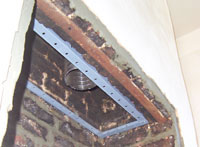
Frame built for register plate
The surround to the fireplace was rendered temporarily and will have a fire surround fitted later. See our project on inserting new fires to see some wonderful fire surrounds. The hearth to the fireplace was also added later and the size and construction of the hearth is also stipulated in the Building Regulations (J) document
You can just see, at the top of the fireplace, the new flexible flue hanging down. Our first job, while the fireplace was empty, was to install a steel frame to hold what is called a register plate. The register plate stops loose objects falling from inside the stack into the fireplace and also keeps the flue insulation in place.
It should be made of a non flammable material and it fits round the wood burner flue pipe while also blocking off the opening to the stack completely. Proprietary steel register plates can be bought from the fire supplier and they will measure the fireplace opening and position of the flue for you. You will still need to install a frame or some other means of holding it in place.
We use fibre cement for our register plates because it is easy to cut, very light and easy to position.
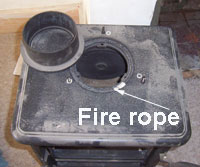
Fitting top flue outlet to wood burner

Adapter and liner
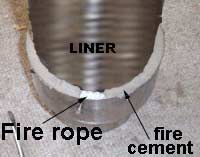
Adapter and flue liner
Next the flue outlet is fitted to the top of the wood burner. To stop heat escaping from any gaps the flue outlet bracket sits in a slight recess at the top of the wood burner and a length of fire rope is placed in between the two.
As the flue outlet is tightened down onto the top of the wood burner, the fire rope is squashed into place. Fire rope is also used as the seal between the wood burners door and the frame it butts up to. This is in place when you purchase the woodburner.
Having measured the distance from the top of the fire (inside the flue outlet) to a point 100 mm above the top of your new register plate frame, you can cut off the surplus flue liner and cut the wood burner flue pipe to length.
If you use a steel register plate it is as well (if it will not cause an eyesore) to keep the joint between flue pipe and flue liner, below the register plate. Our fibre register plates can be lifted easily and the joint inspected.
A special collar, or adapter is used to join the top of the flue pipe to the bottom of the flexible flue. Sit the flexible liner into the collar so it is located centrally. Tighten the self tapping screws round the collar to hold the liner in position and to secure the collar to the liner.
Another length of fire rope is inserted into the collar and fitted around the circumference of the flue pipe. Fire cement is now rammed into the collar so there are no air voids. The joint is then smoothed off and left for a while. Fire cement goes hard when exposed to heat. Many installers use fire mastic for this joint.
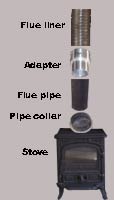
Complete unit of wood burner and flue system

Flue adapter with pipe
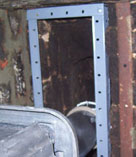
Flue pipe in position
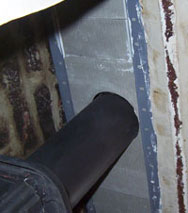
Register plate installed and sealed in
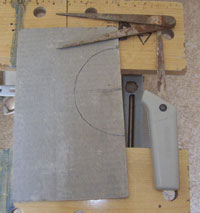
Cutting fibre cement to size and shape
The register plate can now be fitted into the frame. The offcut of the flue pipe can be used as a template and a line drawn round it. This circle can be cut out with a jigsaw, pad saw or coping saw.
This is done for the two parts of the plate surrounding the flue pipe and straight lengths are fitted to fill any gaps. Fibre cement can be bought at builders merchants and it is most often used in strips of 100 or 150mm wide as a tile undercloak to roof verges.
Seal the joints and gaps of the register plate with some fire mastic and you are now ready to get up onto the roof (Please heed the safety warning shown on our flue lining page) and slide the closing plate off, or to one side, while you fill the void between flue liner and chimney with Vermiculite insulation.
As you tip the insulation into the stack, tap and shake the flexible flue liner a little to make sure the vermiculite travels all the way to the bottom of the stack. This will make sure your flue stays efficient by reducing condensation and keeping its heat.
Finally, place a chimney pot over the remainder (maximum 150mm) of flexible flue liner and haunch it in place with sand and cement. You can see which mix of mortar to use by clicking here. Lift the register plate to check the adapter joint periodically.

