Many DIY enthusiasts wonder: “Can I install a Central Vacuum System (CVS) myself?” While it’s true that with determination, anything is possible, retrofitting a CVS can be quite challenging. Installing one in a new build is simpler.
So, yes, you can do it yourself, but it’s particularly challenging for retrofitting. We’ll explain how to retrofit one below, but first, let’s address common questions like “What are Central Vacuum Systems, and why would I want to install one?”
Understanding Central Vacuum Systems (CVS)
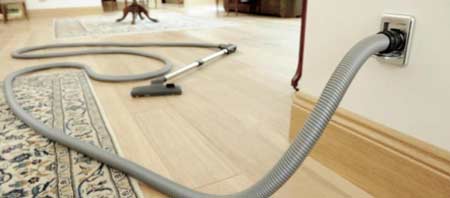
A Central Vacuum System (CVS) is a built-in vacuum unit installed permanently in a house. It allows vacuum cleaning by connecting a hose and attachments to fixed inlets positioned throughout the house, negating the need to move around your home carrying awkward vacuum cleaners and trailing cables.
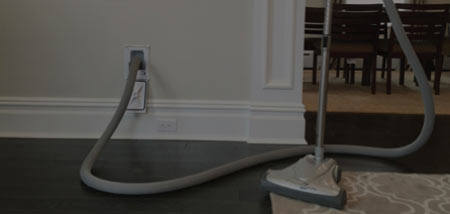
A Central Vacuum System (CVS) inlet and hose attachment – Image courtesy of duravac
While they are popular in Canada, where approximately 25% of houses have them, they are less common in the USA and the UK, with only about 1% of homes in the USA having them.
A CVS is integrated into the house with ducting built into the structure, which carries the dust and dirt to a storage canister that’s then periodically emptied when full. It consists of three main components:
- The power unit: This large unit, approximately one meter (three feet) high, contains a motor and a collection chamber or canister for dust and debris. It creates suction and collects debris.
- The hose and attachments: This part of the system is responsible for cleaning. The hose is typically around 10 meters (30 feet) long but can reach up to 15 meters to cover every part of the house.
- Inlet valves and ducting: Inlet valves are where the hose and cleaning attachments connect. Ducting connects the inlet valves to the power unit through plastic pipes behind walls, under floors, or in cupboards, carrying the debris to the canister.
There are various options for each component. The power unit’s size should match the house’s size to ensure sufficient suction power for the length of ducting and hose needed to reach all areas. Manufacturers can advise on the appropriate unit size.
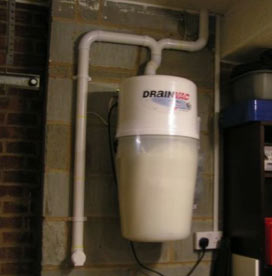
A Central Vacuum System power unit on a garage wall – Image courtesy of Vacpoint Ltd
Installing ducting can be challenging and is arguably teh most tricky part of the install, while hoses and attachments are less critical as they are removable. CVSs offer various inlet types, providing versatility and innovation. We’ll explore some of these at the project’s end to inspire ideas for your CVS.
Central Vacuum System: Advantages and Drawbacks
Wondering why people opt for a central vacuum system? Here are the main benefits:
- Enhanced cleaning: CVS units typically offer 3-5 times more suction power than standard vacuum cleaners.
- Allergy-friendly: They expel dirt, dust, and air outside, reducing allergens, unlike traditional vacuums that filter and recirculate air.
- Quiet operation: The power unit, which generates noise, is located in another room, minimising disturbance during cleaning.
- User-friendly: No need to lug around a heavy vacuum and trailing cables; only the hose and attachment are required.
- Value addition: Homes with a CVS supposedly sell better and faster, potentially boosting property value.
- Durability: CVS units are reputed to last longer than portable vacuums, with replaceable parts available when needed.

Using a central vacuum system – Image courtesy of Homecare Systems
However, there are some considerations that might deter you from installing a CVS:
- Installation: While DIY is encouraged, installing a CVS can be challenging to say the least.
- Cost: CVS units are typically pricier than portable vacuums, with installation costs adding to the expense.
- Blockages: Though rare, blockages in pipes within walls or under floors can be difficult to clear.
- Lost items: Strong suction power may accidentally suck up unwanted items, though they can usually be retrieved from the canister.
Planning Your Central Vacuum System:
Considering a Central Vacuum System? Opt for professional assistance or DIY installation with manufacturer-provided guides. It’s your call at the end of the day and if you’re a keen DIY’er you may relish the challenge, however if you’re not then it may be best to opt for professional assistance.
For easier installation, new builds or extensions provide better installation access, so bear this in mind if you are planning either. In existing properties, plan outlet positions for optimal coverage of all of your rooms.
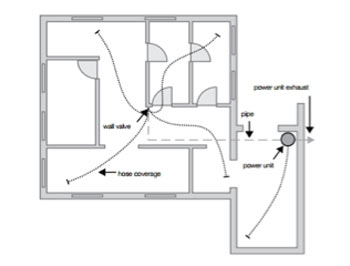
Strategically place your CVS inlets – Image courtesy of www.myvacuumplace.com
Utilise internal walls for simpler installation. Consider legal requirements for socket height, especially for disability access.
Factor in ducting length for appropriate vacuum power. Plan your route carefully, avoiding structural elements and existing utilities.
Original property plans can aid in planning extractor pipe runs. For inaccessible walls, consider boxing in any ducting and pipework.
Boxing in, while less disruptive, may affect aesthetics. Plan accordingly for minimal impact.
Installing or Retrofitting a Central Vacuum System
For existing buildings, installing a CVS involves exposing timber studs, lifting floorboards, and possibly removing floor tiles and cutting into ceilings.
If DIYing, you will also learn how to cut chases and electrical boxes into solid walls and reinstate these areas.
In new builds, installation is simpler as ducting can be laid during the first fix and inlets/power units fitted during the second fix, when everything is much more accessible.
Test the system before finishing to avoid later disruptions for fault detection or loose connections.
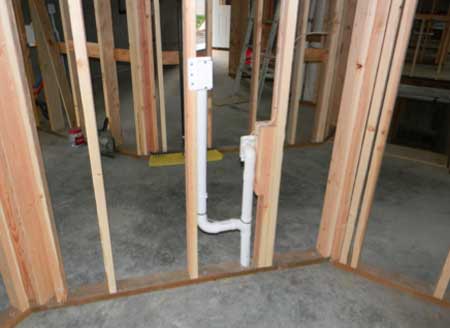
Installing a Central Vacuum System in a new build – Image courtesy of Smart Solutions Inc
Step 1: Installing the CVS Power Unit
Position the extractor power unit in a garage, cellar, or sound-proofed room to minimise noise pollution. Avoid hot and dusty locations like the attic.
Mount the unit on an external wall for easier exhaust pipe installation and ensure good ventilation.
Use the provided mounting bracket to securely attach the power unit to the wall.
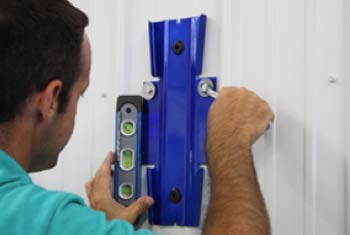
Installing a mounting bracket for a CVS power unit – Image courtesy of Vacumaid
Step 2: Installing the Exhaust
Attach the exhaust to release air sucked out by the power unit, usually equipped with a silencer to reduce noise.
Direct the exhaust outside, potentially requiring drilling an opening. Follow guidelines for using a core drill here.
Position the unit close to the exit point for efficient airflow. Seal with a well-caulked flap vent to prevent weather intrusion.
Installing a flap vent on the exhaust outlet
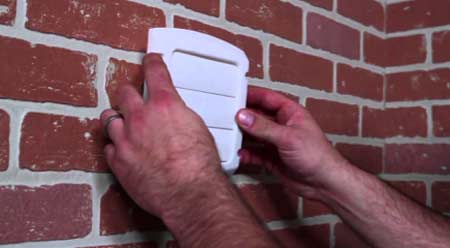
Step 3: Installing the First Inlet Valve:
Begin installation from the farthest usable vacuum socket from the extractor unit, then work backward. Minimise 90° bends to maintain maximum airflow and prevent blockages.
Use 42mm diameter pipe or flexible hose with various connectors like 90°, 60°, Y connectors, and pan outlets for kitchen kick-boards.
Work in small sections, dry-fitting first, then glue each section in place. Repeat until the system is fully installed.
Step 4: Install Remaining Inlet Valves and Pipe Work
Routing your remaining pipes may require various additional skills depending on your home’s construction. Here are some additional guides to help you:
- Lifting floorboards
- Building and rebuilding stud walls
- Cutting chases and electrical boxes into walls
- Boxing in and hiding pipes
Rebuilding these areas should follow the same principles as the original construction.
Each wall inlet connects to a low voltage power cable circuit running back to the vacuum unit. Inserting a pipe connector triggers the unit to turn on, eliminating the need for manual activation.
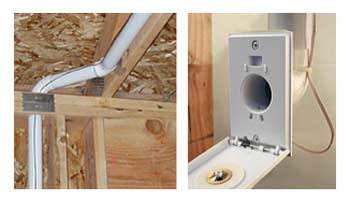
CVS inlet and ducting with low voltage cable back to power unit – Image courtesy of Cape Cod Vacuum
While self-installation is possible with good planning and DIY skills, it’s important to note the expenses and challenges involved, including creating space for outlets and ducting and reinstating disrupted areas of the home.
Ensure you possess the necessary skills before starting the project.
Options for Central Vacuum System Inlets
Common inlet types allow easy hose connection for cleaning.
A typical inlet valve for a central vacuum system – Image courtesy of The Road to Domsecication
Kitchens and stud wall skirtings may feature “toe-kick dustpans” for effortless dirt removal, often included in full system kits.
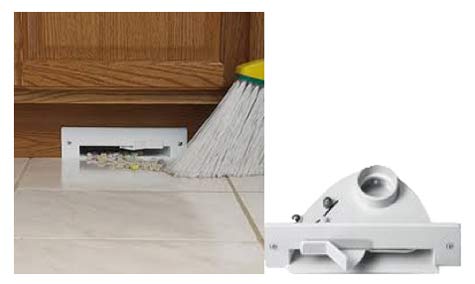
Kitchen unit kick board dustpan for a central vacuum system
Flush floor and wall plug-in extractor sockets with spring-loaded lids offer convenient usage.
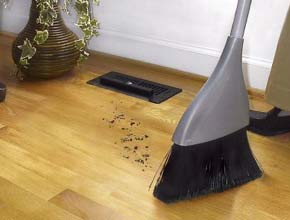
Floor-mounted vacuum inlet
Clever vacuum drawers enable easy waste removal from work surfaces.
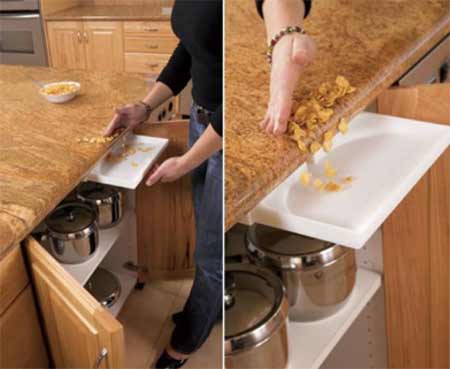
DrawerVac CVS inlet valve – Image courtesy of DrawerVac
A Central Vacuum System (CVS) offers powerful, allergy-friendly cleaning for homes. While installation, especially retroactively, can be challenging, our DIY Doctor projects provide guidance for success. With patience and careful planning, it’s more than possible to install a central vacuum system yourself.