Installing an Acrylic Splashback (also refered to as Perspex) is an effective and easy way to improve or update the look of your kitchen or bathroom without too much work. Unlike glass splashbacks (as seen in our project here), acrylic tends to be easier to work with as it is much lighter, more flexible and also much more forgiving if dropped!
Types of Acrylic Splashback
Similar to glass, acrylic sheets come in a vast array of styles, thicknesses, colours and finishes. We would recommend a minimum thickeness of 6mm for use as a splashback.
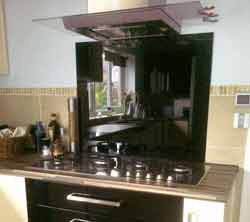
Acrylic splashback fitted behind cooker in kitchen
As you might imagine, acrylic splashbacks are available in many of the same styles of finish as glass such as frosted, gloss, matt, printed, patterned, stone effect etc…. and through the use of cleverly positioned lights, your chosen finish can really be accentuated to make a great feature.
If you are really feeling creative, you can even mix and match different finishes!
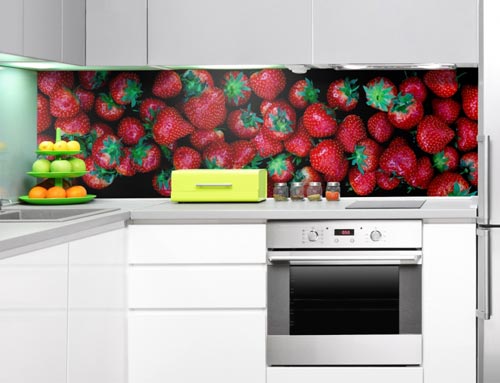
Printed acrylic splashback above kitchen units – Image courtesy of wowacrylic.co.uk
Benefits of an Acrylic Splashback
Splashbacks are extremely versatile, easy to clean and hygenic which makes them ideal for pretty much any area of a kitchen or bathroom e.g. behind sink areas and basins, food preparation areas and they can even be used in and around shower cubicles.
In terms of positioning, one point to note is that if you want to add an acrylic splashback behind a cooker you will first need to check with the manufacturer to confirm that this is safe to do so. When plastic, perspex and acrylic get hot they melt so you will need to make sure that the material you choose will resist any high temperatures.
In most situations, acrylic splashbacks can also be purchased in large sheets and due to this can be used to cover larger areas with no visible joins, again, not only helping to maintain hygiene levels, but also to create a great visual look.
As mentioned at the top of this page, one of the big advantages of acrylic is that it is light so installing large sheets in one go or smaller sections in tricky and tight spaces is much easier compared to the equivilent glass splashback.
Additionally, unlike glass, acrylic and perspex are quite easy to shape in that small adjustments can be made using a file or piece of sandpaper if you find that cuts made for sockets etc…. are a little tight. Without the required expert knowledge and experience, trying to do this with glass would almost certainly end in disaster.
In respect to the above, when dealing with glass, the normal process is that a representative from the manufacturer will come out to your home, measure out the area and all the cuts that you want the splashback to fit to and on their return to the factory, your splashback would be produced according to the measurements taken. As mentioned previously, due to the very specialist cutting process involved, this is really the only way to ensure a great finish with this type of splashback.
Many suppliers of acrylic splashbacks will also offer this similar service, but unlike glass, cutting acrylic is a little easier and as long as you take your time and practice first, there is no reason why you cannot buy a large sheet and make your own cuts.
However, there are advantages and disadvantages to both of the above that you should be aware of:
Advantages
- If measured by the manufacturer, all measurements should be taken accurately by someone with the experience necessary to ensure they are correct
- If any mistakes are made then they are up to the manufacturer to rectify
- All cuts and fixing holes are ready to go
- The splashback is delivered ready to fit rightaway
Disadvantages
- Any mistakes you make when cutting are your fault
- Inaccurate cuts can require adjustments and "fine tuning" which can lead to un-true lines and the increased risk of damage
Preparing the Walls Surface
When dealing with glass, ideally, the wall that the splashback is to be installed on needs to be totally flat as any undulations can cause stress points and ultimately breakages.
As acrylic is a little more flexible you can get away with the wall not being totally flat, but ideally, you really need to get it as flat and clear as possible.
Check the Surface of the Wall
The first job is to remove any wallpaper, flakey paint, tiles, adhesive etc…. and then fill any holes or damge using a suitable filler.
You can check the level of your wall using a spirit level. Place the level both horizontally and vertically over several random places on the wall and look along the level to check for gaps. Once identified, fill these gaps and then sand back flat.
Depending on the condition this may take a while but it is worth it as it will be reflected in the finished job
If you find that there are extreme dips over large sections of the surface (more than 6mm in depth) it is propably worth considering getting the entire surface re-plastered (more information can be found in our plastering projects section).
Clean and Seal the Wall
Now the wall is clear you will need to wipe it down with a suitable cleaner such as Sugar Soap as this will remove any remaining dust and grease.
If you did get the wall replastered or you are fixing directly on to plasterboard then you will need to seal the surface first. Due to the porous nature of plasterboard and plaster, when you apply the acrylic bonding to the wall, the plaster or plasterboard will suck all the moisture out of the bonding before it goes off and it will not set correctly.
A watered down PVA or SBR solution should do the job. Once brushed on to the wall and dry, this will seal the wall and also provide a good "key" for bonding adhesive.
Seal up the Worktop
The final job is to seal the back of the worktop to the wall. Using a suitable silicone sealer, seal along the rear of the worktop where it meets the wall.
This will ensure that no moisture is allowed to penetrate and run down the back of the worktop and units, causing future damp issues.
Fitting an Acrylic Splashback
Measuring up for an Acrylic Splashback
The first task is to settle on where the splashback is going to go and what area of the walls surface it is going to cover.
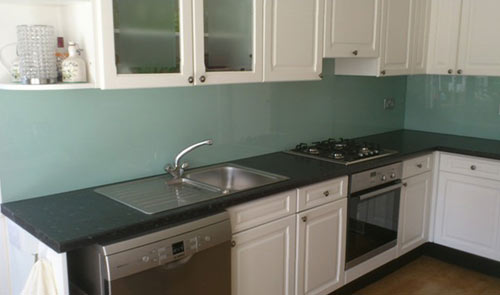
Acrylic splashback positioned between worktop and kitchen wall units – Image courtesy of theconstructioncentre.co.uk
The best way forward when measuring is to draw out a plan on a piece of paper of the area that is going to be covered and also include any obsticles that will require cuts e.g. wall units, cooker isolators, sockets etc…. With this plan you can then mark all you measurements down so that you know exactly what cuts need making and where.
In most cases you will be fitting your splasback to a surface between your worktop area and possibly cupboards above. In this case it is wise to leave around 1mm top and bottom so that there is room for a little movement. These gaps can then later be filled with sealant as you will want to prevent any moisture from seeping under and down the back of the worktop and also any moisture from running down walls and behind the splashback from the top.
Measure the total width and height of acrylic needed and then mark it on your plan (remember to leave 1mm or so top and bottom). Where it needs to cut in round any cupboards or other items, measure this also, again leaving a slight gap for movement.
When it comes to sockets, switched etc…. you have two choices:
- Cut around: A gap of 3 – 5mm is left around the cut so that the socket faceplate sits inside it. Sealant is then applied around the inside of the gap to seal the socket faceplate and the edge of the acrylic
- Cut behind: The electircal supply to the socket is cut and the socket isolated. The faceplate is then unscrewed and removed to reveal the back box. You then measure the size of the back box and make your cut about 1mm larger (for movement). As the back box is slightly smaller than the faceplate, once fixed to the wall, the faceplate is then screwed over the top of the splashback, disguising any cuts. One the whole, this looks much tidier and more professional
With all your measurements made your plan should look something like the below image:
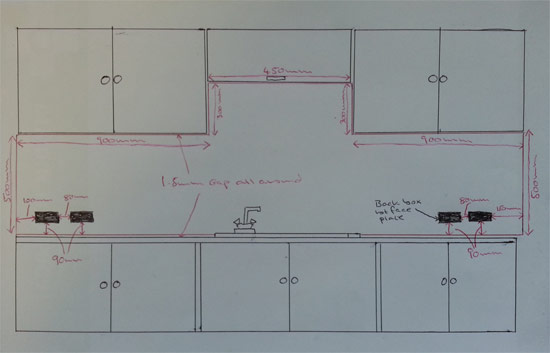
Cutting and measurement plan for an acrylic splashback
Cutting Acyrlic for your Splashback
As stated above, as long and you take your time, cutting your own acrylic splashback can be a relatively straight-forward and rewarding DIY job. As long as you use the correct tools for the job e.g. saws, drill bits etc…. that do not create too many vibrations and you take your time when cutting, then you should be fine.
In respect to the right tools to use, you should stick with the following:
- Drills: You should only use drill bits made specifically for drilling acrylic. This are normally pre-ground twist bits. When drilling, make sure that you don’t push the bit through the acrylic as it can burst through the bottom and cause sections to splinter off. Support the drill hole with a piece of timber and drill down into this to help stop any damage of this kind
- Saws: Again, there are many specialist blades made for this job, so please make sure you use one of these. You can cut with a hand saw if you wish but using a jig saw set on the fastest cutting speed will produce the cleanest, most uniform cut. Never force the blade through the material as it can overheat and cause the cut edge to melt. Also make sure that vibrations are kept to a minimum as these can cause cracks and splits. Laying the acrylic on top of cardbaord while you cut it can help with this
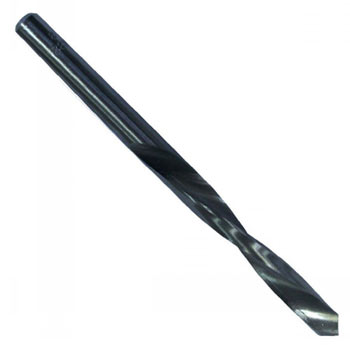
Specialist drill bit for acrylics and plastics
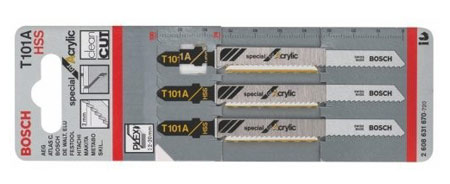
Specialist jogsaw blades used for cutting acrylics and plastics
If the thickness of your material is over ¼ of an inch then you should also lubricate while drilling and sawing using water as you go. This will help to ensure that it does not overheat and melt.
When cutting long straight lines with a jigsaw, it is a good idea to clamp a piece of batten along the line that you are cutting so that the base-plate of the jigsaw can follow it, ensuring that the cut is traight.
When you purchased or took delivery of your nice shinny piece of acrylic, it should have been provided with masking film covering the large flat surfaces. It is vitally important that you leave this on until the very last minute. The film will help protect the surface until it is ready to be secured to the wall, especially when you are drilling and cutting!
If you would like more information and advice on cutting, drilling and even gluing acrylic then see our project here.
With all of the above in mind, find a nice clear, flat area that you can cut your acrylic in. As stated, make sure that you take your time, measure twice and cut once, don’t let the acrylic overhead when cutting and reduce any and all vibrations as much as possible.
When cutting out areas for sockets etc…. the best way is to mark out the exact area that needs cutting on the acrylic and then use a jigsaw to cut the area out. In order to get the blade in and down to start cutting you can drill some large holes in each corner and then cut along the line from hole-to-hole until all cuts are made.
When drilling the holes for the above, make sure that you drill them on the inside of (e.g. the section that you are cutting out) and make sure that they do not spill out into the area you want to use and are as close to the outline of the area you want to cut out as possible!
Again, take your time doing this and ensure that your cuts are straight!
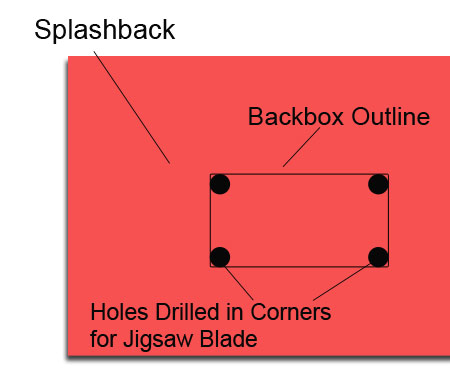
Holes drilled in corners of backbox section for jigsaw blade
If you follow your cutting plan (presuming that it is correct) then the end result should be a perfect piece of acrylic, ready to fit!
Before progressing onwards, find a second pair of hands to help you position your splashback in place to make sure that it does indeed fit. If not, you can use a suitable small file to make some fine adjustments.
Smoothing and Preparing cut Edges
If you have made any cuts you might now notice that the cut edges are a little rough so we will need to now sort these out.
There are several ways that this can be done:
- Filing using the flat edge of any suitable, small, half round file
- Using several different grades of wet and dry sandpaper
If using a file, lay the flat edge on the top of the cut edge of the sheet at around a 45° angle and gently pull it backwards and forwards along the length of the sheet. Do not dwell too long in one place or you can create depressions which will spoil the visual look.
Additionally, it is important that you also hold the file as flat to the edge as possible as if you file at an angle, especially where two pieces are joined together, this will widen the joint and again, spoil the visual appearance.
The filing itself will remove the majority of the major burrs but it is also best to use some wet and dry paper to give it the final finish.
When using wet and dry paper, this will need to be done in several stages using several different grades of paper:
- First Pass: Using around a 100 – 120 grit paper, get a small bowl and fill with clean water. Dip the paper in the water and get it nice and wet. Wrap the paper around a small, fflat piece of wood (to use as a rubbing block) and the proceed to rub the paper along the cut edge, keeping the block and paper flat to the edge of the scrylic. Again, do not apply much pressure and stop occationally to clean the plastic shavings off the paper and also to wet the paper. Continue for several passes, up and down the full length of the edge
- Second Pass: Swap the previous paper for something a little finer now, around 400 grit should be fine. Get the paper wet and then wrap around the block and repeat the above passes over the edge, stopping to clean the paper and re-wet periodically
- Final Pass: This time we will be using a very fine paper. Something around 600 – 1000+ grit should be just right. Repeat the previous steps, checking the edge between passes to check progress. Once the edge is pretty much back to its smooth, shinny state you should be done. Again, check your passes regularly as you don’t want to go too far and cause more damage
Once you have got your cuts as smooth as possible using the wet and dry paper you can finish off with a special acrylic polish. This will give it its final "shine". In most cases, T-Cut is ideal for the final polish-up but before you get stuck in please test on an off-cut just to make sure no damage is caused.
Dab a small amount of the T-Cut on an old cloth and using your finger, rub it along the edge. Using a clean cloth, rub off misty residue to reveal your perfectly smooth and shinny edge.
Fixing the Splashback In-Place
With all the prep work done, you are now ready for the final fix. Before you do actually fix the splashback in place, its a good idea to perform a few dry runs to make sure it fits and that you know exactly what to do. It’s also a good idea at this point to get some one to help you with this delicate job.
make sure that the electrical supply to all sockets etc…. on the wall you are fixing to are isolated and that you have removed all socket faceplates and other items that may be in the way.
Before applying any bonding to the rear of the splashback, clean the entire area with an "Isopropyl Alcohol" to remove all traces of dust and grease. Once done you can start applying the bonding adhesive.
Along side the bonding adhesive you should also use either double sided mirror tape or specialist splashback fixing tape. This should be applied around the edges and also vertically and evenly throughout the splashback. You will also need to make sure that non of the bonding adhesive gets on teh tape as this will affect its ability to adhere to the walls surface.
Apply the bonding adhesive in horizontal lines along the length of the splashback, spacing them evenly apart, but ensuring they are no more than 300mm apart. One important thing to note is not too put any beads of bonding too close to the edges as when it spreads, it will seep out if too close.
If you are using edging caps these will also need to be positioned onto the splashback before it is fitted. Bonding can be applied to the inside of the "U" section of the edge cap to secure it in place. Additionally, tape can also be applied to the cap to secure it to the wall.
Aluminium edging cap for splashbacks
When ready to go, position the base of the splashback exacty where it needs to be in terms of position but hold the rest of of the wall for the moment at about a 45° angle. With an extra pair of hands to help, starting at the bottom, push the sheet into the wall, working upwards as you.
A piece of batten comes in really hand at this stage as you can use it to run over the surface and apply pressure to ensure the entire area is firmly against the wall. Make sure the timber does not dig in or scag the surface and damage it as you do this.
Check on the packaging for the manufacturers drying time for the bonding, you may have to stand there for a bit applying pressure, just until the bonding has cured enough to hold the splashback in place enough so that it neither falls off the wall or creeps off causing gaps down behind it.
At this point you can also screw the socket faceplates back on as these will help with holding things in place.
If you have adjacent walls and some spare timber around, it might be a good idea to knock up some bracing to keep some pressure on the splashback until the bonding has totally cured. Again, do not apply too much pressure and this could cause damage. Total curing time should be around 24 hours.
Once cured and totally stuck, remove any bracing you have and then you can finally remove the protective film to reveal your amazing acrylic splashback in all its glory!
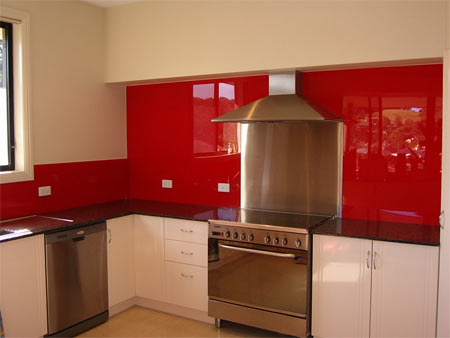
Completed acrylic splashback installation – Image courtesy of ozziesplash.com.au
What to put Behind Cookers and Stoves?
As mentioned previously in this project, unless the manufacturer states that the acrylic you are using is safe to use behind a cooker or stove, it’s probably not worth putting it behind your cooker rings as over time, the heat will damage it and cause it melt or even catch fire!
This begs the question – "What is safe to use?". In answer to this question, stainless steel is the best way to go. You can purchase sheets of stainless steel to form your own stainless steel splashback from DIY stores, kitchen suppliers and many other locations in the UK, even from eBay. In most cases you can supply your measurements and it will be cut to size for you, ready to fit on delivery.
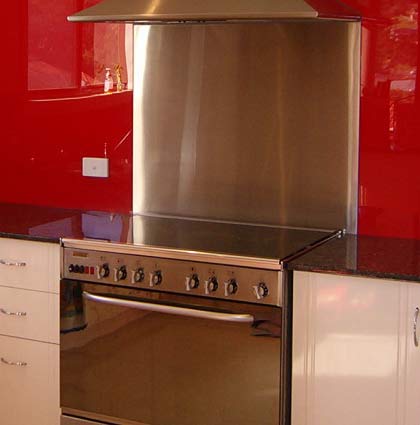
Stainless steel splashback
In terms of fitting, it can be stuck to the wall using a suitable construction adhesive or you can also screw it to the wall using specialist mirror fixing screws that are chrome plated so will blend in nicely with the overall look.
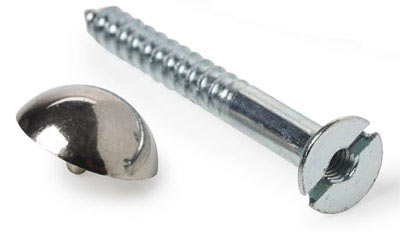
Mirror fixing screws can also be used for fixing glass splashbacks and stainless steel splashbacks
Creating Joins Between two Pieces of Acrylic
If you are covering a large area then it may be necessary to use several sheets of acrylic to do so. There are limits to the sizes in which acrylic can be supplied in.
If you need to create joins then it is important that these are done correctly. It is possible to simply glue the edges of the two sheets creating the join together, but due to the inevitable undulations is even the smoothest wall, these joins are often not straight and you always end up with high and low edges.
If you do have the skills to get this spot on then it will create a very neat and almost seemless join, so if you are feeling confident, go for it, but beware, it can go horibly wrong.
If you have a large, flat area it is possible to do this before fitting, but you will have to be careful not to split it.
The join can be made using a suitable high strength glue (will have to ensure that the glue itself will not damage the acrylic) or the bonding solution used to secure the splashback to the wall.
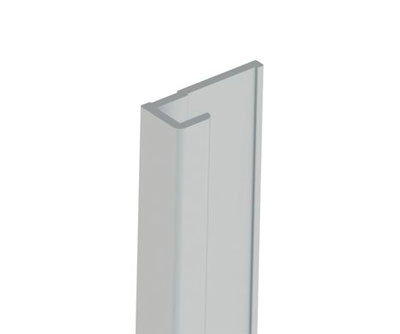
If you don’t fancy going down this route, your best choice is to use a special aluminium splashback straight joint as seen below
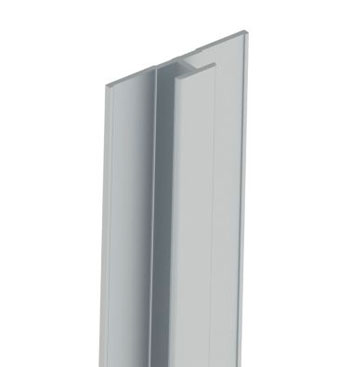
Aluminium straight joint for joining sections of splashback together
The edges of the sheeting should be fixed in place in the joint using bonding adhesive and the joint itself can be fixed to the walls surface using the tape mentioned above.
Repairing Scratches in Acrylic
Acrylic by nature is quite soft, and over time it is inevitable that scratchs and scrapes will occur. The good thing about acrylic is that these can be repaired using the same methods outlined under the "Smoothing and Preparing cut Edges" heading above.
Polishing soltuion can be used to deal with very shallow scratches while wet and dry paper can be used to deal with more severe damage.
As always, with machinery that creates dust, debris and has sharp components DIY Doctor recommends the use of gloves, dust masks and eye protection. Fitting an acrylic splashback certainly involves most of these so please stay safe!

