This section is all about practical and straightforward instructions to get your carpentry project done easily. We have clear instructions on projects that you are likely to be attempting around the home, as well as some that are more recreational woodworking projects such as building furniture.
For information about joinery and carpentry techniques we have a separate section that explains these in detail. There you will learn practical techniques from Mitring to Countersinking and understand some of the practical aspects of working with wood and timber in a DIY or Home Improvement context. See more about Carpentry Techniques here.

There are a range of timber cuts and joints that you will need to know it you are going to be doing any carpentry around the home. We cover all these in detail, explaining when they should be used, there relative advantages and disadvantages and how to make them in our Timber Joints and Cuts section.
The tools that are used commonly in carpentry have developed over hundreds of years; there are lots of them and some can be difficult to use effectively. We have an excellent section all about hand tools where we cover most of the tools that are commonly used in joinery projects.
Tips, Tricks Hints and Advice for Carpentry Projects
There are so many tips that we cannot possibly hope to include them all here. In fact we have a fantastic Tips section with another article dedicated to Carpentry Tips – see here.
Here as some more that we think are really helpful. They have been collated by seasoned pros. Some you might already know but other might ‘flick on the light’ in your mind.
- Good tools, great work – Well serviced and sharp tools will be easier to use and give you a much better result. You should use tools that match the quality of your aspirations; there is no need to spend a fortune on tools that you are going to use rarely, conversely if you are doing fine work and often get yourself the tools to match
- Mark Clearly – Use a sharp pencil or knife to mark where you are going to cut. A fat line will lead to errors before you even factor in your cutting. Make sure you know which is the waste and which part you are keeping. It sounds crazy, but it is easy to get confused at times. Stick a piece of masking tape on your tape measure so you can write on it the measurement you need to remember; particularly handy as one gets older!
- Check you measurements – “Measure twice, cut once” is the old adage. But also make sure your tools are accurate. If you tape measure hook is bent it’ll miss read. Check your combination square is really square by putting in on a square surface with the rule fully extended, draw a line and then flip it over; the rule should follow your line if it is square
- Offer up – When measuring you cannot get more accurate that actually measuring up the wood that you are about to cut to where it should fit. You can’t always do this, but where you can it is a very useful trick to making sure you are right before you cut
- Support your work – When you are cutting, you will find it much easier and quicker if you stop and find support for the end you are cutting off. Make sure the piece you are cutting is as stable as you can get it; your cut will be more accurate and easier to achieve.
- Get a clean cut – Sometimes you will find that the cut is ragged, particularly when cutting across the grain or cutting ply wood. Circular saws are notoriously bad for this. Make sure that the saw blade cuts into the ‘good’ side rather than out, leaving it ragged. Or you can use a knife to score the edge you are cutting along so that the grain is already cut and will not fray. Using a piece of waste wood clamped to the side that will get ragged will stop this as the waste wood will protect and ensure a cleaner cut
- Practice makes perfect – Have a quick practice with a scrap piece before you move onto the real thing. Start in an obscure place before moving on the more visible areas once you have got the hang of it
- Nailed – When banging in a nail at the end of a piece of wood, what out that it does not split it. You can prevent this by banging the tip of the nail with your hammer to blunt it. This will reduce the chances of splitting. A Nail Gun is a great way to avoid splitting, and it a whole lot quicker and easier, but is more expensive than a normal hammer!
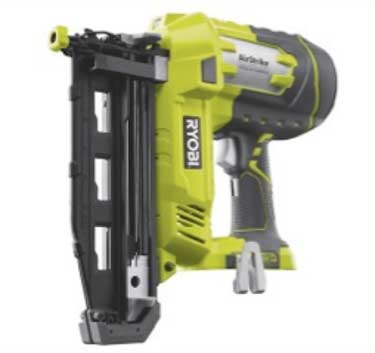
A Nail gun will reduce the chances of the wood splitting - Clamp and Saw – When sawing a long straight cut it is often much quicker and easier to clamp a straight edge along the line you are going to cut (less the width of the saw frame). You butt the edge of the circular saw frame against this, knowing that the blade is in exactly the right place, and then slide the saw along the straight edge
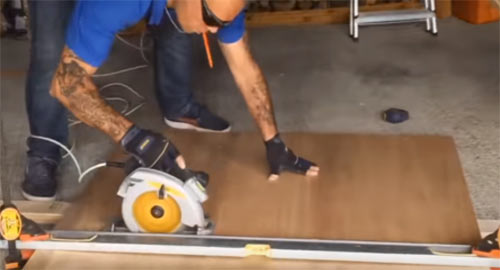
Clamp a straight edge to guide your saw for a long straight cut - Stain and Glue don’t mix: Literally, they don’t mix; if you are planning to stain a piece and glue get on the surface you will end up with whiter blotches where the stain cannot colour the wood with embedded glue. Offer up the pieces without glue, then tape over the middle of the join. Run a sharp blade down the join cutting the tape, leaving half on each side of the join. Now when you glue the pieces any excess glue will not sit on the surface of the wood but on the tape which can be peeled away
Please get in touch if you have more – we can always add to these and help people who might be struggling.

