Fitting a towel radiator or heated towel rail as they are also known is certainly a DIY job, especially if you are familiar with basic plumbing techniques. The trickiest part of the job is your plumbing connections and making sure no pipe fittings leak.
Fitting towel rails is usually done in the bathroom and they are usually installed instead of, or to replace an existing standard radiator, this is the most straight forward type of installation.
To this end, in this guide we will walk you through the steps on how to fit a towel radiator that’s supplied by your central heating system, read on below.
Types of Heated Towel Rails
There are 3 different types of towel radiator; electric, centrally heated and dual fuel and the type that you choose to install will very much depend on your current heating setup.
Central Heating
As gas-fired central heating systems are the most common form of heating in the UK this is generally the most common type of towel radiator.
In essence the heated water that the boiler produces is pumped around your heating system, including any towel rails and heats the rail itself and any towels that may be resting on it.
Centrally heated towel rails come in a huge range of shapes and sizes, some tall, some wide, some shaped and some more traditionally styled. To make fitting in place of an existing radiator as easy as possible many heated towel rails are made to the same size as existing radiators.
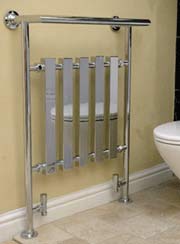
Domestic towel rail
Electric
Electric towel rails are installed independently of any existing heating systems and are essentially just plugged into the mains, however as they are mostly installed in bathrooms they need to be installed by a registered Part P electrician using a suitable socket or connection rated for use in bathrooms.
Once connected up and turned on, the internal heating element heats the liquid contained in the rails and the whole unit heats up.
An electric towel rail with a thermostat allows you to adjust the amount of heat produced e.g. you can turn it up and down and it will turn on and off to regulate to the set temperature whereas a single heat unit will only heat to one set temperature.
Thermostatically controlled towel rails can be more energy efficient due to this but they do cost more.
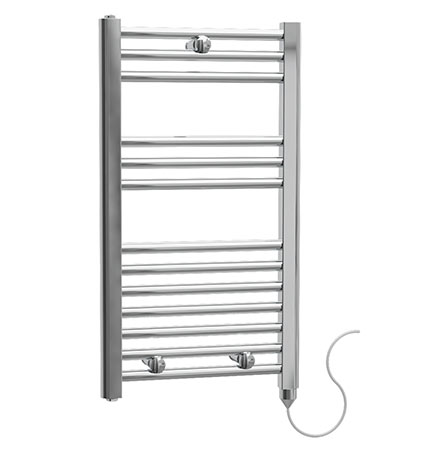
Electric towel radiator
Dual Fuel
A dual fuel towel rail is pretty much a mixture of the above two systems. It will run off of the central heating system in the same way a centrally heated rail will however when the heating isn’t switched on it is also connected to the mains electric and can be turned on independently of the central heating.
This is a very handy feature, especially in the summer months when central heating is rarely turned on.
Dual fuel towel radiator
Choosing a Towel Radiator
When it comes to choosing a towel rail for your bathroom, in many ways the one that’s most suited to you will be dictated by your existing heating system.
If your central heating is supplied by a gas boiler and water is pumped around radiators it makes great sense to simply replace the existing radiator in your bathroom with a heated towel rail as this would be the quickest, cheapest and easiest way to go, or even as we have mentioned above a dual fuel option.
If this is your preferred choice then measure up the existing radiator and then find one to match, more on this below.
One point to note is that towel radiators don’t generally output the same amount of BTU’s as an equivalent standard radiator. This shouldn’t be noticeable in a small bathroom but may be slightly more so in a larger space.
However if you either don’t have a boiler-fed central heating system, don’t have a radiator in your bathroom currently or simply want to keep your existing radiator the way it is without swapping it out then the best option for you is to fit an electric towel rail.
Pretty much any decent electrician will be able to easily run an electrical feed into your bathroom to supply such a radiator so costs should be kept to a minimum.
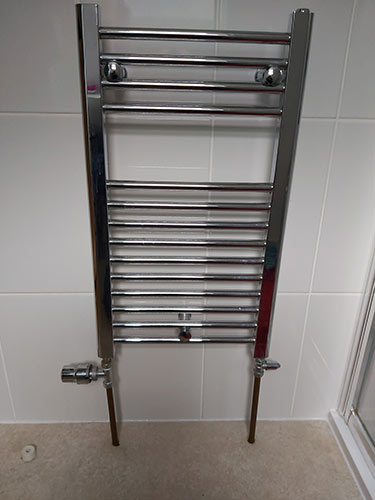
Standard central heating-fed towel rail
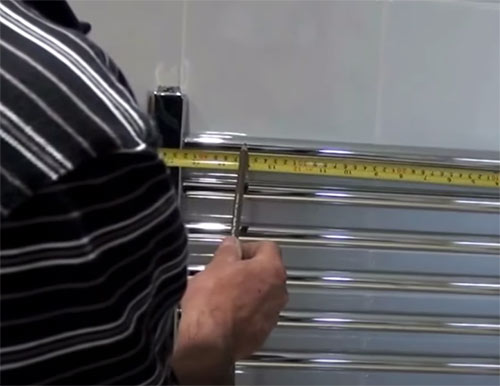
How to Measure a Radiator to Replace With a Towel Rail
If you are replacing an existing radiator in a bathroom with a towel radiator as we have mentioned you will need to measure your existing radiator and ensure the towel radiator you buy is an exact match so that it is a direct replacement and minimizes any work.
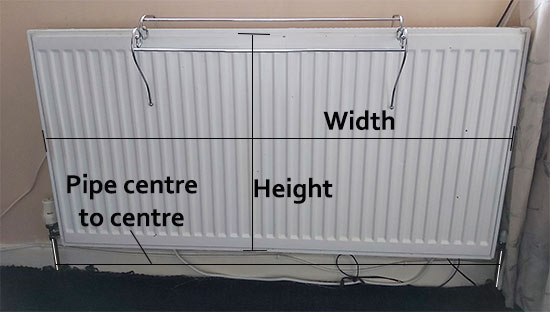
You need 4 separate measurements to ensure a new radiator is a direct replacement for the one you are measuring, these are:
- Width – from left edge to right edge
- Height – From bottom edge to top edge
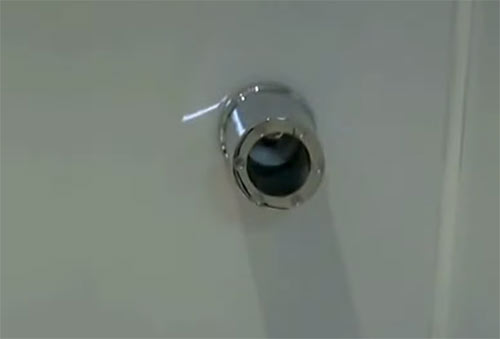
- Pipe centre to pipe centre – measure from the centre of the pipe inlet to the pipe outlet on the opposite side
- Wall to pipe centre – Measure from the face of the wall the radiators fixed to, to the pipe inlet or outlet centre
Once you have these measurements you can then use them to find a towel radiator of the exact same size.
How to measure an existing standard radiator
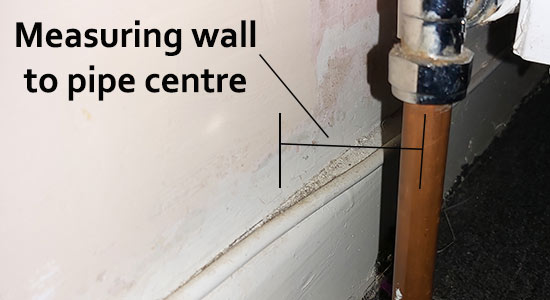
Measuring wall to pipe centre dimension when measuring a radiator
How to Fit a Central Heated Towel Rail
As we have mentioned the easiest way to replace a radiator with a towel rail is to find a towel rail which is the same size as the radiator. If the valves of the two are the same distance apart, the job is much easier and the new one will drop straight into place. If not however you will need to add or reduce your pipework.
Step 1: Remove old Radiator
The first job is to remove the old radiator form its current position and replace it with the new towel radiator. To do this you will need to turn off your central heating system and drain it down. More can be found about removing a radiator in our project here.
Turn off your boiler by switching it off at the socket or switch it’s powered from or by turning off the switch on the boiler itself.
Once turned off you will then need to drain the system down by sticking a hose on the end of the outlet that will be located somewhere on the pipework running from the boiler and trail the hose outside. Once connected loosen the valve and allow the water to flow out to a drain.
If you can’t run a hose position a bowel under the outlet, fill the bowel and then close the valve while you empty it. More can be found on draining down a central heating system in our project here.
Once fully drained, close off the outlet valve and remove the hose.
Once drained down use a suitable sized adjustable spanner to loosen each valve and then fully unscrew each of them. Once fully loosened lift the radiator up off the brackets and away. Place the radiator upside down so the inlet and outlet are facing upwards to prevent any water that’s still in there from leaking out.
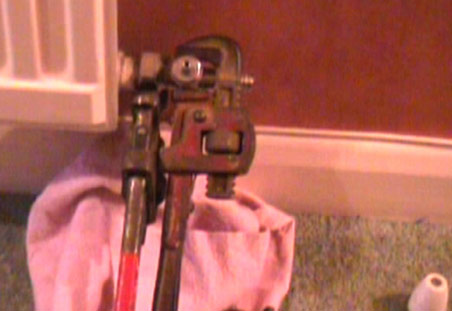
Undoing radiator valves to remove radiator
Step 2: Fit Tails and Valves to Towel Radiator
With your new towel radiator kit this should include all of the connections and valves required to successfully complete the job, if not you can purchase a towel radiator valve and tail fitting kit from most DIY stores.
Whilst selecting valves it’s a great idea to fit a TRV (thermostatic radiator valve) on the inlet. As the name suggests they feature a thermostat and allow you a great deal more control over your heating making it more eco friendly and reducing your heating costs. More can be found on TRV’s in our project here.
Flip the radiator upside down so the inlet and outlet points are facing upwards. Take one of the adjustable tails and wrap PTFE tape around the thread in a clockwise direction. Three full wraps should be sufficient. More about PTFE tape can be found in our project here.
Once the tail thread is covered with tape screw it into either the inlet or outlet and fully tighten using an adjustable spanner. Repeat this for the other side also.
It’s a good point to note that radiator valve tails such as this are slightly telescopic and will allow so up and down movement if required.
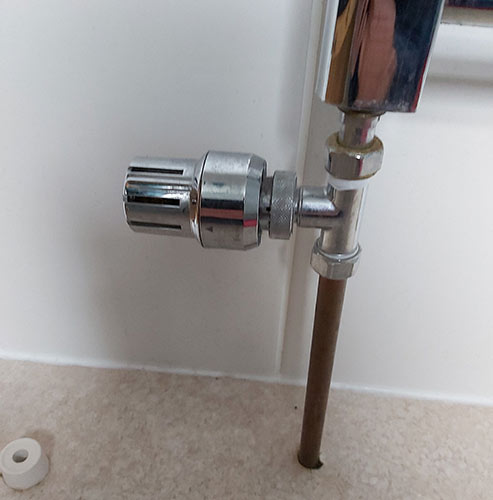
Next take a valve, TRV for the inlet, standard lockshield for the outlet and unscrew the top compression fitting. Slide the compression nut on first and then the olive and pop the valve on the end of the tail, push the olive up to meet the fitting and then screw up the compression nut finger tight.
Use an adjustable spanner to tighten for 2 or 3 half turns but don’t over tighten as this can cause leaks. This will also tighten the tail into the base.

Tighten up radiator valve on towel radiator
Repeat this for the opposite side also.
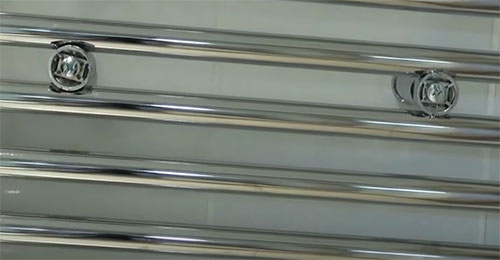
Step 3: Fit Plugs in Top of Radiator
With the tails and valves fitted flip the radiator back over and in your fitting kit you should find 2 plugs, one with a bleed valve in it.
Screw each plug into each hole on the top of the rail and again tighten each pinch tight using an adjustable spanner.
Fit plugs into top of towel radiator
Step 4: Hang Towel Radiator
Once the rail is fully assembled it’s time to hang it on the wall. Position the rail in the exact place you want it go and check that it is sat level on the floor using a spirit level. Level it up if it’s not
Measure in from the inside of each side of the rail by 70mm at the top or second rail down of the radiator and mark this point on the wall behind on each side. Put the radiator to one side and check that both marks are dead level using a spirit level, level them up if not.
Mark top radiator fixings on the wall
Once marked move the radiator out of the way and then use a 6mm tile cutting bit and a power drill to drill through each tile at each mark. Once you have broken through the tile and hit the wall use a 6mm masonry bit to drill and inch and a half or so into the wall.
Insert a red wall plug into each hole and push it fully through and behind the tile into the wall to prevent it cracking the tile as it expands when the screw is screwed up.
Take one of the brackets, a screw and a washer and slip the washer over the screw and then push the screw down into the bracket and out the bottom. Push the screw gently into one of the holes in the wall and screw it up using a screwdriver but not too tight as this can crack the tile.
Towel radiator bracket fixed in place on wall
Repeat this again for the opposite side but as there is some movement with the brackets, use a spirit level as you tighten it up to ensure it’s level.
Next, pop the bracket inserts into each bracket, level them up and then tighten the small grub screw that should be on eth side of the bracket to hold them in place.
Now, place the radiator back on the wall, moving it up slightly higher off the floor and take the head of the bracket and the shorter screw, pop the screw through the head piece and then screw this into the bracket lightly and repeat for the same side.
Towel radiator fixed to brackets
The final job here now is to repeat the same for the bottom bracket or brackets. Larger radiators will have 2 whilst smaller ones will have one that’s fitted in the centre.
Measure and mark in 70mm at either side at the centre between two sets of rails near the base and mark on the wall. Put the radiator to one side, drill out tiles and holes in wall, fit wall plugs and then screw brackets in place ensuring all is level.
With the bottom brackets fitted, put the radiator back on the wall and fix all 4 bracket heads loosely in place. Centralize the towel rail on the brackets so that all is even either side and screw the head brackets up tight as well as the small grub screws.
Towel radiator hung on wall
One point that we haven’t mentioned is which way around your radiator needs to go and to answer it doesn’t matter. The only thing that really matters is which of the existing supply pipes is the supply and which is the return e.g. which pipe is supplying the hot water from the boiler and which one is taking the water back to the boiler.
This is relevant as if you are using a TRV then this will need to be installed on the incoming feed pipe.
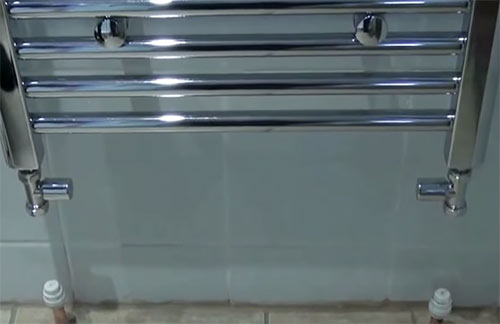
Step 5: Fit Connecting Pipework for Towel Radiator
Once the radiator is hung on the wall one of the final jobs now is to fit the connecting pipework.
If you are fitting a direct replacement for an existing radiator then this should just be a case of fitting some compression joints or Pushfit valves on the tails of the exiting pipework and then cutting a length of copper pipe for each side and fitting tis between the existing supply pipe tails and those on the base of your radiator.
If this is the case then if your existing supply pipe tails are quite long then you can trim them down but leave at least 25mm to connect your new compression fittings.
As before, slip a compression nut over each tail and then an olive. Pop the compression fitting on, move the olive up tighten the compression nut finger tight for now. It’s a great idea to fit isolation valves here as it you need to remove the radiator again you can simply isolate it here without having to drain down yout whole heating system.
Use a screwdriver to measure the depth down into each compression fitting (top and bottom) and then measure the distance between the base of each and add all the measurements together and cut your pipe to this length.
In terms of pipe you can use standard copper pipe of chrome plated copper pipe which looks much nicer but costs much more. If using copper you can simply pop a chrome effect cover over it and no one will be any the wiser.
With the pipes cut you may now be able to wiggle them into place between the tails (don’t forget to put a compression nut and olive on for the top joints), if not you will need to loosen the bracket head caps and move the radiator up to fit them.
If so put everything back into place and tighten it all up fully and then pop the caps onto the bracket heads.
Once the supply pipes are fitted tighten each compression nut up finger tight, top and bottom on both sides and then use an adjustable spanner to nip them up 2 half turns if you can or until they feel they are going tight.
Once your pipe tails have been fitted, go over all brackets and grub screws and tighten if needed and then also check compression joints and the 2 caps on the top of the radiator. If all is well you are ready to prime your heating system and turn it all back on.
Supply pipes fitted to towel radiator
If you have moved the radiator slightly so the supply pipes no longer line up you are going to need to bend your new supply pipes slightly using a pipe bender so that they meet up. Using a pipe bender is quite tricky for anyone new to the task so practice first. Use copper pipe if you are using chrome pipe so you don’t waste it.
For a full and detailed run down on how to bend copper pipe see our project here
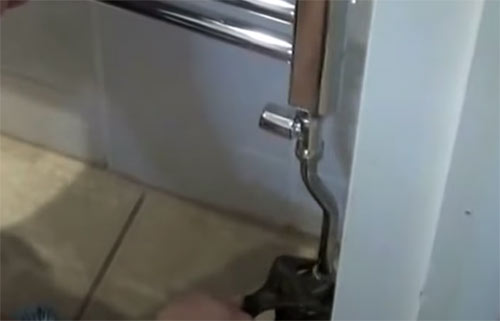
Bent chrome pipe to meet new towel radiator position
All that is left to do now is to re-prime you heating system and turn everything back on. Check that the drain valve is fully tightened up and then turn your boiler back on.
Once on check the water level indicator or pressure gauge on the boiler. Open the first end of the filling loop and then gently open the second valve and allow water to enter the system, do a little at a time.
Keep a very close eye on the water indicator or boiler pressure indicator and do not let too much water in as you will have to drain it off again if too much. Once the levels are normal close off the filling loop.
Turn the heating on if it’s not on and go up and inspect the new towel radiator for any leaks. If there are any tighten the valve in question a little at a time until it stops.
As air will be in the new radiator you will need to bleed it (see our project here if you don’t know how). Open the bleed vale and let the air out until water starts to flow and close it off again.
As the heating warms up so should your new towel radiator. Pat yourself on the back for a job well done! You may need to bleed it a few more times for it to fully heat up so keep an eye on this.
As you have drained your system it is likely that you have also drained out any inhibitor that was in the system (this helps to prevent sludge buildup and corrosion etc.) so you will need to add some more.
One point to not that we haven’t mentioned above is the positions of the supply pipes. In the majority of cases the supply pipes will be at the base of the radiator however in some cases they can be at the top. In this situation all you will need to do is flip your radiator over so, the remaining installations steps will be the same.
Swapping an existing radiator for a towel radiator is a fairly straight forward job and as long as you take your time and ensure all of your joints are secure and don’t leak, it’s a job that you can proud of once done.