If you are new to the world of DIY, especially carpentry, you may be wondering what a biscuit joint is and how it is used?
In brief a biscuit joint (or plate joint as it’s also known) is a carpentry joint used to join and align two pieces of timber together and hold them in place until the glue or adhesive applied has cured and the joint has been fully secured.
Traditionally a tool known as a biscuit joiner (more on using a biscuit jointer can be found in our project here) is used to cut the required recesses in each piece of timber, but it is also possible to use a router, or in the case of this project, a relatively modern palm router to cut these recesses.
Before we go any further it has to be noted that using a propper biscuit jointer will provide a more accurate and precise hole, but with a little practice and care there is no reason why you can’t cut a comparable hole using a router.
Purchasing a biscuit jointer to cut, maybe, 8 or 10 biscuit joints per year doesn’t make financial sense, unless you have the spare cash of course, so using a router in it’s place makes sense, but then again, if you are likely to be forming a fair few biscuit joints, then it’s advisable to purchase the correct tool for the job.
One point to note is that there are a few situations where a router can’t really be used. A router can only cut a biscuit slot on the edge of a piece of timber and not into the face and also not along a beveled edge. You should only cut along a square edge.
What is a Biscuit Joint?
If you were trying to join two pieces of timber together to form a butt joint or mitre, attempting to keep the two pieces aligned while any glue dries or you screw in any screws can be a complete nightmare and more often than not leads to the joint itself falling out of line.
To prevent this from happening a biscuit jointer or in the case of this project a router is used to cut a small crescent-shaped recess in both pieces of timber being joined, into which an oval shaped “biscuit” (normally made from compressed timber) is placed.
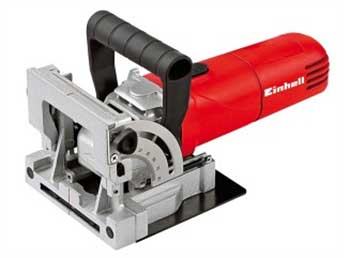
Einhell biscuit jointer
When pushed together, the biscuit helps to form the joint between the two pieces of timber, keeping them perfectly aligned and also providing a little more rigidity and strength to what would otherwise be a faily weak joint.
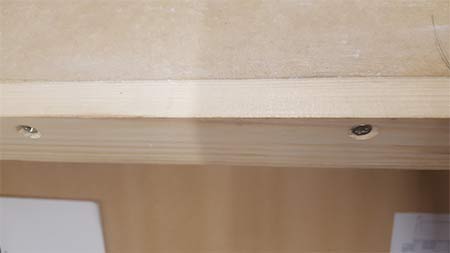
2 pieces of timber perfectly aligned using a biscuit joint
Before the timbers are joined, glue is also applied to the recesses and the biscuit. This not only holds the timbers together when cured, but also causes the biscuit to swell in each recess, preventing movement and also firming up the joint even more.
You may be thinking to yourself; ok, I now know what a biscuit joint is, but why are they called biscuits?
In answer to this, their called biscuits because they do in some ways resemble an actual biscuit in terms of their shape and texture.
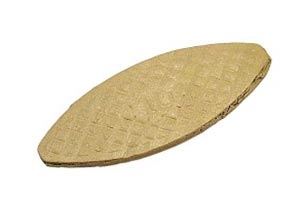
Number 10 biscuit
Are Biscuit Joints Strong?
To answer this question, it really depends on the situation in which it’s being used and the forces being applied.
If you are wanting to form a biscuit joint to joint two pieces of timber together that will carry a certain amount of weight then the answer would be no.
A joint of this type should not be used in this case and instead a suitable joint for the type of timber and weights/forces being applied should be used e.g. dowelled joint, mortice and tenon, lap joint etc (more can be found on the different timber joints here).
If however a biscuit joint is being used in place of a simple butt joint e.g. gluing or screwing two pieces of timber together, then yes, a biscuit joint will certainly add additional strength to the overall joint as a whole, plus allow you perfectly align the two pieces together.
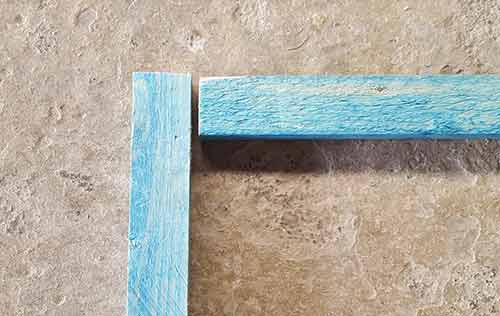
Timbers butted together to form butt joint
So, in essence, a biscuit joint is mainly used to align two pieces of timber together plus add a little strength to what would otherwise be a simple butt joint.
One final point to make is in terms of the forces that may be applied to the joint.
Biscuit joints are not really suited to situations where substantial upward or downward forces will be applied to the joint e.g. a large weights bearing down or resting on the joint.
In this case the joint itself will only be as strong at the glue/adhesive bonding the faces of the timbers together plus the strength of the biscuit.
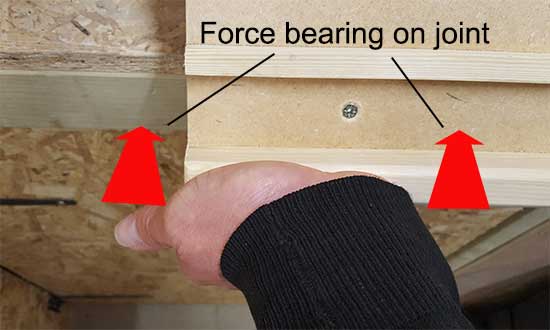
Downward force being applied to biscuit joint
Where a biscuit joint does shine in respect to strength is in the case of applied forces or pulling force. Due to the fact that the biscuit swells when glue is applied to it, it essentially locks itself within the biscuit holes and provides a decent amount of resistance to any pulling forces applied.
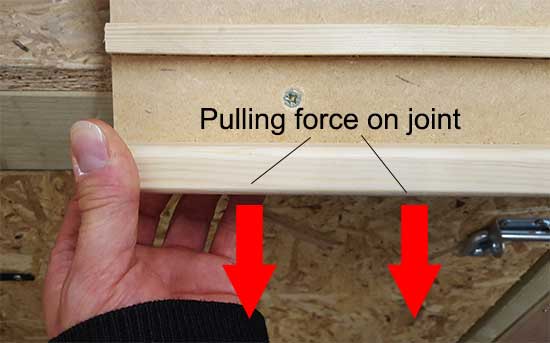
Pulling force on biscuit joint
Correct Spacing’s for Biscuit Joints
When it comes to the correct spacing’s for biscuits within a biscuit joint, this is very much down to personal preference and what the biscuit joint you are forming is going to be used for.
As a very rough rule of thumb, biscuits should be spaced somewhere between 6 and 12 inches (this is measured to the centre of each biscuit) so a good starting point is a happy medium of between 8 and 9 inches.
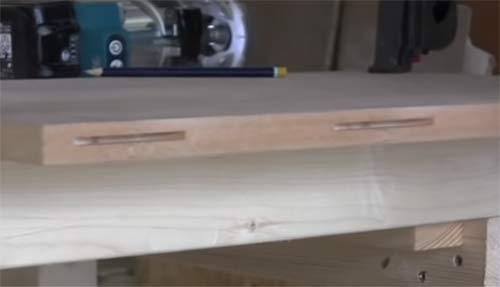
Biscuit joint holes spaced equally apart
You should also be aware that adding too many biscuits will compromise the actual strength of the timber as you will have made too many cuts.
Likewise, cutting a biscuit joint too close to the edge or corner of a piece of timber can cause the biscuit to spill out over the edge or can also result in splitting.
But on the other hand, if your joint is formed too far away from an edge or corner then this may result in a weak spot.
Again as a rough rule, try to keep your biscuit around 3 inches in from any edge. This will reduce the chances of splitting or spillage but still provide a decent amount of strength.
What Sized Biscuit Should be Used?
In general, it’s normally always best to use the largest biscuit that you can for the size of timber you are working with e.g. if you can use a #20 biscuit and it won’t compromise the overall strength then go for it.
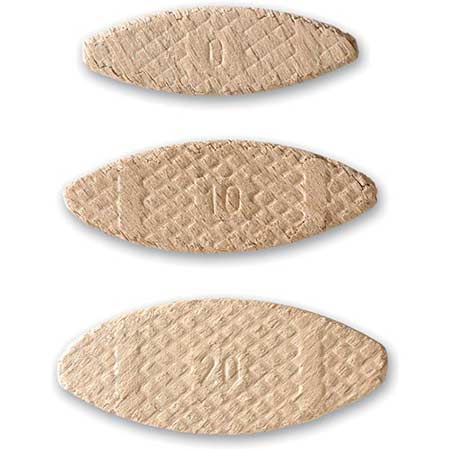
The three most common different sized biscuit jointing biscuit
In respect to the actual sizes of biscuits available here in the UK, they are as follows:
- #0 (47x15x4): Ideally for smaller jobs and where any applied forces will be kept to a minimum or where the timber you’re working with is narrow
- #10 (53x19x4): Arguably the most commonly used biscuit, the #10 is suitable for a wide range of applications where a moderate amount of forces may be experienced
- #20 (56x23x4): The largest standard sized biscuit is great for larger jobs and where fairly large forces may be experienced
As you may have noticed above, regardless of the width and size of biscuit, all are 4mm (or 5/32 of an inch) in thickness inline with the standard thickness of the biscuit jointer cutting blade. This is an important point to note when it comes to selecting the correct thickness of router bit, you need to ensure that it will cut a 4mm deep hole.
As stated above, the actual sizes mentioned are UK sizes. In the U.S. these sizes do vary slightly for each biscuit number so be sure to check the manufacturers stated sizes on any packaging as to what size they actually are.
Tip: It’s always a good idea to purchase good quality biscuits as in almost all cases they will all be the same size.
Some cheaper branded biscuits tend to vary slightly in size which can have a dramatic effect on the overall outcome and finish.
How to Make a Biscuit Joint Using a Router
As we have stated above, in the below steps you will learn how to make a biscuit joint without a biscuit jointer, instead we will be using a router.
A standard router can be used, but they are a little bigger and slightly more awkward to use, but as long as you take your time and work steadily and methodically, there is no reason why you can’t achieve the same standard of result.
Align and Mark Biscuit Joint Locations
Once you have decided how your timbers are going to be attached together e.g. which edges you’re joining, which way around they are going to go etc, you then need to align these edges up.
Once aligned, you need to decide where the biscuit joints are going to sit. If you are a fairly seasoned DIY’er then you may be able to pretty accurately guestimate the required 3 inch gap from each end, but if not you will need to use a tape measure to measure in from each end at least 3 inches and then mark with a pencil.
Next, measure the total gap between the two marks and then divide this by the remaining number of biscuits you are going to use.
For example if you are going to use four biscuits in total, we have already used two (one at each end) so we need to divide the gap between the two marks by three to give us an equal spacing for our remaining two biscuits.
Once you have calculated this, measure and mark these points.
The final job to do at this stage is to place our second timber to be joined in position against our first piece and then transfer the markings that we made on the first piece onto the second.
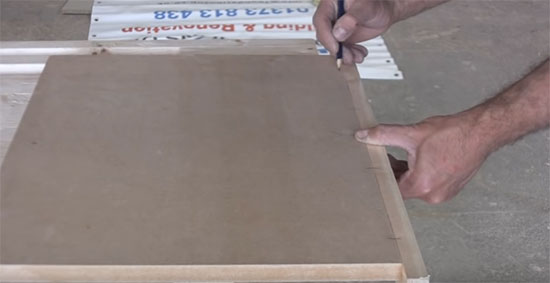
Mark the location of each biscuit joint onto both timbers so you know where to cut each biscuit hole
Set up Router and Insert Cutting Blade
Before we can start cutting we need to get the router set up. To do this we need to insert out router bit (the bit that does the cutting) and then set the correct depth so that the cutting bit cuts into the joining face of each timber in the correct position.
Before making any adjustments, remove the battery (if cordless) or unplug the tool from the mains so that it cannot accidentally turn on and cut you.
In this instance, due to the depth of cut being made, the bit needed to be inserted outside of the guide. This is obviously potentially dangerous as we will have an exposed cutting bit rotating at high speed, so when the tool is running extreme care must be taken at all times!!
Ensure the guideline on the router bit is set to the correct depth in the chuck (or collet as it’s also known) so that the chuck has enough “bite” to hold the router bit firmly in place. Once set correctly, tighten the chuck fully.
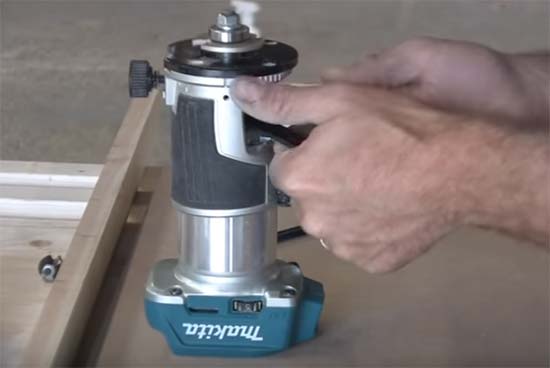
Tighten the chuck of the router to hold the router bit firmly in place
The next job is to set the depth so that when the “foot” of the router is resting on the face of the timber, the cutting bit cuts in the correct location e.g. as close to the centre as possible and not too close to the edge.
Depending on the type of tool and manufacturer, the method for setting the cutting depth will probably vary so you will need to refer to the instructions provided for your tool.
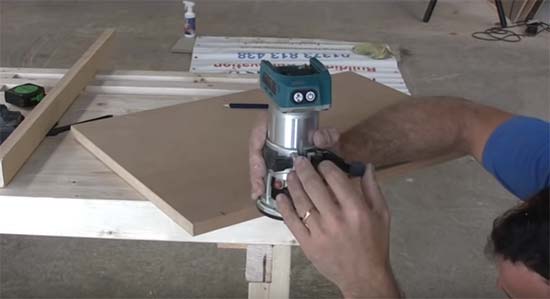
Setting the cutting depth of the router to ensure bit cuts in correct place on timber
Clamp and Cut Biscuit Holes in First Piece of Timber
To prevent any movement of your timber whilst cutting your biscuit holes, it’s important to clamp it down to a solid surface.
If it moves while cutting, not only will you inevitably cut in the wrong place but you could also easily catch your fingers or cause any number of other injuries.
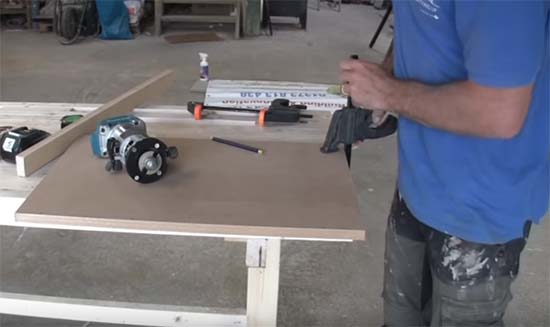
Full clamp your work to a solid surface to prevent any movement while you’re working
With the timber firmly held in position, it’s now time to start cutting.
Place the foot of the router flat on top of the timber and position the bit directly inline with your first cutting mark.
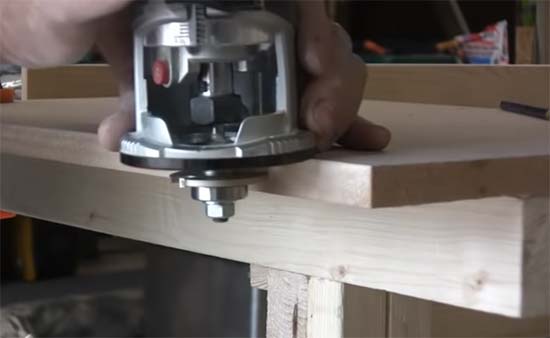
Position your router on your first mark and cut your first biscuit hole
Turn on the router and gently push it forwards until the cutting bit starts to bite into the timber. Push gently on in until the bit hits its full cutting depth and stops.
Make sure as you push gently forwards that the router foot stays perfectly flat down on the surface of the timber so that the bit cuts flat and level and not at any angles.
Once the cutting depth is reached, move the router an inch or so either side of your cutting line so that the bit cuts roughly a 2 inch hole which will be enough to accommodate the biscuit in full (measure length of biscuit first to determine how long the hole needs to be).
With your first hole cut, remove the router and turn it off and then do a test fit of the biscuit just to make sure it fits correctly.
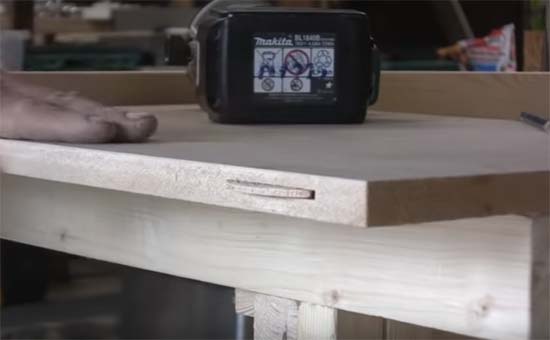
Test fit your biscuit in the hole
With your first hole completed, repeat the above for the remaining biscuit holes.
Clamp and Cut Biscuit Holes in Second Piece of Timber
With our first timber fully cut and prepared, the next task is to work through the same steps for our second joining piece of timber.
Again, before we start, clamp it to a firm solid surface so it can’t move.
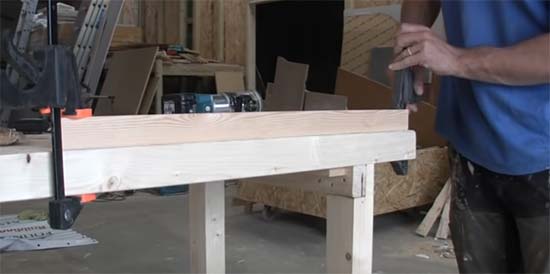
Fully clamp the second timber to a solid, flat surface
Once clamped solid, position your router on your first cutting line and make your first cut.
Ensure you cut to the correct depth and width to allow the biscuit to sit fully into the joint.
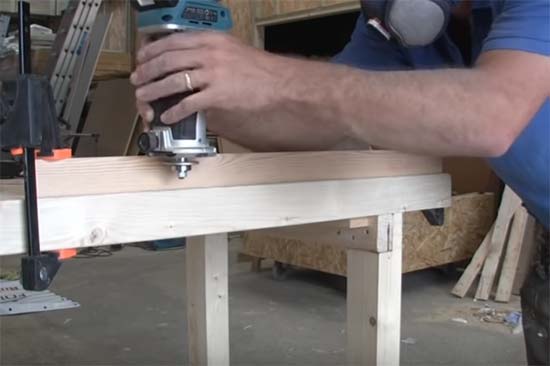
Cutting biscuit joints into second piece of timber
As before, once all holes have been cut, test fit your biscuits to make sure they fit correctly.
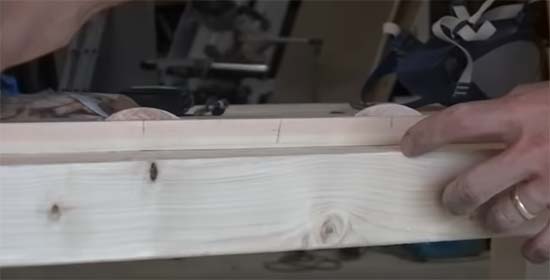
Test fit biscuit joints on second piece of timber
Dry Fit Biscuit Joints
Before we go ahead and glue everything together it’s always a great idea to perform a dry fit. This is essentially fitting everything together, biscuits included, without gluing anything, just to make sure all fits nicely together.
Insert a biscuit into each hole on our second timber. It doesn’t really matter which one you use but as this is the most recently cut piece, that’s what we used.
With the biscuits inserted, push the two timbers together fully to make sure everything is snug and tight.
If all is well, the timbers should join together perfectly and the top faces of each timber should be perfectly inline, flat and level.
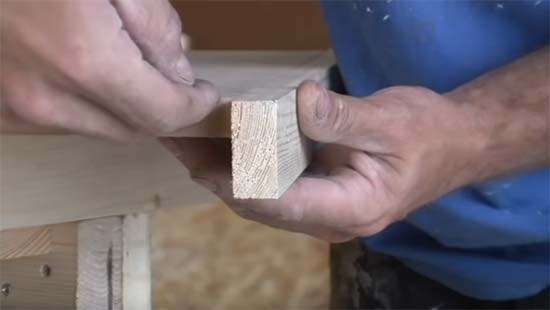
Dry fit the timbers together to make sure all fits well
Apply Glue to Joints and Insert Biscuits
After a successful dry fit, we’re now ready to apply some glue. Before we do so, always get all of your clamps ready to go and also a few piece of scrap timber to use to prevent the clamps from maring (biting into and marking) the finished faces of our timbers being joined.
Once the glue has been applied you want to get everything clamped up right away. You don’t want to be fumbling about looking for clamps and scrap timber while the glue is starting to cure.
If it’s particularly warm then the certain wood glues can start to set quite quickly so you don’t want the glue starting to dry out if nothings fully and securely clamped.
Apply plenty of glue to each biscuit hole on both pieces of timber and then a decent amount along the flat faces between each biscuit joint, again on both pieces of timber and also a little on each biscuit as you push them into each hole.
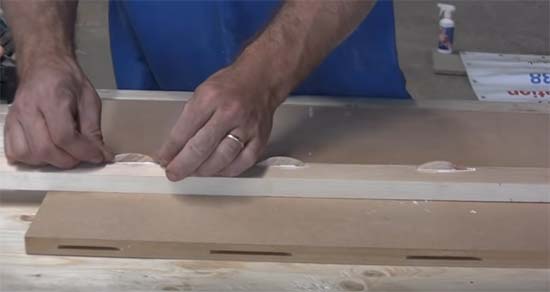
Apply glue to each biscuit hole, the faces between each hole and to each biscuit
Once the glue has been applied, push the timbers together. Tap down with the heal of your hand if necessary in order to close the joint up fully.
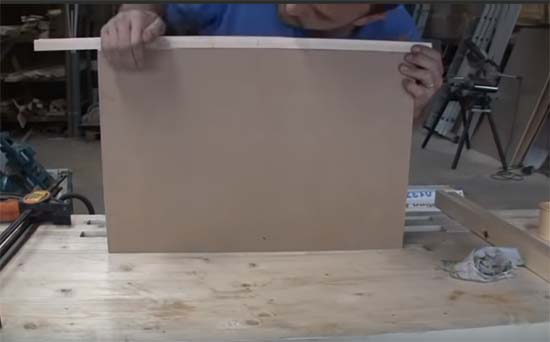
If you need to close the joint up fully, hit down with the heal of your hand on top
Push Joints Together and Clamp up
Once everything is joined together and any gaps have been closed, lay the timbers down on a solid flat surface and get everything clamped up.
Position your scrap timbers at either end and then position each clamp and clamp up. Don’t go too mad with the clamping, just pinch them up.
Additionally, make sure that the end of each clamp is flat against the surface of your timbers. If either is slightly twisted then any pressures applied, could twist the joint and open it up.
Some clamps can excerpt a huge amount of pressure so you don’t want to damage anything, especially if you’re using MDF.
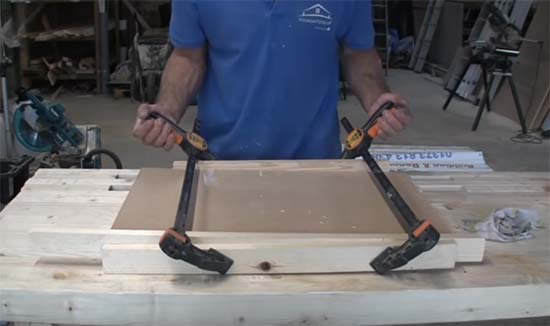
Once the glued timbers are in place, ensure everything is firmly clamped up
Once clamped up, check over the joint in full and wipe away any glue that has squeezed out using a damp rag.
Whilst checking, look at the joint each side of the timbers to make sure that it is fully closed up. If you spot any gaps then this is a sign that your clamps may be slightly twisted.

Gap between joints caused by uneven clamping pressure
If you do find any gaps, you have two choices; release the clamps and then reclamp or add more clamps.
As you have some spare clamps, instead of disturbing everything and if the gaps are only slight, it’s best to add some more clamps to close the gap up.
However, if the gaps are quite extreme then you will need to release the clamps and start again.
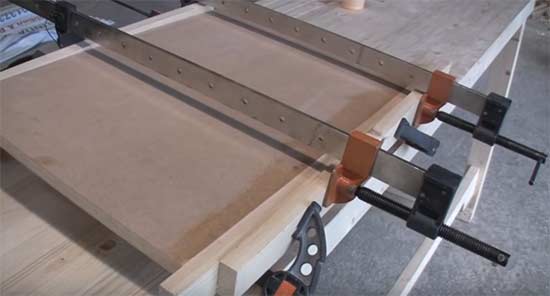
Additional clamps added to close up any remaining gaps in joints
Once the additional clamps have been added, again check over the job as a whole to make sure all is well and also wipe away and glue that has been squeezed out.
Safety, Safety, Safety
As with any DIY or construction job involving power tools there are safety risks involved.
As we have mentioned above, great care should be taken using a router due to the high-speed rotating cutting blade. Keep your hands and fingers away at all times.
Also, remove any hanging items of clothing or jewelry. Such items can easily get caught in the spinning blade and pull you into it!
In the case of the demonstration, we used MDF for one of the pieces of timber. The dust generated through cutting MDF is carcinogenic so you should always wear a suitable mask when working with it.
Additionally, always wear eye protection, old clothing and any other suitable safety clothing.
Cutting a biscuit joint using a router may seem quite tricky to begin with but as long as you measure everything out and take your time you can easily create a biscuit joint and successfully join two pieces of timber.

