Fitting a raised shower tray is fairly similar to fitting a flat or low level shower tray, the only difference being that as opposed to fitting the tray directly on top the floor it’s raised off of the floor on either purpose built legs or a timber frame.
Out of the two options, fitting a low level shower tray is typically more tricky as it involves sinking the waste trap down into or under the floor. This isn’t so bad with a floating timber floor but not easy if you are installing on a solid concrete floor.
Fitting a shower tray of any kind may seem like a tough job, but if you take your time and plan it out it can easily be done as a DIY job.

Profile view of shower tray lifted off floor with legs
in this guide we are going to be installing a raised shower tray over a solid concrete floor. To find out how to install a flat or flush shower tray, see our guide here.
What’s best, a flush low profile shower tray or a raised shower tray?
The answer to this is, it really depends and by this we mean do you want to keep things as simple as possible or do you want to possibly open yourself up to a great deal of work.
Essentially what we mean is if you are doing a like-for-like swap and simply replacing your flush fit shower tray mounted on a timber floor then this should be fairly straightforward, just whip the old tray out and replace it with a new one using the existing waste.
Likewise, if you are simply replacing a raised shower tray over a solid concrete floor you can take out the old tray, put your new tray in place and connect to the waste that’s already there.
However, if you want to install a flat or flush fit shower tray on a solid concrete floor in place of an existing raised shower tray this is a little more complicated as you are going to need to excavate the existing waste and put in a new one that’s level with the floors surface to allow the new tray to sit flat.
You would then also need to cut a channel for the waste pipe to run along to a main drain. In most cases this will be outside the building so you may end up having to run through foundations and then connect into main drainage, not an easy job.
This is typically done when you are working with limited head height and every millimetre counts.
In these situations you would probably also want to fit a low profile shower tray (see the project linked to above for this), use an extra low profile shower waste trap (normally around 40mm in height) and also fit a reduced height shower enclosure, some can be as low as only 1750mm.
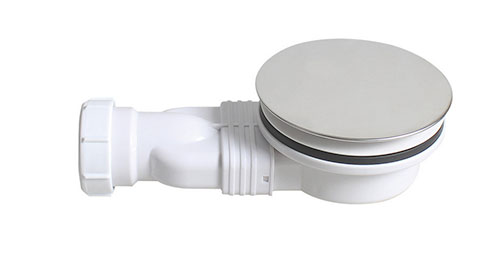
Extra low profile waste trap
In respect to the above, we would always advise to keep things as simple as possible if you are fairly new to this type of project e.g. use the same type and size of tray. This way you are pretty much guaranteed everything will fit nicely.
If you are feeling ambitious that’s great, but just be aware that if you are working with unknown quantities, things can quickly escalate!
In terms of this, the first port of call is to do some homework, see our project here on the different types and shapes of shower tray for more information.
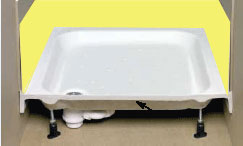
Shower tray raised off floor showing shower tray waste trap
Shower Tray Construction Materials
When it comes to the types of shower tray and raised shower tray, particularly their construction materials, there are 2 main types: acrylic plastic and stone resin.
Acrylic plastic is probably one of the most common construction materials used for shower trays as it has many benefits. It’s both very strong and lightweight, able to resist the constant barrage of heat and temperature changes without discolouring and it’s also resistant to scratches and easy to keep clean.
Despite these advantages however, acrylic trays need to be supported correctly on a decent solid base as despite how strong they are, if they’re not supported correctly, they can be easily cracked or split if exposed to heavy weights.
Stone resin shower trays on the other hand also have all of these advantages but they are also extremely strong and able to cope with heavy weights much better due to the fact they’re made using stone or concrete and a resin mix. Despite this huge advantage, due to the materials used they can be extremely heavy so again you need to ensure they are mounted on a base capable of supporting the weight.
Constructing your own raised shower base
When fitting a raised shower you have two choices; use a purpose-made shower tray riser kit or make your own.
Making your own is a fairly easy job and can be done using 3×2 or 4×2 timbers. There is any number of ways to construct such as base so it’s really up to you to decide which way you want to go, the one thing to remember is that you need to adequately support the base of the tray.
A good solution is to fix two 3×2 timbers to the floor and then run four or so 3×2 timbers across them spaced at around 200mm or so, so the tray is raised up off the floor around 5 inches, as seen in the image below.
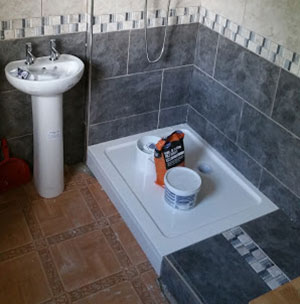
Shower tray raised up on 3×2 timbers
The one point to remember is to allow enough space for the waste and also ensure you can access it easily.
Preparing to install a raised shower tray
To make installing your new raised shower tray as simple and straightforward as possible there is some preparation work that will need to be done beforehand:
Replacing and old raised shower tray with a new one
- Remove the old raised shower tray and shower enclosure first. Note: The existing raised feet my be suck or screwed to the floor and the tray itself may have been stuck to surrounding walls using silicone so it may need some persuasion to come out or screws may need to be removed
- Inspect the area for signs of damp or water damage
- Inspect the waste pipe for signs of wear or damage
- Inspect all tiles around the shower for signs of damage. Tap each one gently with your knuckle. If any are loose they will rattle slightly. These will need to be removed and replaced
- Check over all grout lines for signs of cracks or damage. If found, all old grout needs digging out and replacing with new grout
- Check that the floor is level and in good condition (both concrete and timber floors)
- Fully remove any traces of old silicone sealant (see our removing silicone sealant project here for help)
- Fully clean and degrease all surfaces using a suitable cleaning solution
- Test fit the new tray roughly to make sure that the existing waste pipe lines up with the new raised tray
As you should always tiles down to a shower tray you may find you can’t get the old tray out with out removing the bottom row tiles. In all honesty this is worth doing any way as you can then easily silicone the gap between the wall and the tray when the new tray is in place.
Installing a new raised shower tray
If you are installing a brand new raised shower tray in a new location there are also some checks that need to be carried out before the tray is fixed in place:
- Check that the shower tray fits nicely in it’s place of rest
- Check that the floor is flat and level
- Test fit the tray and check that the wastes all line up (for the purposes of this guide we are assuming the waste is already in place, see our project here on fitting waste pipes for help with installing one)
- Check that you have the correct shower riser feet for your raised shower tray
- If constructing your own raised base, check that it is fully level and solid (for this guide we are assuming you have already constructed your raised base)
Whether your are replacing an existing raised shower tray or installing a new one, once you have worked through the above points you are now ready install your shower tray.
When installing any kind of shower tray you should always tile down to the tray and not tile the wall and butt the tray up to the tiles.
Extremes of temperature and expansion and contraction cause everything within a bathroom to move a fair amount and by tiling down to the shower tray and leaving a 2-3mm gap between the tiles and tray, you can then fill this with sanitary silicone and allow for any expansion/contraction and minimise any chance of leaks.
How to install a raised shower tray
Once all the preparation has been done and you have settled on your chosen method of raising the tray, it’s time to get going.
For the purposes of this guide we are going to replace an old shower tray with a new one using a DIY timber raised plinth.
Remove old tray and inspect for damage
Start by removing the front covering at the base of the tray to expose the waste and underside and then use a small craft knife to slice through any existing silicone, pulling away as much as possible to prevent it holding the tray in place.
Remove any screws in the feet or if on timbers, inspect them to see how the tray is fixed to them.
Unscrew the waste trap on the tray and detach it from the waste pipe and then give the tray a wiggle to see if it is loose. If so give it a gentle tug to see if it moves.
If so see if you can pull it out. If not, inspect it to see what’s holding it in place and detach this and tray again.
In the event that the tiles are the culprit, as mentioned, you may then need to remove the first row so that you can apply some more pressure to the tray.
If the tray is stuck down to timbers then you’re probably not going to have any choice but to remove tiles as you are going to need to pry the tray off so will need some wiggle room.
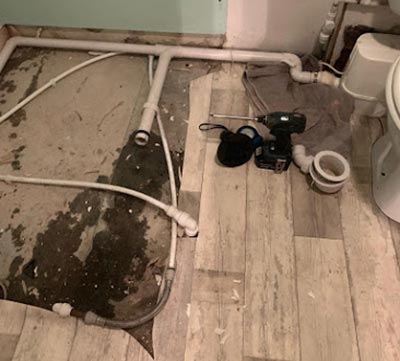
Old existing raised shower tray removed exposing floor
Check floor level
Once the old tray is out of the way, tidy the area up, removing any remaining silicone and loose material and then give everything a good hoover.
Once the floor area is clean, use a spirit level to check the level of the floor. As there was an existing tray in place the floor should be pretty level, but it’s worth checking just so you know any areas that will need adjustment and leveling up.
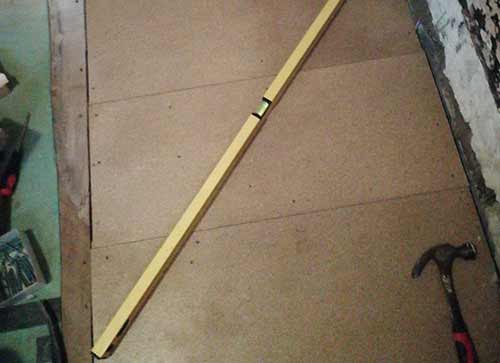
Checking the level of the floor using a spirit level
Assemble raised plinth or attach legs to shower tray and set tray in place
If you are going down the DIY route for your raised tray, fix your timbers in place as desired according to your requirements.
Ensure that your timber base is constructed so that it is totally level across each edge and also diagonally.
If using a shower riser kit, flip your tray over and attach the feet to the base of the tray. Depending on the type and manufacturer of your riser kit will depend on how the feet are attached so refer to your manufacturers instructions for details.
Once the legs are on or base constructed you now need to loosely attach the waste to the tray ensuring that each seal is in the correct place according to the manufacturers instructions. There are many different types of waste and the specific one for your shower tray should be supplied with it.
If using feet, once attached, use a tape measure to adjust them all so that they are all the same height and then flip the tray back over.
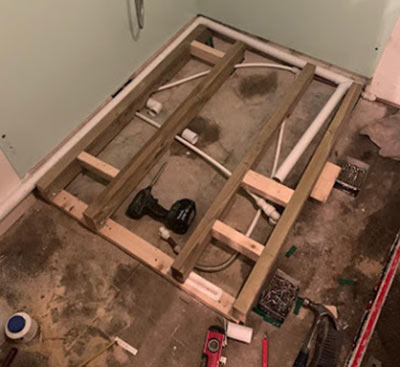
Raised timber base for raised shower tray constructed
Test fit shower tray and get level
Once the tray is sitting on its feet, move it in to position where it’s going to live.
Using a spirit level, check the level of the tray across all four sides and then also diagonally across the tray in several locations.
Adjust feet as required to ensure tray is sitting totally level across all sides. This is normally done by screwing the feet either in or out as needed.
It is imperative that the tray is level. Shower trays are shaped so that any water flows to the drain so if their not level then water can easily build up and overflow.
Also make sure that all feet are fully in contact with the floor.
In this case as we have made our own raised base it should be totally level, but it’s a good idea to check one final time just to make sure.
The final job now is to test fit the waste. The waste itself should simply slot straight on to the shower waste trap without any extreme stretching or tugging to get it to fit. If this is the case then you may need to reduce or extend the existing waste pipe.
Putting a waste pipe under stress will eventually loosen it and cause leaks!
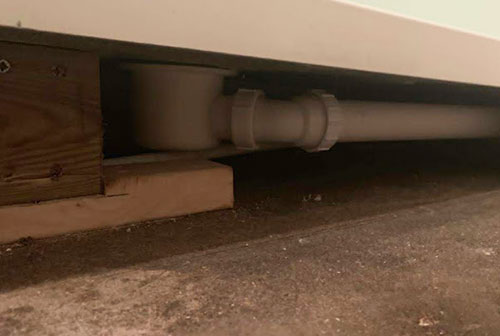
Shower tray raised off floor showing shower tray waste trap
Fix shower tray in place and secure and test waste
With the tray and waste both test fitted and hopefully lining up nicely it’s now time to fix everything in place
Pretty much all shower waste traps use a compression fitting so before putting the tray in place, unscrew the compression cap on the shower waste trap, pop it over the waste pipe the right way around, then pop the plastic washer on and finally the tapered seal. More information can be found in our compression wastes project here.
Put the tray back in place ensuring the waste is in the correct position, line the shower waste trap up with the waste pipe and then screw the waste trap up fully as we had only roughly fitted it in the steps above.
If using a riser kit, depending on the manufacturer will depend on how it’s secured in place but most are simply screwed to the floor through the feet.
Just before screwing in place, pull the tray out slightly and thoroughly clean the edges and then run a bead of silicone along each edge. This will seal the tray to the wall once in place.
If you are building a DIY raised base, apply a decent construction adhesive to the tops of the timbers and position your shower tray down on top and leave it for the adhesive to fully cure before going any further.
As with the riser kit, before fixing the tray in place, apply a bead of silicone to the sides of eth tray that will butt up to the wall to help seal it.
With the shower tray fixed in place now attach the waste and screw up the compression cap so that it’s pinch tight.
Fill a decent sized jug with water and then gently pour it in to the base. Check all around the waste pipe for any signs of leaks. Tighten the compression cap further if there are.
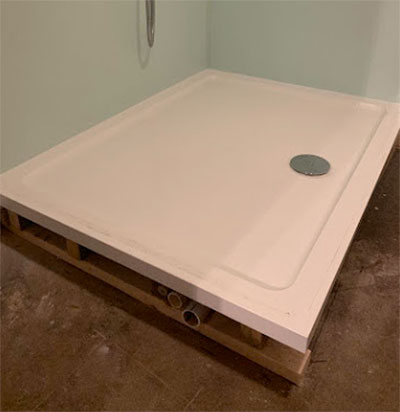
Shower tray secured in place to timber raised plinth
Fit coverings or mouldings
When purchasing a shower riser kit it should be supplied with the side covers for the tray also. Most sides will be a universal fit up to a certain height so if your tray is lower than this then you will need to trim them down.
If so measure the gap between the floor and the underside of the tray. Do this in several places to make sure it’s the same and then mark this on your side panels and cut them to size.
Again, depending on who manufactured your tray and riser kit will depend on how the sides are secured in place. Most use a clip system where one end is fixed to the rear of the panel and the other clips over one of the support legs.
In the case of a DIY riser you can use any number of items such as plywood, skirting or other similar material to make your coverings.
Simply cut your chosen material to the correct length and height and screw it in place to the timber used to create the raised plinth. You can then fill any screw holes with a suitable filler for seamless finish.
If using timber for your coverings it will need to be painted correctly to ensure that it is fully protected from any moisture or water.
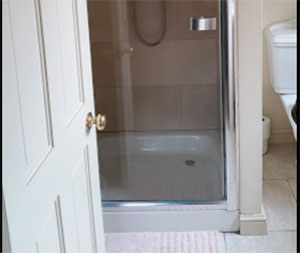
Timber skirting used to cover over raised timber shower tray plinth
Finish any tiling and grouting
With the tray and sides fixed firmly in place it’s time to get started on the finishing touches, but before any tiling happens, run another bead of silicone along the top edge of the tray where it butts to the wall just to plug any gaps.
Once cured you should now replace any tiles that have been removed down to the shower tray, however leave a 3mm gap between the tray and the bottom edge of the tiles so that it can be filled with sealant to allow for any expansion or contraction and prevent any leaks.
Cut and lay your tiles in place and ensure they are correctly spaced using 2mm tile spacers and then allow the adhesive to fully cure for 24 hours. Help with ceramic tiling can be found in our project here.
Once the adhesive has fully cured you can then grout all the joints using a good quality grout and again leave for 24 hours to fully cure. For help with grouting see our project here.
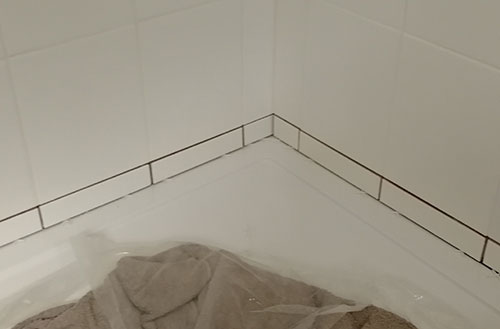
Replace any tiles that have been removed above the shower tray
Seal up shower tray with silicone
Once all is tiled and grouted the final job now is to apply some silicone sealant in the gap between the top of eth shower tray and base of the tiles.
Use a good quality sanitary sealant such as the Forever White by Everbuild that we generally use.
Apply it using a decent caulking gun, ensuring you force as much sealant in to the gap to completely fill it and then dampen your finger and run it gently over the top to smooth it off. Again, give it a good 24 hours to fully cure.
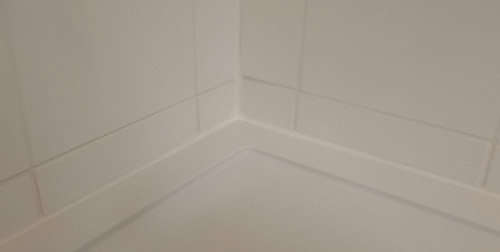
Fully seal the gap between the top of the shower tray and the tiles to prevent water ingress
Fitting a raised shower tray is a fairly straightforward job as long as you are replacing an existing shower tray with a like-for-like tray.
Once your brand new tray has been successfully installed, before you can put it to use you will need to install a shower enclosure. Check out our project here covering the different types of shower enclosure.
Once you have settled on the type of enclosure you want to go for, see our project here on how to correctly install a shower enclosure to fix it in place.

