If you’re decommissioning an unused open fireplace, or if you have a brick fireplace that’s looking tired and shabby and you’re not sure what to do with it, a lick of paint can work wonders and totally transform it.
In this DIY guide you will learn all you need to know about how to paint a brick fireplace, read on to find out how.
Why Paint a Brick Fireplace?
If you’ve recently moved into an older home, chances are it features a fireplace. However, a worn, dirty, or unattractive fireplace might be the one thing holding back a room from reaching its full potential.
Despite the romantic idea of an old-fashioned fireplace, many end up looking more sad than charming. Chipped, cracked, or damaged bricks, along with deteriorating mortar, can significantly diminish visual appeal.
Attempting to fix these issues by repairing bricks and mortar often results in noticeable discrepancies, making the fireplace look worse rather than better. The key lies in painting — this not only disguises repairs but also imparts a fresh, new look to the entire fireplace, giving it a whole new feel.
By painting your brick fireplace, you can effortlessly revive its appearance, creating a focal point that enhances the overall aesthetics of your space.
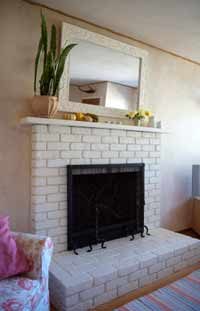
A beautifully painted brick fireplace
Choosing the Right Paint for Your Brick Fireplace
When it comes to painting your fireplace, selecting the appropriate paint is crucial for a lasting and appealing finish. Here’s a guide to help you make the right choice:
The optimal paint for your fireplace is a high-quality masonry paint, serving as both a primer and sealer. Renowned brands like Sandtex, Dulux, and other reputable manufacturers offer excellent options.
Brick surfaces, akin to bare plaster, are highly porous. To ensure proper adhesion of coatings, start with a top-notch primer to seal and prepare the surface.
For brick surfaces, a flat, non-textured finish is generally recommended. However, for rough surfaces, a textured finish can provide better coverage.
Once primed and sealed, if you desire a broader colour palette beyond masonry paint options, which tend to be limited, consider covering with a high-quality eggshell or emulsion paint.
The type of paint you choose depends on whether there is existing paint on the fireplace. If it’s an older oil-based paint, use an oil-based primer followed by a water-based top coat. For a blank canvas (e.g., bare brick or stone), opt for a water-based primer and top coat, which are environmentally friendly and offer an excellent finish.
Consider the finish of the paint — while eggshell is a popular choice, gloss and satin finishes should be avoided for fireplace exteriors. These finishes may cast shadows and accentuate repair areas.
Flat finishes, such as matte, generally provide the best appearance, maintaining evenness regardless of lighting and viewing angles.
It’s important to note that general-purpose masonry paint should not be used inside the fireplace itself, if it’s still in use.
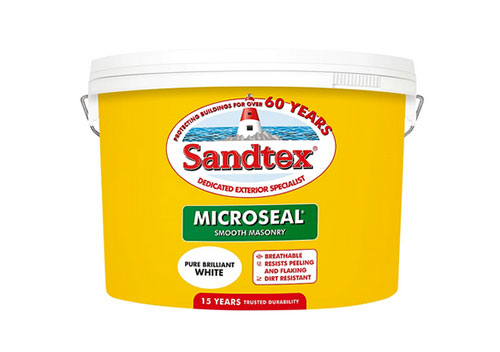
High-quality Santex masonry paint
Choosing the Right Paint for Inside Your Fireplace
While the outside of your fireplace is the main focus for painting, addressing the interior, where the actual fire sits, is also essential.
If you have decommissioned the fire and it won’t be used again for any form of heat generation, you can use standard paint, similar to what’s used for the exterior.
However, if the fireplace will be used for warmth and feature a fire or wood burner, you must use a specialised heat-resistant paint.
Several options are available on the market, offering a range of colours, though slightly more limited than standard paints. When purchasing heat-resistant paint, ensure it is resistant to at least 180°.
For the best results, explore heat-resistant paint options that not only provide protection but also complement the overall aesthetics of your fireplace.
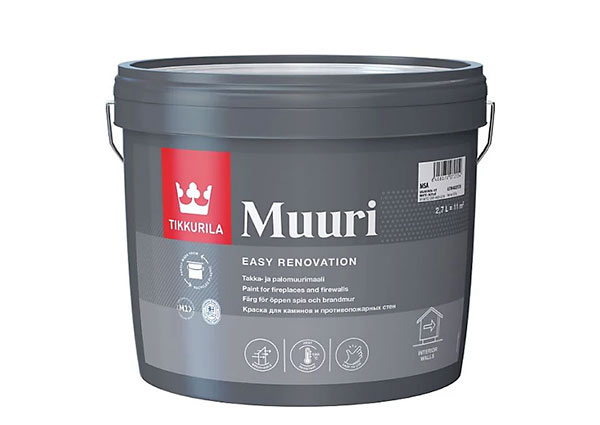
Heat-resistant paint available from B&Q
Choosing the Perfect Color for Your Brick Fireplace
When it comes to painting your fireplace, one of the significant decisions is selecting the right colour. Your choice is entirely personal, as it’s your home, but here are some considerations to keep in mind.
Lighter colours, like white or beige, can look stunning when fresh, but they may show signs of wear quickly if not regularly cleaned. If you’re still using your fireplace, soot and smoke can easily stain lighter colours in a short period.
If you aim to make a bold statement and turn your fireplace into a focal point, consider strong and bright colours. Two or three-tone colour schemes can also create a striking and standout appearance.
For inspiration and ideas on achieving a particular look, explore online resources such as web searches or Pinterest. These platforms offer a wealth of creative ideas to guide your decision-making.
Remember, your fireplace colour choice plays a significant role in the overall aesthetics of your room. Find the perfect colour that not only reflects your style but also enhances the ambiance of your living space.
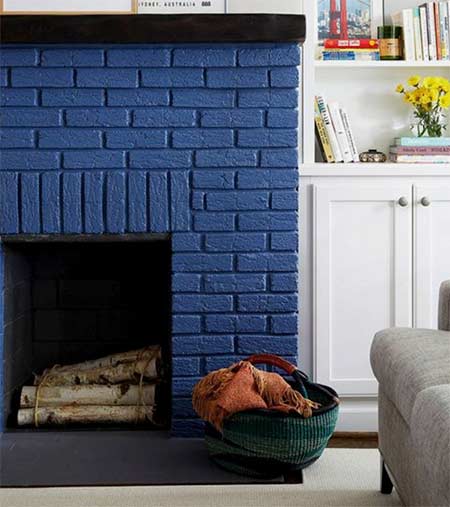
Dark blue painted fireplace – Image courtesy of Pinterest
Removing Paint From a Brick Fireplace
While this project primarily guides you on painting a fireplace, it’s crucial to briefly cover how to remove paint if the need arises.
Sometimes, you might encounter a painted fireplace that requires stripping before repainting for optimal results. Alternatively, after painting, you might realise you preferred the original look.
If the surface is relatively flat and smooth, a good-quality paint scraper can effectively remove a significant amount of paint. However, exercise caution to avoid damaging the surface while scraping.
Dealing with a rough or pitted surface makes scraping an uphill struggle. In such situations, the most effective method involves using a gel or paste-based paint stripper. Work the stripper off using steel or wire wool to reach into every nook and cranny.
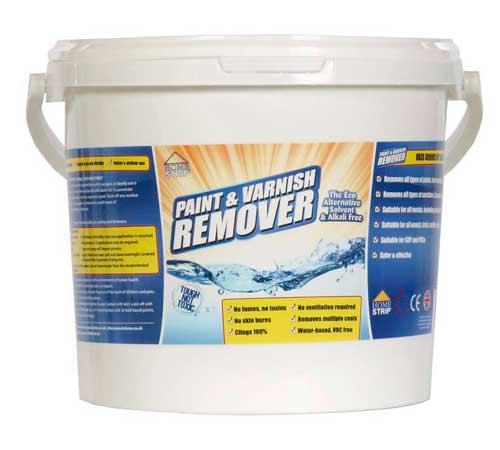
Gel-based eco-friendly paint and varnish stripper
Do I Need to Prime or Seal a Brick Fireplace Before Painting?
Absolutely! When you’re about to paint a bare brick fireplace, the first crucial step is to prime or seal it with a high-quality primer or sealer. Bare surfaces like brick, block, and stone are porous, and for the paint to adhere correctly and stay in place, it requires a stable base provided by a primer or sealer.
There are various options available for this process. One effective choice is to use any reputable masonry paint, such as those from brands like Sandtex.
While technically considered a type of top coat, these paints are specially formulated for masonry surfaces, offering one of the most stable bases. They can be utilised as an undercoat or primer, ensuring optimal adhesion for subsequent layers of paint.
Alternatively, you can opt for a dedicated masonry primer and undercoat, exemplified by the product featured in the image below. Products like this create a solid and stable base, setting the stage for a flawless finish with topcoats.
By investing in the right primer or sealer, you’re ensuring the longevity and aesthetic appeal of your painted brick fireplace. For a successful painting project, start with a solid foundation.
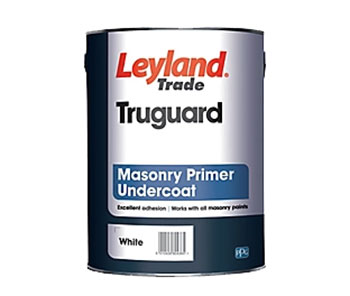
Masonry primer and undercoat
How to Prepare a Brick Fireplace for Painting
When it comes to painting, the preparation of the surface plays a crucial role in achieving a flawless finish, and this holds true for painting a fireplace.
Over its lifetime, a fireplace accumulates dust, debris, soot, sawdust, dirt, and grime, all of which embed into the exposed brick surfaces. To ensure proper paint adhesion, it’s imperative to remove all these elements.
Follow these steps to prepare your brick fireplace for painting:
- Protect the surrounding area with dust sheets or carpet protector to catch any mess.
- Use a stiff brush to carefully sweep the entire surface, simultaneously vacuuming to remove dust.
- Test a brass wire brush in an inconspicuous area to ensure it won’t mark the surface. If safe, go over the entire area to remove final debris and stains.
- Scrub the surface with a stiff brush, warm water, and Sugar Soap or brick cleaner. Pay attention to tight corners.
- Wipe the area with old rags and let it dry for at least 12 hours with proper ventilation.
- Once dry, use a high-quality filler to repair any cracks or damage. Let it dry fully before sanding for a smooth finish.
Even if the surface isn’t visibly stained, bricks and mortar collect dust and grime over the years, making cleaning essential. If stubborn stains persist, check our Cleaning a Brick Fireplace project for additional tips.
By investing time in proper preparation, you set the foundation for a successful and visually appealing paint job on your brick fireplace.
Tools and Products Needed for Painting a Fireplace
To complete the painting of a brick fireplace you will need the follows tools and products.
- Masonry paint or masonry primer
- Chosen top coat (if any)
- Paint brush – masonry brush for rough surfaces, normal brush for smooth surfaces
- Paint roller – Smooth sleeve for smooth surfaces, long-pile sleeve for rougher surfaces
- Stiff brush
- Vacuum cleaner
- Masking tape
- Sugar Soap
- Bucket
- Clean warm water
- Sponge
- Old rags
- Brass wire brush
- Rubber gloves
- Old clothes, boots etc.
- Decent dust mask
How to Paint a Brick Fireplace
Now that you know excatly what type of paint to use and why it’s necessary to prime or seal a brick surface before covering with a top coat, you can now get started.
Step 1 – Prepare Fireplace and Surround
To kick off, clear the space around the fireplace by moving furniture, ornaments, and any other items. This creates a clean working area for your project.
Once movable items are out of the way, safeguard fixed objects and flooring with dust sheets. Cover everything thoroughly to prevent dust, water, or paint from reaching unwanted areas.
Take a stiff brush to the fireplace and surround, eliminating surface dust, debris, and loose mortar. Use a vacuum simultaneously to prevent the spread of dust to other areas. Don’t forget to wear a dust mask for protection.
Test a brass wire brush on a small, inconspicuous area to ensure it won’t cause damage. If all’s well, go over the entire fireplace to remove ingrained dirt. Vacuum promptly to clear away the dust.
Now, give the entire area a good wash with Sugar Soap and a stiff scrubbing brush. Ensure the bristles reach into tight spaces to remove any trapped dirt. Wipe down everything, dry it as much as possible, and leave it to fully dry for at least 12 hours.
For the finishing touch, apply masking tape around the perimeter of the fire surround. Cover any surfaces that should remain free from paint marks.
Step 2 – Repairing and Filling Damage
Now that the fireplace is clean and any loose areas have been cleared, it’s time to address visible damage.
Choose a high-quality filler, such as Fill Once or a similar product, and apply it generously over any chips, damaged areas, and cracks. Allow it to cure for the recommended duration.
Once the filler is dried, use medium-grade 120-240 grit sandpaper to sand down the repaired areas. If the surrounding surface is flat, sand it to achieve a smooth, even finish. If the surface is not flat, aim to sand it in a way that blends seamlessly with its surroundings.
For additional tips on repairing cracks and damage, refer to our filling cracks project.
Step 3 – Apply a Primer
Now that your fireplace is thoroughly cleaned and any damage is fixed, it’s time to introduce some colour.
Using the appropriate brush for your surface, start by cutting in around the edges of the fireplace. Ensure the paint reaches into any tight corners for a seamless finish. If you need guidance on cutting in, check out our cutting-in project.
After completing the cutting-in process, cover the remaining fireplace with primer. Use a brush or roller with a deep-pile sleeve for an even application. Let it dry for the recommended time specified by the manufacturer.
Once the primer is dry, inspect the entire area. Touch up any missed patches and proceed to apply a second coat. Allow it to dry thoroughly.
Depending on the surface’s roughness and the presence of pits, a third coat may be necessary to ensure comprehensive coverage.
By applying a primer, you’re creating a solid foundation for the paint, ensuring a smooth and lasting finish on your fireplace.
Step 4 – Apply Top Coat Finish
Now, onto the exciting final step – applying the finishing top coat that will bring your fireplace to life. We recommend using eggshell for a durable and easy-to-clean finish. While emulsion is an option, it may not withstand cleaning as well and might not last as long.
Just like with the primer, start by cutting in around the edges. Then, use a masonry brush or a roller with a long-pile sleeve to cover the central area.
After the first coat has fully dried, apply a second coat using the same techniques and allow it to dry. Inspect the surface for any missed patches and touch them up with a brush.
In most cases, two coats should suffice, but if you want to ensure a flawless finish, go ahead and apply a third coat if needed.
Once your final coat is dry, step back and take in the beauty of your newly transformed fireplace. Congratulations on a job well done!
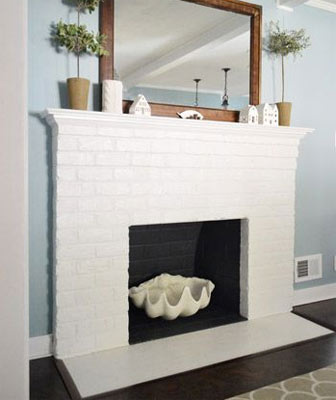
Minimal white painted fireplace – Image courtesy of younghouselove.com
Painting a brick fireplace, if you have one in your home and are unsure what to do with it, is a great idea and ultimately will totally transform it’s look and the overall feel of the room.