Rising damp can be a real problem in many UK homes and happens when water and moisture rise up from the ground, up through bricks, mortar and stone and the likes and cause huge amounts of damage to interior walls.
In this guide we look at the issue of rising damp and how to stop it and then fix any damage to interior surfaces that it causes.
What Is Rising Damp?
Rising damp is when moisture from the ground travels up through your walls. It happens because water is naturally drawn upward through tiny gaps in brick, stone, or blockwork, this is called capillary action.
The moisture keeps rising until gravity stops it, usually around 1.2 metres high. However, signs of damp, like salt stains or peeling paint, can appear even higher if the wall is covered with non-breathable materials like vinyl wallpaper or certain plasters and paints.
Understanding rising damp is key to stopping it early and protecting your property from long-term damage.
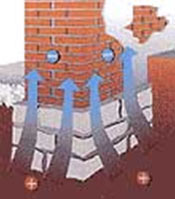
How rising damp can rise up from the ground and on up into your walls
What Are the Signs of Rising Damp?
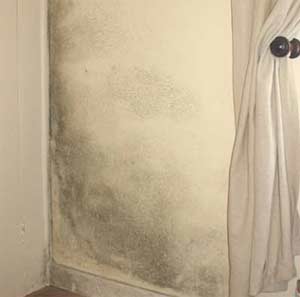
The most common sign of rising damp is a visible ‘tide mark’, a yellow or brown stain along the lower part of your wall, just above the skirting board. You might also notice bubbling or crumbling plaster.
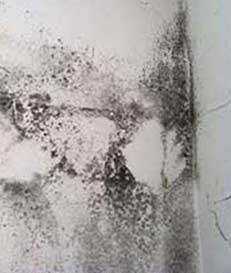
Other signs include damp or decaying skirting boards, soft or warped flooring, and white, powdery salt deposits on the plaster. In some cases, black mould spots may appear in the damp areas.
If you spot these signs, it’s important to act quickly to prevent long-term damage to your home.
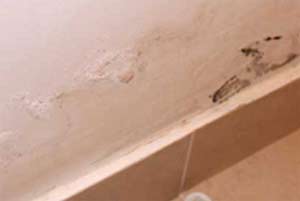
A yellow or brown ‘tide line’ above your skirting board is one of the signs that you may have rising damp in your walls
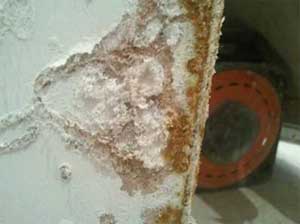
As damp evaporates from your walls it can leave salt deposits behind – these are another sign that you have a damp issue
What Causes Rising Damp?
Rising damp usually happens when your home’s Damp Proof Course (DPC) is missing, damaged, or not working properly. The DPC is a waterproof barrier built into the base of your walls to stop moisture rising from the ground and into the fabric of the building.
This barrier is normally about 6 inches (150mm) above ground level on external walls and level with your internal floor. It blocks water from soaking into bricks or stone.
A damp proof course is a waterproof layer in your walls that stops moisture from rising.
Even with a working DPC, rising damp can still occur if something allows moisture to bypass it, this is known as bridging the DPC.
Common causes of DPC bridging include:
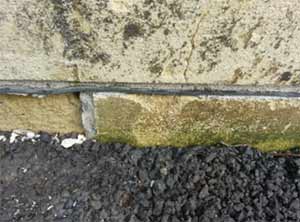
- Soil or paving built up higher than the DPC outside
- Structures like steps or planters attached above the DPC level
- Internal plaster touching a solid floor without a moisture break
- Debris inside a cavity wall creating a moisture path over the DPC
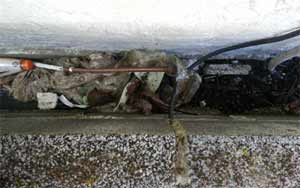
Debris inside your cavity wall can bridge the DPC and let moisture travel up your wall.
It’s important to check that your damp issue is actually rising damp. If damp patches are above 1 metre or spread unevenly, you may have penetrating damp instead.
To confirm what type of damp you’re dealing with, visit our detailed Damp Diagnosing and Analysing project page.
Uneven damp patches higher on your wall than 1.2 metres may mean that you have penetrating dampness in your walls instead of rising damp
How Can I Find Out What’s Causing My Rising Damp?
To diagnose rising damp, start by checking for a Damp Proof Course (DPC). This is usually a visible line in the brickwork, about 6 inches (150mm) above ground level.
If you have a DPC, make sure it hasn’t been bridged. Common causes include:
- Soil, paving, or steps built higher than the DPC
- Internal plaster touching a solid floor
- Debris or rubble inside the wall cavity
- Moisture travelling from an adjoining property with a higher or missing DPC
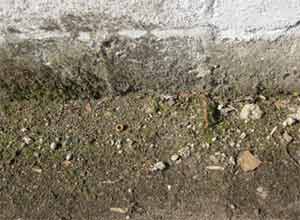
If your DPC is missing, blocked, or below ground level, it can allow moisture to rise up your walls.
If you suspect internal bridging, your cavity wall may be filled with debris, allowing water to bypass the DPC and reach the interior wall.
Here’s how to check for cavity wall bridging:
- Carefully remove one or two bricks from the external wall (consult a professional if unsure).
- Use a phone light or camera to inspect inside the cavity.
- If debris is found, remove what you can by hand (wear heavy-duty gloves).
- Use a vacuum cleaner or a bar to clear unreachable material.
- Once cleared, replace the bricks securely.
Proper inspection can help confirm whether your DPC is blocked or bridged and is a necessary step in stopping rising damp at its source.
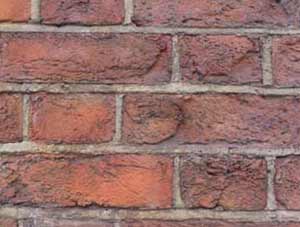
Brick wall with brick faces blown off
Treating Rising Damp
Before fixing the effects of rising damp, it’s essential to deal with the root cause. Covering up signs of damp, like repainting or repointing, won’t solve the problem and can lead to more costly repairs later.
Start by identifying what’s causing the damp:
- Blocked cavity? Clear it as described in the previous section.
- DPC bridged? Remove soil, steps, or plaster that’s higher than the Damp Proof Course.
If ground levels are too high, dig a shallow trench (about 6 inches) next to the wall to expose the DPC. Ensure it drains properly as standing water can cause new damp issues.
If your DPC is missing, damaged, or permanently bridged by a fixed structure, you’ll need to install a new Damp Proof Course.
This creates a continuous, waterproof barrier in your wall to block moisture rising from the ground via capillary action.
According to British Standard 6576 and Building Regulations, your DPC should be at least 150mm (6 inches) above external ground level.
There are different types of DPCs available:
- Plastic or bitumen sheet – installed during construction
- Chemical injection – ideal for retrofitting into older walls
Trying to ‘top up’ an old DPC isn’t recommended, as it may not form a continuous barrier, making it unreliable.
Proper damp proofing is the only long-term fix. Once the source is removed and a working DPC is in place, you can only then safely repair the damage left behind.
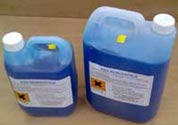
Chemical formulation Damp Proof Courses are installed in liquid form – a popular choice for DIYers
Dealing with Damp: Types of Damp Proof Course (DPC)
Most new homes have a Damp Proof Course (DPC) installed during construction, typically a plastic, stainless steel or sometimes slate sheet built into the walls. Retrofitting this type of DPC into an existing wall is hugely complex and will require a professional with the necessary experience in order to do it correctly.
Fortunately, there are several effective DIY and professional DPC options for existing buildings:
- Chemical DPC – Creams, gels, or pastes injected into drilled holes. Ideal for brick or block walls and popular with DIYers.
- Salt-blocking mortar – A cement-based injection used mainly on stone walls. Best handled by professionals.
- Osmotic DPC systems – Use embedded wires to repel moisture. Can be active or passive and are installed by specialists.
The simplest method for homeowners is a chemical injection DPC. It’s cost-effective and doesn’t require major structural work. You just drill holes and inject the solution. For step-by-step guidance, visit our full DIY DPC injection guide here.
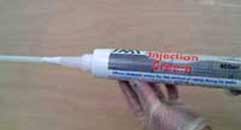
A chemical cream DPC is one of the easiest and best DIY damp proof treatment solutions
How to Install a Damp Proof Course to Stop Rising Damp
To stop rising damp effectively, your Damp Proof Course (DPC) must be installed in both the internal and external walls if your home has a cavity wall.
Install the DPC at least 6 inches (150mm) above external ground level, and make sure it’s at the same height inside the property.
If your outside ground is higher than the internal floor, dig a trench along the external wall. This allows the DPC to line up with your concrete or timber floor inside.
If digging isn’t possible, install the internal DPC above floor level to match the height of the external DPC. In this case, apply waterproof tanking to the lower section of the internal wall to stop moisture entering below the DPC.
Before installing, remove skirting boards and strip plaster from floor level up to where the new DPC will go.
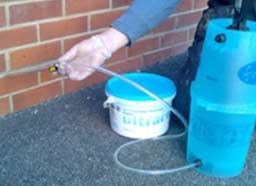
For DIY installation, the easiest method is a chemical DPC. These come as gels, creams, liquids, or pastes that are injected into pre-drilled holes in the wall, quick, cost-effective, and ideal for homeowners tackling rising damp themselves.
Water Repellent Chemical DPC: How to Install
- Drill 10–12mm holes into the brick, stone, or mortar. If you have a cavity wall, you can drill both walls separately or angle through from outside. Check manufacturers guidelines on your product.
- Follow the specific instructions on your DPC cream or liquid to determine the drilling pattern and whether the wall needs to be damp before application.
- Inject the DPC using:
- Liquid: high-pressure pump
- Cream, gel, or paste: skeleton gun or manual pump
- The solution spreads through the wall over time, creating a waterproof barrier that stops rising damp and allows the wall above to dry naturally.
- Fill the holes with mortar mixed with a waterproofing additive. This helps seal the wall and restores its original appearance.
- Let the mortar dry fully before treating for salts or replastering. This method is fast, clean, and almost invisible once complete.
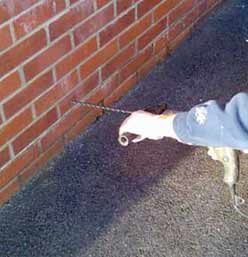
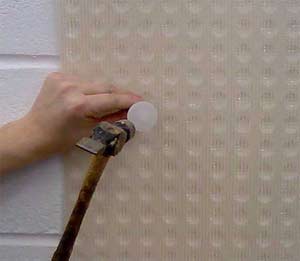
First, drill holes that are 10-12mm in diameter – varying this according to the DPC manufacturers’ instructions
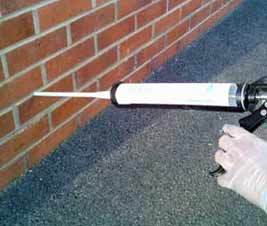
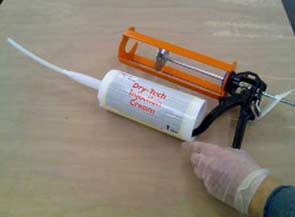
Fill the holes with a chemical formulation DPC – this is a cream/paste/gel being used with a skeleton gun
You can also use a hand pump to pump in your chemical formulation Damp Proof Course
Pore Blocking Salt Mixture
- Drill 18–20mm holes into the wall. This method is best suited for thick, solid stone walls due to the large hole size.
- Mix a cement-based mortar with water to create a slurry, then inject it into the holes using a heavy-duty mortar gun.
- As the mortar sets, it forms solid plugs and releases water-repellent salts. These salts spread through the wall over time, sealing the masonry pores and stopping rising damp.
- This technique requires specialist tools and generates high heat during setting, so it’s usually only cost-effective for professional installation.
Osmotic Water Repellence
Modern osmotic damp proofing systems, like the Lectros Active System, use corrosion-resistant titanium wire connected to a mains-powered control unit and transformer.
The wire runs around the wall like a ring, with loops (anodes) inserted into pre-drilled holes in the internal or external wall. These are hidden inside mortar joints or shallow grooves called chases.
Once connected and earthed, a low-voltage electric current flows through the wire, creating a field that repels rising moisture.
The system is secured in place with conductive mortar for better performance. While effective, this method requires specialist tools and installation skills, so it’s typically used by professionals.
How to Repair Walls After Treating Rising Damp
Once you’ve fixed the cause of rising damp, it’s time to repair any interior wall damage. Start by checking if your plaster is still solid. If it is, and the wall is dry, you may not need to replaster, you may just be able to treat for mould or salt before redecorating.
After treating damp, check plaster condition and look for mould or salt build-up before redecorating
Mould usually shows up as black spots. Use an anti-mould cleaner and finish with anti-mould paint, or add an anti-mould additive to wallpaper paste for extra protection.
For staining, apply a stain-blocking primer before painting or decorating.
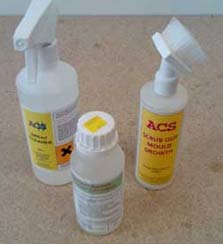
Use anti-mould cleaner to remove spots before redecorating
If you see fluffy white deposits, those are salts drawn from bricks by the damp. As long as the plaster isn’t crumbling, apply a salt neutraliser and let it dry completely before repainting.
Apply salt neutraliser to stop salts from reappearing
What If the Plaster is Damaged?
If the plaster is loose or flaky, remove it up to 30cm above the last visible sign of damp, all teh way back to the bare wall.
Once removed, use a damp meter or your hand to check where damp ends.
Replastering Options After Damp Treatment
You have three main options to stop mould or salts returning:
- Option 1: Clean the wall, apply salt neutraliser and anti-mould treatment, then replaster.
- Option 2: After treatment, fit a mesh membrane before plastering.
- Option 3: Use a breathable, waterproof render before replastering.
Fit a mesh membrane to block future salt contamination
Using Salt Neutraliser
Salt neutralisers can be:
- Painted directly onto the wall
- Mixed into plaster
- Used with pre-treated plaster
Always follow the product instructions and manufacturers suggestions for best results.
How to Apply Waterproof Render
Brush off all loose debris and fill any and all cracks with a 4:1 mix of sharp plastering sand and cement. For non-porous walls like granite, use a bonding agent.
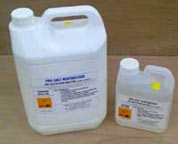
Lightly dampen the wall, then apply a base render no more than ½ inch thick using a 3:1 sand-to-cement mix with Renderproof waterproofer at a 1:40 ratio.
Scratch the surface while it’s damp. Once firm, apply a second layer the same way. Add layers as needed for thickness.
Finish with a skim coat of Board-Finish or Multi-Finish plaster—don’t polish or overwork it.
Wait 4 weeks before decorating. Use breathable emulsion (avoid vinyl). After 3 months, the wall should be ready for full paint or wallpaper.
Use a waterproofing agent such as Renderproof to make a breathable waterproof render for your walls that you apply after treating your damp and before you replaster
You can confirm that a render or other waterproofing product you are buying is of good quality by checking that it meets the British Board of Agrément’s standards over on their website.
Rising damp, or any damp issue for that matter, can be an absolute nightmare to resolve, however, fortunately today there are quite a few innovative and easy to use products that can be used to fix such issues once and for all.