
Damp in a chimney breast can appear in many ways and for numerous different reasons.
Common signs include brown stains on the plaster, damp patches that appear and fade or moisture on the chimney breast, ceiling, or nearby walls. You might also notice damp in the loft around the chimney or halfway up the breast itself.
In this how-to guide, we’ll show you how to spot the signs, find the cause, and fix the issue to prevent future damp and restore your chimney properly.
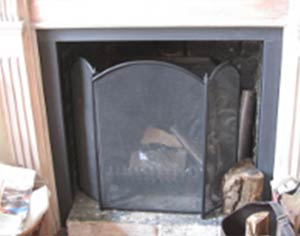
We look at what’s causing damp in your chimney
Are Chimney Damp Issues the Same as Other Damp Issues?
Chimney damp problems are often similar to other types of damp, but chimneys have some unique features that can create some unique issues.
Since chimneys carry smoke, soot, and fumes from fuel-burning appliances, these by-products can lead to specific damp-related damage inside or around the chimney breast.
First, confirm that damp is actually present. There are two simple ways to check:
- Relative Humidity Hygrometer – Measures air moisture levels to help identify potential damp sources in the room.
- Back of Hand Test – Feel the affected chimney area with the back of your hand, then compare it with a dry wall nearby. Use this as a quick moisture check.
For more accurate results, use a damp meter. These devices have two metal prongs. Press them into the wall, and the meter will display the moisture content as a percentage.
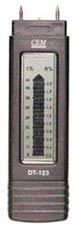
A damp meter shows how much moisture is in your wall, helping you confirm damp issues.
Before repairing any damage, you must locate and fix the source of the damp. If the root cause isn’t resolved, any cosmetic repair will be short lived and certainly fail in time, costing you more in the long run.
Be thorough in your inspection. Chimney damp can be tricky to diagnose and may be caused by more than one issue. The list below outlines common problem areas to check.
Some chimney faults are difficult to see without accessing the roof. If you have the right ladder, understand roof safety and know how to avoid damaging the structure, you can inspect the chimney yourself. See our ladder safety guide here.
However, if you’re missing any of the skills or equipment, do not attempt roof access, it’s dangerous and could lead to injury or damage. Instead, use a good pair of binoculars to safely inspect the chimney from the ground.
Damp Chimney Breast Causes – What to Check Around the Chimney
Before you can fix a damp chimney breast, you need to find out exactly what’s causing it. There are several possible reasons, and each one needs a different approach.
Below is a list of the most common causes to check first.
Open or Capped Chimney Stack
Start by checking if your chimney stack or pots are open or capped.
If your chimney isn’t in use and the top is open, rain and moisture can enter, travel down and cause damp at the base of the chimney breast.
This often looks like a rising damp or a DPC issue but the moisture is actually coming from above, not below.
To confirm, remove a brick at the base of the chimney and check for internal moisture.
If it’s damp inside, consider fitting a vented cap or chimney cowl to stop water getting in while still allowing airflow.
A low-cost option is to remove the pots and cover the chimney with a paving slab, raised about 2–3 inches on all sides for ventilation.
Planning to reuse the chimney later? Go with cowls instead. While you’re at it, clear any internal debris as it may be causing DPC bridging.
If your chimney is capped and sealed, check if it’s ventilated. A fully sealed top can trap cold air, leading to condensation when your home warms up, this can also cause damp on the chimney breast.
Fix this by replacing sealed caps with vented cowls or a raised slab solution.
Also, if your fireplace is sealed off and there’s no vent in the wall in front of it, install one. Fit an airbrick about 300mm above floor level to let the chimney breathe. See how to replace a brick here.
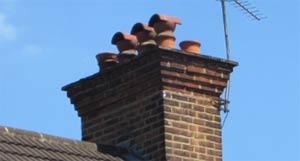
Add cowls to your chimney pots to shield against rain and add ventilation
Chimney Stack Mortar
Check the mortar around your chimney stack and at the base of the pots. Look closely for any cracks, cracks or gaps.
Cracked mortar lets in rainwater, which can seep down inside the stack or leak into your home, leading to damp patches on your chimney breast.
Even if it’s not the main cause, damaged mortar makes the problem worse and should be repointed to stop further moisture issues.
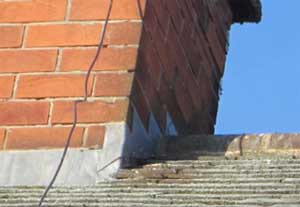
Mortar missing from your chimney stack can allow damp to enter
Shared Chimney
If you share a chimney with your neighbour, any alterations they have made could be causing your damp problem.
They may have installed a wood burner without a proper flue or blocked internal ventilation, both of which can lead to trapped moisture and chimney damp issues.
Have a friendly conversation and ask if they’ve made any changes to the chimney, even if this was years ago, as some damp issues take time to show.
If their work is the likely cause, aim to agree on a fair solution together. Stay calm and cooperative to avoid conflict, especially where shared costs may be involved.
Check Your Roof Area Around the Chimney Stack
Once you have thoroughly checked your chimney for any faults and potential causes the next port of call is the roof as there are many areas here that can also cause a whole host of chimney breast-related issues.
Here follows some of the most common:
Lead Flashing
Lead flashing seals the joints where your roof meets walls or a chimney stack, keeping water out. Over time, flashing can crack, lift, or deteriorate, letting moisture in and causing damp issues on or around your chimney.
Check for gaps, splits, or loose sections in the flashing. From inside your loft, look for daylight around the stack or signs of leaks like damp patches or white salt deposits (hygroscopic salts).
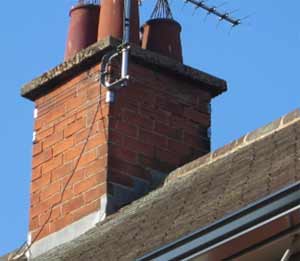
Check that your chimney flashing is in good condition
Lead is the best material for flashing, it’s flexible, long-lasting, weather-resistant, and ideal for temperature extremes. While there are modern alternatives, none match lead’s durability.
If your flashing is damaged, replacing it is the most reliable fix, even though it can be costly. Learn more in our Chimney Flashing project.
As a cheaper short-term option, use flashing tape to cover cracks or splits. We recommend Sylglas, available at most DIY stores. See our guide on repairing lead flashing for step-by-step help.
You can also seal small gaps with silicone, but keep in mind: nothing beats proper lead replacement for a lasting fix.
Guttering
Blocked or damaged gutters can lead to rainwater leaking onto your walls and seeping into cracks, causing damp in your chimney breast.
In heavy rain, broken guttering allows water to run directly down the wall, soaking brickwork and mortar. Over time, this moisture can be drawn into the chimney by capillary action, especially in wet climates.
Also check where your downpipes discharge. If water pools near the base of your wall instead of draining away, it could be a major source of damp.
Look for cracks, leaks, sagging sections, or loose brackets in your guttering and downpipes. Even small issues can lead to big damp problems if left untreated.
Fix any damage quickly to protect your chimney from water ingress. See our guide on how to replace plastic guttering for easy DIY instructions.
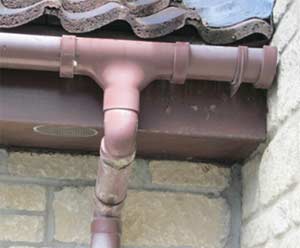
Inspect your guttering for cracks and faults which could be exposing your walls to moisture and damp
Damaged Tiles
Cracked, broken, or missing roof tiles can let rainwater in, leading to damp patches and other internal moisture problems on your chimney breast.
Roof tiles are designed to keep your home watertight. Once cracked, split or damaged, they provide a direct path for water to reach internal walls. This is often far from the actual leak so can be misleading in terms of the actual cause.
Inspect your entire roof, not just the area above the chimney. As said, damp and moisture can travel inside before showing up elsewhere.
If you spot any broken tiles, replace them as soon as possible. While it’s possible to DIY, tile replacement can be risky and complex.
If you are in any way unsure or lack confidence in accessing your roof to make any repairs then consider hiring a roofing specialist for a safe and proper fix.
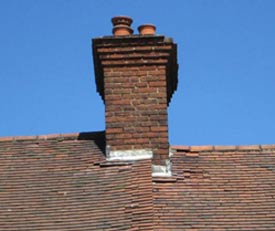
Broken roof tiles can allow damp into your roof timbers
Inspect the Chimney Breast Itself to Identify the Cause of the Damp
Once you have completed checking the roof area to identify any issues that may need fixing there, the next job is to turn your attention back to the chimney and breast as there are a variety of issues here that could be the root cause and also contribute to issues even if it’s not the actual cause.
When checking out your chimney breast, take note of the following areas and features:
Ventilation (Capped Chimneys & Bricked-Up Fireplaces)
Sealing a chimney or bricking up a fireplace can trap moisture, leading to condensation and damp. Proper ventilation is key to preventing this.
Blocked fireplaces should have an air vent fitted about 300mm above floor level. In homes with underfloor voids, vents can go below the floor to reduce draughts.
If you are wanting to block up an old fireplace correctly, see our guide to blocking up a fireplace here.
Without correct airflow, capped or sealed chimneys can develop damp inside the stack or in loft spaces. Ventilation is needed at both the top and bottom of the chimney to let air circulate and prevent cold air from getting trapped.
Top ventilation options include:
- Fitting vented caps or cowls to chimney pots
- Placing a raised paving slab (2–3 inches) over the chimney stack
Installing top vents may require working at height, so consider hiring a roofer if unsure.
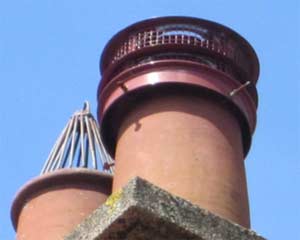
Add a vented cap or cowl to your chimney pot to improve airflow
To ventilate a sealed fireplace, insert an air brick in the front wall, 300mm above the floor, or under the floor for less draught.
This involves removing one or more bricks from the chimney breast and replacing them with a vent. It’s a straightforward job with basic DIY skills.
Proper ventilation helps stop damp caused by condensation and keeps your chimney dry over time.
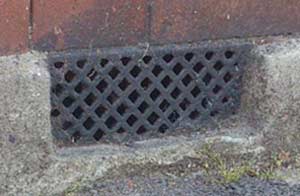
Add an air brick or vent to your blocked up fireplace to add ventilation at the bottom of your chimney
Wood or Gas Stove Causing Chimney Damp
If you use a wood-burning or gas stove, your chimney must be correctly lined. Without a liner, moisture from burning fuel can condense on the cooler inner walls of the chimney, leading to damp.
This often shows as:
- Damp patches or brown stains near the top of the chimney breast
- White salt deposits (hygroscopic salts)
- Visible water droplets
These signs mean moisture is building up inside the chimney instead of being safely vented out.
Important: Burning fuel produces carbon monoxide, which is a colourless, odourless gas that can be deadly. Without proper ventilation or a functioning flue, fumes may enter your living space. Always ensure the room has enough airflow, and never ignore warning signs of poor ventilation.
If you’re seeing damp issues and have a stove installed, get the flue inspected immediately. It may be a lining issue, or simply poor chimney ventilation, but don’t risk it.
To find a certified expert, visit the National Association of Chimney Engineers.
Damp Proof Course (DPC) and Chimney Damp
Check if your chimney breast has a damp proof course (DPC). This is a horizontal barrier (usually slate or plastic) around 150mm (6 inches) above ground level. Many older homes were built without one, especially around chimneys.
Without a DPC, moisture from the ground or water inside the chimney stack can rise into the walls, causing rising damp.
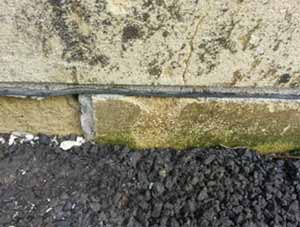
Check if your chimney breast has a DPC — install one if it’s missing
If there’s no DPC, install a chemical damp proof course. It’s a simple DIY job, simply drill holes at the base of the chimney breast and inject a specialist cream using a pump or skeleton gun.
This cream absorbs into the brickwork and forms a water-resistant barrier to stop damp rising. Learn how to do this in our guide to larger DPC jobs and small-scale DPC installations.
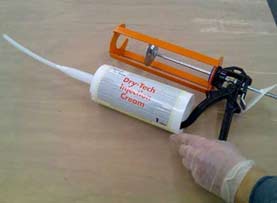
Injecting a DPC cream is quick and DIY-friendly
Also check for a “bridged DPC”. This happens when debris inside the chimney or surrounding cavities builds up above the DPC level, letting moisture bypass the barrier. Remove any rubble or blockages to prevent this.
Damp issues around a chimney breast can manifest themselves in a variety of different ways, and in most cases, each has a unique set of characteristics defined by the reason for their existence.
In the information below we take a detailed look at the most common individual chimney breast issues and how they are caused and subsequently then fixed.
Damp Patches on Walls and Ceilings Around Chimney Breast
The first issue on the list is brown and yellow staining on or around the chimney breast, so if you are experiencing this issue, find out what is the most likely cause and then how to resolve it once and for all.
Issues Caused by Damp Patches
If you’re noticing yellow or brown stains on ceilings near your chimney breast, these marks often point to water leaks.
Start by inspecting the chimney flashing on your roof. Cracks or splits here can let water in. Repair or replace damaged flashing if needed.
Next, check your loft. If the chimney breast feels damp, the cause could be crumbling mortar (pointing) or open chimney pots. Installing a chimney cowl can help stop rain from entering while keeping airflow.
Tip: Rain entering unused chimneys is more problematic, as moisture isn’t evaporated by heat.
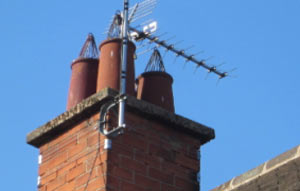
Open chimney pots can let rainwater into disused chimneys
Even if no leaks are found, damp patches can still occur due to &ldquohygroscopic salts”, minerals left behind from burning fuels like coal or wood. These salts absorb moisture from the air and draw it into the walls, especially during damp or humid weather, so they may be more apparent during these times.
Over time, these salts migrate through chimney brickwork, appearing as recurring damp spots. They often bring staining from soot or even kitchen vapour in humid rooms like bathrooms or kitchens.
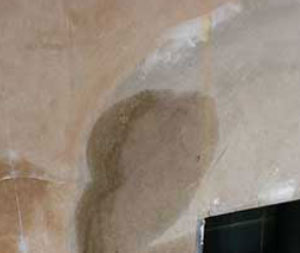
Hygroscopic salts can present as white staining on chimney breasts
How to Fix Damp Patches on Chimney Walls
If your chimney walls show damp patches, fixing them properly is key after you have resolved the root cause. Damp often damages plaster beyond repair, especially if salts are involved, so cutting corners won’t help in the long run.
Step 1: Remove Damaged Plaster
Strip away all affected plaster right back to bare brick. This includes surrounding areas where salts may have spread.
Step 2: Let the Wall Dry Fully
Allow the wall to dry completely. This may take weeks or even months. Speed up the process using ventilation, fans or a dehumidifier.
Step 3: Apply Salt Neutraliser
Once dry, treat the exposed wall with a salt neutraliser. Follow the product’s instructions carefully for best results.
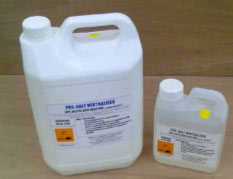
Apply a salt neutraliser to block future salt damage
Step 4: Replaster and Redecorate
Use a salt-resistant plaster or mix salt neutraliser into your plaster. Once dry, you can redecorate confidently.
Advanced Fix: Air Gap Membrane
For severe salt contamination, we recommend you install an air gap membrane. This protective barrier prevents future salt transfer from the wall.
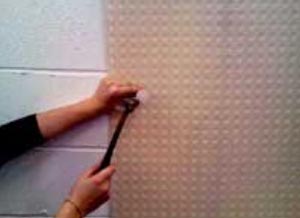
Use an air gap membrane to block salt and moisture from reappearing
To learn more about these handy membrane barriers and how they are installed, see our lining damp walls project here.
Can You Skip Replastering?
If the wall dries without damage, you might apply salt neutraliser directly and redecorate. But be warned, this is often a short-term fix. For a lasting result, strip the wall and do it properly.
Yellowing Stains and Marks around the Base of Chimney Breast
Next on the list are yellowy stains that may be appearing on or around the base of the chimney breast. If you are experiencing issues such as these, find out what’s likely to be causing them and how you can sort the issue once and for all.
Chimney Base Damp: What It Means and How to Check
If you notice damp patches just above your skirting boards, typically no higher than 1.5m, it’s likely to be rising damp from the base of your chimney breast.
Common Causes of Rising Damp:
- No Damp Proof Course (DPC): Many older chimney breasts and properties for that matter were built without a DPC. To check, inspect the area around the chimney both inside and outside. A DPC is usually visible as a thin plastic or slate layer about 150mm above ground level. If you can’t see one, consult a qualified tradesperson for confirmation.
- Bridged DPC: Debris inside the chimney or nearby wall cavities can build up above the DPC, letting moisture bypass it and rise up the wall. This is a common hidden cause of chimney damp.
How to Investigate:
Carefully remove one or two bricks at the base of the chimney to check for debris in the cavity. If rubbish is present, it may be allowing water to bypass up and around the DPC. Never remove more than two bricks without professional advice from a builder or surveyor.
Note: In some older properties, they never featured a cavity wall arrangement of cavity space and only had solid walls. If this is the case for you and you have no DPC then one will need to be inserted. Either consult a qualified tradesman or see our project on DPC injection.
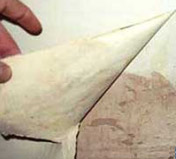
Brown stains on your lower wall are a sign of rising damp
How to Fix Damp at the Base of a Chimney
If your chimney breast has no Damp Proof Course (DPC), installing one is essential to stop rising damp and resolve any associated damp issues.
Step 1: Inject a Chemical DPC
Drill holes about 150mm (6 inches) above ground level into the chimney breast. Inject a chemical DPC cream, which soaks into the brick and creates a waterproof barrier. These kits are widely available, affordable, and suitable for DIYers with basic skills.
Step 2: Let the Wall Dry
Allow the area to dry out completely. This can take weeks or even months depending on how damp the wall is. Use plenty of ventilation, fans, or a dehumidifier to speed things up.
Step 3: Replaster and Treat Salts
If plaster or wallpaper is damaged, remove and replace it. Before replastering, apply a salt neutraliser to stop future staining from hygroscopic salts.
Step 4: Check for Debris Inside the Chimney
If rising damp is caused by a bridged DPC due to internal debris, carefully remove 1–2 bricks at the base and inspect the cavity with a torch or phone camera. Never remove more than two bricks without consulting a builder or surveyor.
Wear strong gloves and clear out any rubbish to allow moisture to escape properly. Once cleaned, allow the space to dry, then replace the bricks and redecorate.
Step 5: Stop Water from Entering the Chimney
If water is entering through open chimney pots, install chimney cowls. These prevent rain from getting in while still allowing airflow and ventilation.
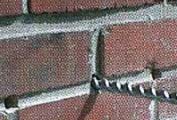
Inject your cream DPC into the holes you have drilled in your chimney breast
Plaster Blowing off Walls or White Salts Present on Surfaces
If you are experiencing plaster blowing off of your walls or white salts forming on your walls surface then this could be due to a variety of potential damp problems, in fact most of those that have been listed above.
To discover the root cause of the issue read on below.
The Problem With Blown Plaster on Chimney Walls
If damp in your chimney is bad enough, it will in almost all cases damage the plaster. Once plaster dries, it doesn’t cope well with moisture, so any ongoing damp issue can cause it to crack, crumble, or fall away (also known as “blown plaster”).
Severe plaster damage often means there’s a water leak. Check your roof, flashing, and chimney stack carefully using the steps mentioned earlier to find and fix the source.
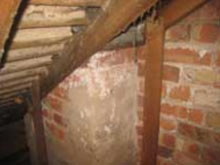
Inspect your roof space for signs of leaks
If you can’t find a leak but notice white, powdery stains or rough, crusty patches on your chimney wall, you may be dealing with hygroscopic salts.
These salts come from burning fuels like coal or wood and can rise to the surface of your chimney breast over time. They attract moisture from the air, making walls feel damp or showing patchy stains that appear and disappear with humidity.
When salts build up, they can erupt through the plaster, causing it to bubble, flake, or fall off the wall, this is often mistaken for rising damp.
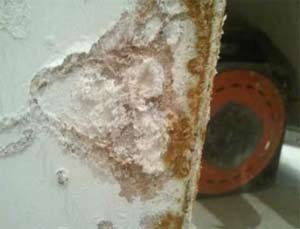
Salts can blow plaster off your walls
How to Fix Blown Plaster Caused by Damp or Salts
After fixing the root cause of the damp, whether a water leak or salt contamination, remove all damaged plaster from the chimney breast and nearby areas. Let the wall dry out completely. This can take weeks, depending on severity.
For water leaks: Once fully dry, replaster and redecorate.
For salt-related damp (hygroscopic salts): Apply a salt neutraliser to the bare wall before replastering. This blocks future salt build-up and moisture attraction.
You can either:
- Apply neutraliser directly to the wall surface
- Add it to your plaster mix
- Use a ready-mixed plaster with neutraliser included
In terms of what to use, always opt for a trusted and reliable brand of salt neutraliser. There should be plenty on offer at your local DIY store.
In severe cases: If salt damage is extensive, fix a breathable damp-proof membrane to the wall after neutralising. Then plaster over the membrane to fully block future salt and moisture issues.
Once everything is dry (follow product guidelines), go ahead and replaster, paint, or wallpaper your chimney wall as desired.
If you’ve followed the steps above but still can’t pinpoint or fix the damp issue in your chimney, it’s time to call in a professional. An experienced surveyor or damp specialist can quickly diagnose the problem and recommend the best long-term fix.

 DIY Doctor Ltd,
  0845 6342 179


