Timber joints are crucial for a successful project. Loose or uneven joints can ruin the quality and appearance of your work.
This guide explores the half-lap joint, also known as the shoulder or rebate joint. These joints are perfect for creating furniture, boxes, and other sturdy shapes.
What Are Half Lap Joints?
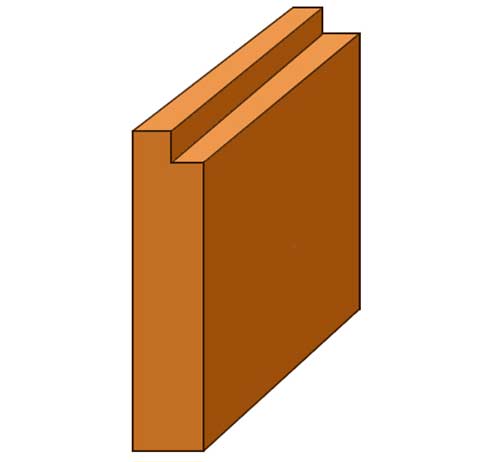
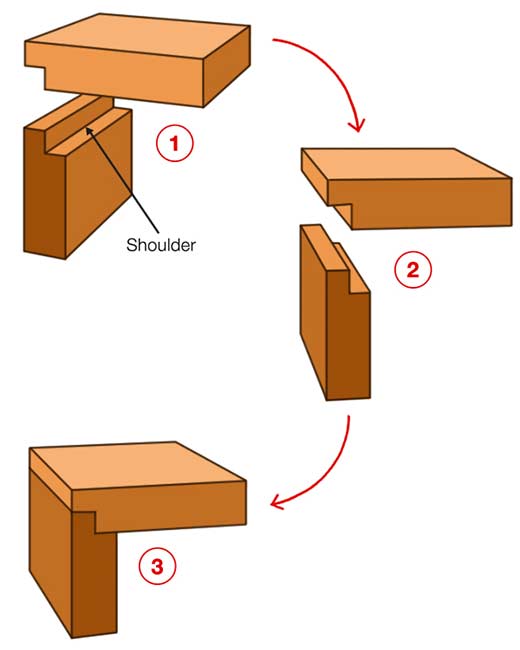
A half-lap joint, unlike a butt joint, involves cutting out a section from each piece of wood to create a stronger connection. This design offers a larger surface area for bonding, resulting in a more durable corner once glued.
For added strength, you can reinforce the joint with screws, nails, or dowels, making it even more robust.
One minor drawback is the visible grain on one side of the joint. However, with high-quality wood and careful cutting, this can become a visually appealing feature.

Shoulder and rebate joint showing how the lapped sections are fixed together to form a solid corner
Choosing the Right Timber for Your Lap Joint
The quality of your lap joint depends on precise cuts and the timber you choose. Poorly selected timber can ruin the final look, so it’s important to pick wisely.
If you’re aiming for a rustic or worn appearance, rough or knotty wood might work, but it still needs to be chosen carefully to match your desired style.
For a clean, smooth finish, consider the following:
- Overall Condition: Ensure the timber is smooth, planed, and free from splits or water damage.
- Bowing: Avoid bowed timber, as it can complicate your project. Choose straight, well-stored wood.
- Knots and Imperfections: While knots can add character, they can also interfere with cutting. Opt for timber with minimal knots unless they fit your design.
Essential Tools for Making a Half Lap Joint
The quality of your half lap joint largely depends on the tools you use and the care you take. While skill plays a role, it’s something you can develop with practice.
Invest in the best tools you can afford. High-quality tools are typically sharper, stronger, and more precise than cheaper alternatives. If purchasing isn’t practical, consider renting top-quality tools for a reasonable price.
If you must use budget tools, ensure they are sharp, straight, and square for the best results.
In terms of the tools required, here is a list:
- Set of sharp, good quality chisels
- Tape measure
- Pen or pencil
- Marking gauge
- Carpenters square
- Tenon saw
- Bench hook, clamp, vise or Workmate
- Plane
- Mallet
- Epoxy wood glue
- Clamps
How to Make a Half lap Joint
If you would like to make your very own lap joint, work through the steps below:
Step 1 – Marking Out Each Half Lap Joint
To mark your cutting lines, a marking gauge is the ideal tool to use, but a pencil and ruler will work too. For this guide, we’ll use a pencil and ruler.
Start by measuring the width of your timber’s end—the section that will join with the other piece. Divide this measurement by two to find the centre. Mark this midpoint on both sides of the timber using your pencil, then draw a line connecting these points.

Line marked on the timber’s end face using a pencil and ruler
If using a marking gauge, set the pin at the halfway width of the timber. Place the stock flat against the edge and score a line across the end face. This line can be hard to see, so go over it with your pencil.
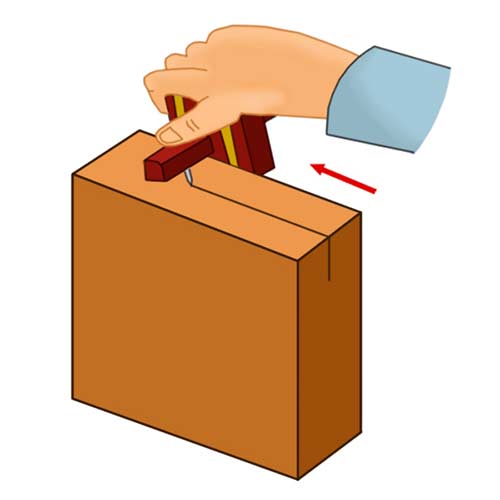
Using a marking gauge to mark the timber’s centre on the end face
Next, transfer this measurement down each side of the timber. Mark the centre along the side’s depth, then connect these marks to form a vertical line.
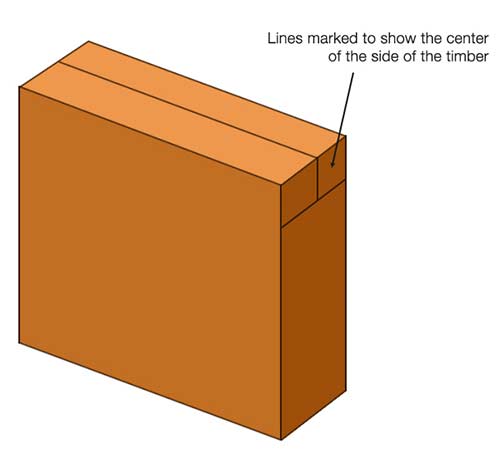
Lines marked to indicate the center of the timber’s side section
Finally, mark a line across the wide face of the timber to complete the square to be cut out. Double-check your measurements with a ruler, then use a tri-square or ruler to draw the final line. A tri-square ensures accuracy.
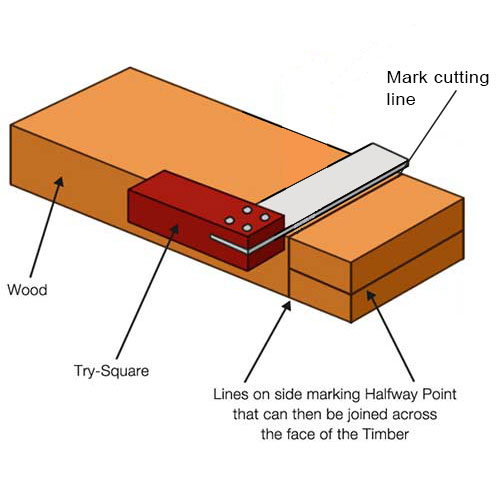
Marking the final cut line across the timber’s face
After marking, your timber should look like the image below. If everything is correct, you’re ready to move on to the cutting stage.
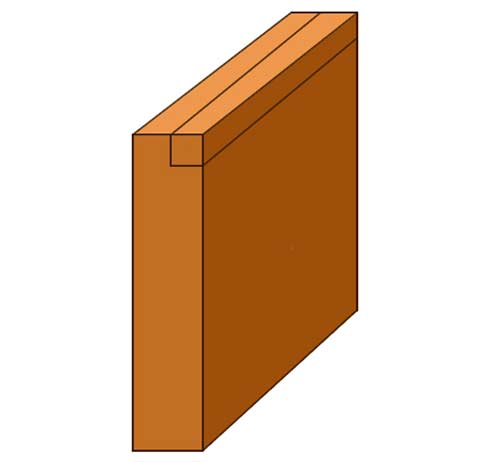
Cutting marks and lines all completed and ready for cutting
Step 2 – Cutting Away Waste Timber for Lapped Joints
Before cutting, securely clamp your timber in a vice or Workmate to prevent movement.
For this project, we’ll start by cutting along the top line. Position your timber upright in the vice or Workmate, ensuring it is level. Use a spirit level to check, adjusting as needed, then tighten the clamp.
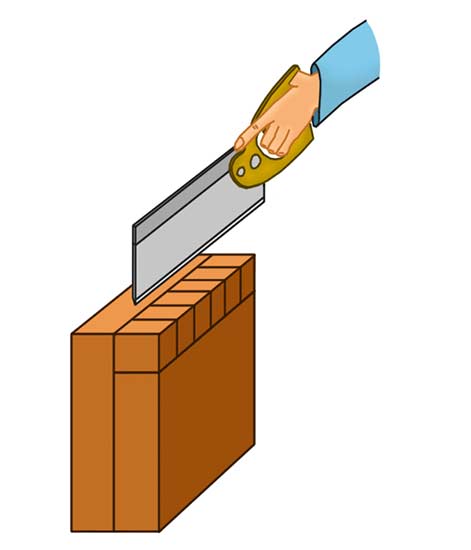
A tenon saw is ideal for this cut due to its rigid top brace, which helps ensure straight cuts. If you don’t have a tenon saw, a jack saw will work, but you’ll need to cut slowly and carefully to maintain a straight line.
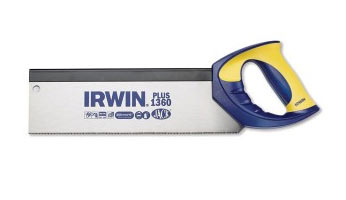
Using a tenon saw for straight cuts
Begin cutting at the far end of the timber, angling the saw downward. As you cut, gradually level the saw to ensure a straight, even line, avoiding cutting past your marked lines.
Cut slowly, checking your progress regularly to stay on your lines. Once you’ve cut down to the marked depth, this side is complete.
Cutting along the first lines
Next, loosen the clamp, flip the timber on its side with the final cutting line facing up, and re-secure it, ensuring it is level.
If available, use a bench hook to assist with this cut. A bench hook provides a stop edge, making it easier to keep the timber steady while cutting.

Using a bench hook for the final cut
With the timber secure, begin your cut. Again, take your time, stopping regularly to ensure you’re following your lines. As you near the end of the cut, go slowly. Once you reach the first cut, the waste timber will loosen and can be easily removed.
Final cut completed, with waste timber removed
Now that one half of the joint is complete, repeat these steps to create the matching half on the other piece of timber.
Step 3 – Smoothing Your Rebate and Shoulder Joint Cuts
Even with a sharp saw, your cuts may have rough edges that need tidying. The method you use depends on whether you’re working with or across the grain:
- With the Grain: Use a shoulder plane for this. Place your timber on a flat surface and secure it with a G-Clamp, using a scrap piece of wood as a guide along the joint edge. Run the plane gently across the surface, removing a small amount with each pass. Regularly check the fit with the other half of the joint to avoid over-cutting.
- Across the Grain: For across-grain work, use a sharp bevel edge chisel. Place your timber on scrap wood to protect your surface, and clamp it securely. Hold the chisel level with the edge of the joint, then gently tap with a carpenter’s mallet to remove any rough spots. Take off small amounts and check the fit often to prevent over-cutting.
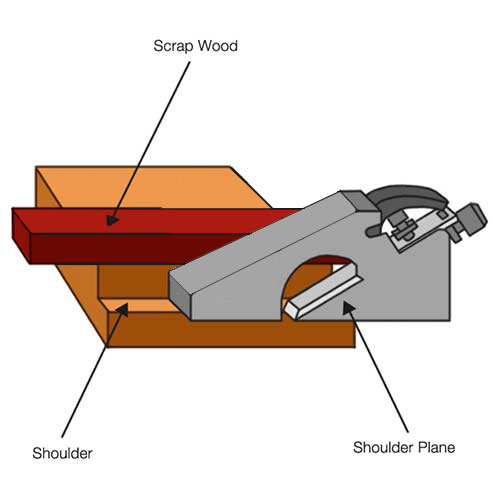
Using a shoulder plane for same-grain cuts
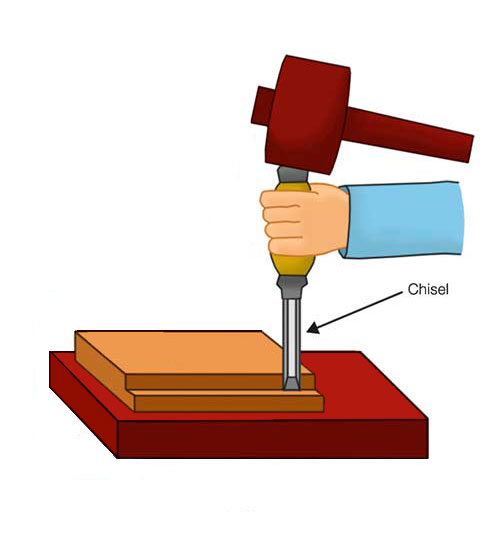
Using a sharp chisel for cross-grain cuts
If rough patches remain, use fine sandpaper (400 grit or higher) to smooth them out, being careful not to remove too much material.
Step 4 – Assembling Your Joint
After cutting and tidying, it’s time to join the timbers.
Start by applying a high-quality wood adhesive to all joint surfaces. Fit the pieces together and secure them tightly using clamps to prevent any movement while the glue dries.
Leave the joint clamped for the time recommended by the adhesive manufacturer. Once fully dry, remove the clamps. Congratulations, your joint is complete!
Assembling the shoulder and rebate joint
Congratulations on completing your first shoulder and rebate joint! To further enhance your woodworking skills, explore our other timber joint projects below.
- Timber Joints – The Bridle Joint
- Timber Joints – Halved Joints
- Timber Joints – Mortise and Tenon Joints
- Timber Joints – Dovetail Joints
- Timber Joints – Finger Or Comb Joint
- Timber Joints – Shoulder / Rebate / Lapped Joint
Making your own timber joints , although a skilled and tricky job to begin with, once you have perfected this skill, can be very rewarding and satisfying and as long as you work methodically and take your time, it’s certainly something that anyone can master.