If you have seen any of our other DIY guides covering timber joints you should be well aware at this point how useful a strong and well formed woodworking joint can be and also how integral they can be to the successful completion of a project.
Besides the structural strength and integrity timber joints can add, they also give a very aesthetically pleasing and authentic look to a piece of work. For example, the heavy oak beams used to form the structure of many old barns, that become the focal point of many a barn conversion wouldn’t look anywhere near as nice if they were bolted together as opposed to using the correct joints.
As we have mentioned in our other timber joints projects covering timber halving joints and also mortice and tenon joints etc…. it is hugely important that you use the correct type in the correct situation, for example, a corner halving joint may be fine for building a set of shelves, but might not be the best choice for a heavy piece of furniture that’s going to get a lot of use.
What is a Bridle Joint?
For this DIY project, we are going to look at the bridle joint. This type is essentially very similar to the mortise and tenon joint, but the main difference between them is the length of the “mortise” and the depth of the “tenon”.
With the bridle joint, the mortise runs the full depth of the tenon meaning that the grains of the actual tenon can be seen at its end, whereas with a traditional mortice and tenon this is not so.
This does have some advantages in the fact that the longer and deeper sections allow for a greater fixing area which technically makes the joint slightly stronger.
On the other hand, this also has a downside in that the grains are visible to all. This might not be a major problem to you but if it is, the traditional mortise and tenon may be a better choice as any end grains are hidden. This generally looks much more visually appealing.
One of the main uses for the bridle joint (or “T-bridle” as they are also called) is for joining uprights such as legs etc…. to benches, tables and other similar objects where you don’t want to affect the structural integrity of existing rails or horizontal beams.
Using a bench as an example, you could cut the top rail in half and use mortise and tenon joints to join the rails to an upright to use as a leg, but this would weaken the top rail. By joining the leg using a bridle would retain the strength in the top rail.
When it comes to this joint, there are essentially three different types, with slight variations:
- T-Bridle Joints: As stated above, they are great for use in situations where vertical (downward) forces are applied and also where twisting forces could come in to play to form a strong and stable join between horizontal and vertical timbers. On the flip side to this they are not ideal for objects that will be moved regularly, as the constant movement will cause weakness over time
- Corner Bridle Joints: Very similar to the above, but only this time, instead of being used to form a joint in the centre or middle of a horizontal section, it is formed at the ends to create a corner. In terms of use, the above also applies – Great for use where downward and twisting forces will be featured, such as in tables and chairs, but not so great if they will be in constant movement use and they will become weak and fail over time
- Mitered Bridle Joints: As you may have guessed, this is pretty much the same as the above, but instead of the joint being formed at 90° horizontally or vertically, it is formed using a mitre at 45°. Normally only used for the corner joints (but not always) it does have a few advantages in that they can also resist laterally applied forces (as well as vertical and twisting) and also the joints themselves, if created correctly, can be almost invisible which makes them ideal for use in such things as furniture making
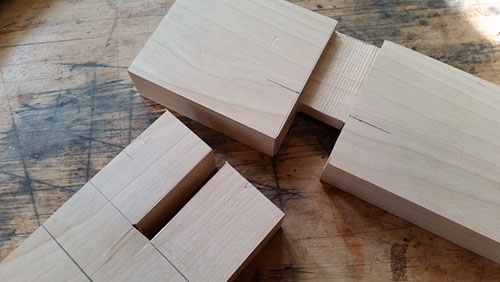
Tee or T-Bridle joint created between horizontal and vertical timbers
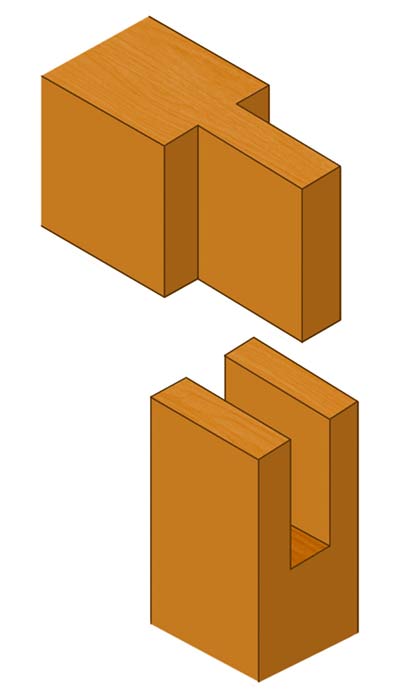
Corner Bridle joint created at the corner between horizontal and vertical timbers
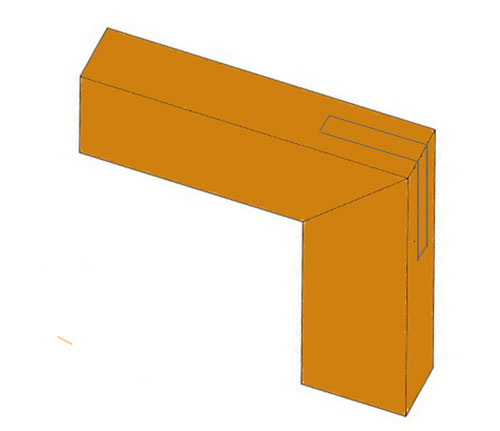
Mitered corner bridle joint
Choosing the Correct Timber for Joints
To make the job as easy and visually appealing as possible you need to carefully choose the timber that you are going to use. Several things to be aware of are as follows:
- Knots: Choose timber that is as free from knots and other imperfections as it possibly can be. When making your joints, if there is a knot in the wood you are using, you can pretty much guarantee that it will fall right where you want to make your cuts
- Bowing: Depending on the type of timber you are using, in some cases if it has been lying around for a long time or has been stood upright, leaning against a wall, then it may have bowed which will mean you will have to try and straighten it, adding unnecessary work and hassle
- Condition: The visual appearance of finished project is in most cases, very important so you are going to want to choose your wood so that it will help towards this goal. With this in mind, look out for splits, planing imperfections, excess sap etc….
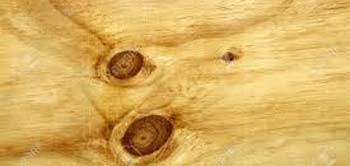
Badly knotted section of timber

section of bowed timber next to a straight piece of timber – Image courtesy of tunin.co.uk
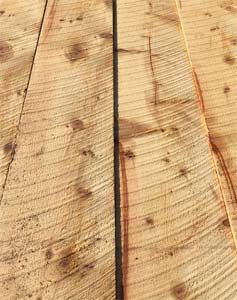
Section of rough cut and unplaned timber
What Tools do I Need for Making a Bridle Joint?
As with most woodworking jobs, their success does in some way (but not always) rest on the timber you are using, your level of skill you have and also the tools you are using.
If you are going to be using a screwdriver as a chisel, a jack saw instead of a tenon saw or mole grips instead of a G-clamp, this will obviously have an impact on how good your joints, fittings, cuts etc… are going to be.
With this in mind you should try and get hold of or purchase the best tools that you can find or afford. Cheap tools are fine to use, but make sure they are sharp and straight, or at the very least, the right tools for the job.
How to Make a Bridle Joint
As there are several types of bridle joint, for the purposes of this project we are going to show you how to make a corner bridle.
Check Your Timber and Square it up
The first task is to check the timber you’re going to use and decide which faces are going to be pointing where e.g. visible once fitted. If there are any knots or slight imperfections and they can be hidden it’s a good idea to do this.
The next job is to square up any ends you will be working with. Don’t rely on the fact that they have been cut square in the shop or factory as in most cases they won’t have been.
Measure and mark a line all around the outside of each piece of timber, over each face around 4-5mm from the end and then cut this off.
Ensure that you cut this off 100% square so that you can be sure you have a totally square edge. Ideally, use a mitre saw, bench or table saw or something similar as you can then be sure that all is square and true. If you don’t have one, use a hand saw by all means, just check and ensure all is straight and true.
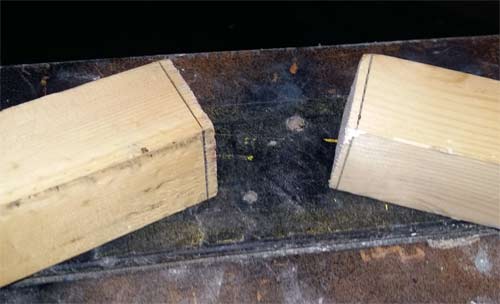
Waste cuts marked on ends of timber to cut off to leave a square edge to work from
Mark Your Bridle Joint Cutting Lines
So that you know exactly what and where you need to cut you are now going to mark all of our cutting lines. To get your marks accurate, measure down with a tape or ruler, make your marks and then joint them up with a square.
Firstly, measure and mark the depth of the piece of timber you are going to use as your mortise section on the piece you will be using for the tenon. The tenon will run the full width of the mortise so this measurement needs to be precise as you don’t want it poking out of the end.
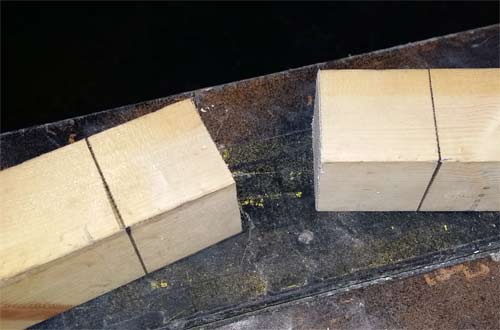
Lines marked on timber for shoulder of mortise and tenon joints
With your line marked all the way around, now measure the width of the tenon timber and divide it by three. The tenon itself needs to be a third of the width of total width of the timber.
Accurately mark points at a third and two thirds of the width on the end edge and also along the line that you marked that signifies the width of the mortise timber and then joint the two parallel marks together to form the tenon.
If you have one, the best tool to use here is a mortise gauge. If you do have one, but are unsure on how to use it, there is a handy guide on using mortise gauges here, but for the sake of this demo we are going to use a a pencil, ruler and square.
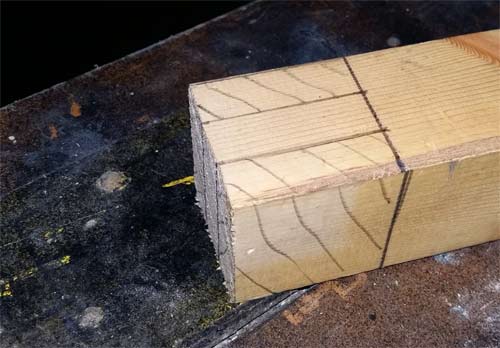
Tenon joint cutting marked on timber and waste area to be cut away shaded in to avoid any confusion
Flip the timber over 180° and repeat the above on the opposite side to the one you have just marked. Once done, you should now be able to see the two waste sections you will need to chop away. So that this is easily identified, shade the scrap sections in so that it is easy to see what has to be removed.
To mark the cutting lines for your mortise uses the exact same steps as above, only instead of cutting away the two end pieces to leave the middle section, this time you will cut out the middle and leave the two ends.
Cutting Your Bridle Joints
Before you start cutting it is a very good idea to score over any cut lines that run across the grain with a marking knife. By doing this you should then avoid too much breakout at the ends and it should also be easier to start with a straight cut from the off.
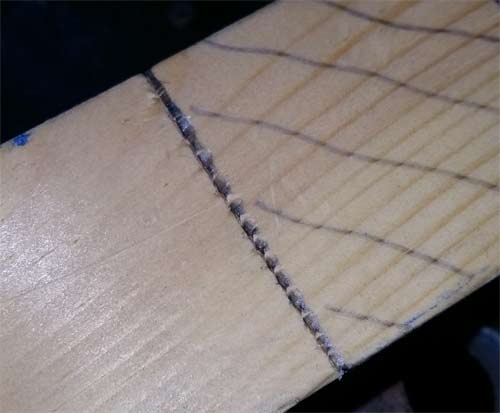
Cutting lines across grain scored with a marking knife
It doesn’t matter too much which section you start with, so feel free to pick one, but for this demo we are going to start with the tenon.
Using a vice or Workmate, position your timber and grip it tightly, angling it to about 45°. Position your saw at the point on the top and start cutting downwards. Cutting at an angle will not only allow you to easily see the line defining the shoulder that you need to cut too, but will also allow you to stay nice and straight.
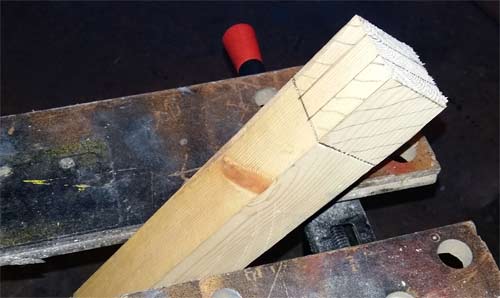
Timber gripped tightly at an angle in Workmate
Make sure that you are cutting in the right place e.g. if your line is marked on the exact point that you measured to, you will need to cut outside or inside the line to retain the precise size of your joint. This goes for both sections.
With your first cut made, turn the timber round and repeat the above on the second cut.
Finally, level the timber up and then cut downwards and through the “triangluar ” area that is now left in the middle. Once done you should now be able to remove the first waste section. Now you can repeat the above for any other cuts you need to make to finish off the tenon.
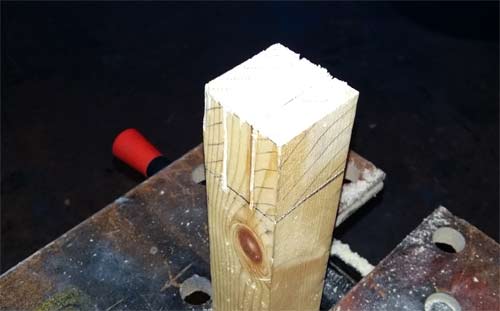
Timber leveled up in Workmate ready for cutting down previously made cut lines
Cutting out your mortise joint uses, again, the exact same process but there is an added level of difficulty in that you need to make a horizontal cut along the base of the waste piece to remove it. There are several ways to do this successfully:
- Drill a Hole: This is probably the easiest and best way – using a suitably sized drill bit (as close to the width of the joint as possible, but not over it) drill down through the waste section so that you can then cut down to the hole. Once cut and the waste removed you can then tidy it up using a chisel. NOTE: Drill your hole before you make you cuts!
- Use a Chisel: If you have some good quality, very sharp chisels then it should be possible to chisel away the waste after cutting. This is reasonably tricky to do and also to avoid any unwanted damage so best left to those with some existing carpentry skills
- Use a Coping Saw: If you have a coping saw then, once you have cut either side, you can slide the blade down and cut along the base. Again, keep this as level and straight as you possible can
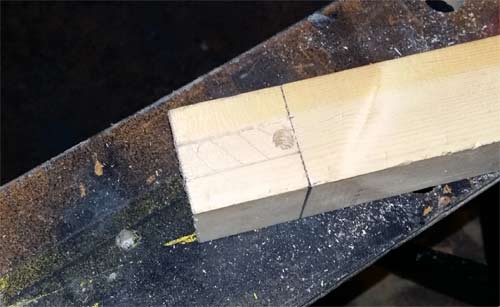
Hole drilled at base of mortise joint to allow waste timber removal
You should now be looking at what resembles a bridle joint so position the two sections together to see how good the fit is. If all cuts and chiseling are dead straight and accurate then the joint itself should be tight but moveable, but if you have to force them together you will need to do a little adjustment.
Tidying up Your Joint
If you are lucky enough to have a nice tight (but not too tight) fit then before we actually fix the joint together it’s a good idea just to run over any cut faces with a fine grade (240 grit or more) sandpaper.
Using a sanding block or flat piece of scrap timber, wrap the paper around and then gently run it over all surfaces, stopping frequently to test your fit and ensure that you have not taken too much off.
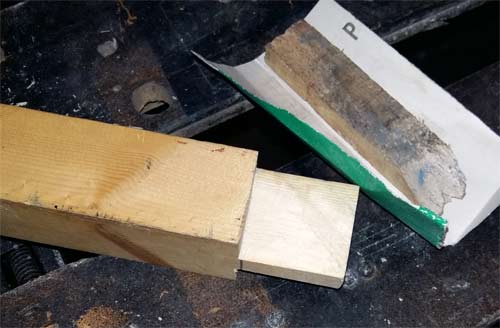
Sandpaper ready for tidying up tenon joint
If the joints are so tight you can’t actually fit them together then we are going to need to take off some material. Preferably, this will be done using a very sharp chisel, but if you don’t have one, use a course grit paper such as 80.
To find the binding points, gently push each section together until they stick and make a mark. Also, check over each cut face to make sure it is flat and level. If you can visually see that an area is not then this is a good starting point.
Additionally, if you can see from any cutting marks that remain that a cut has gone slightly off, then this is also a good sign of where to start.
It is a very tricky job to make accurate adjustments to a fit, so as you sand or remove material, check the fit regularly to make sure that you are not taking off too much, which will then render your joint loose and sloppy.
Fit Timbers Together and Complete Your Bridle Joint
In terms of a permanent fix, you have a few options:
- Screwing: If the joint itself is for practical purposes only and not visual then you may want to screw it together. Measure and mark equal points along the diagonal for your screws. Using a suitable drill, drill your pilot holes and then use a countersink bit to sink the screw heads below the surface. Before the actual fixing, check that the whole joint is square
- Gluing: Using a suitable joint glue or even a decent construction adhesive, coat each internal face of the joint and then push them together, wiping off any excess that squeezes out of the sides. Before the adhesive cures, check the joint is totally square, clamp it up using a decent clamp to prevent movement and then leave for the manufacturers recommended time for it to set. If you decide to use the screwing method, it’s also a good idea to add some glue also as this will make the joint even stronger
- Using a Dowel: This is more of an advanced fixing method and involves positioning the joint together and then drilling a hole through both the mortise and tenon sections and then inserting a dowel rod through the hole that then holds the joint together. The dowel itself is usually slightly bigger that the hole so that it is a tight fit and won’t fall out and glue or adhesive is also added for extra strength. This is ideal for tables and furniture as it will help the joint as a whole cope with regular movement
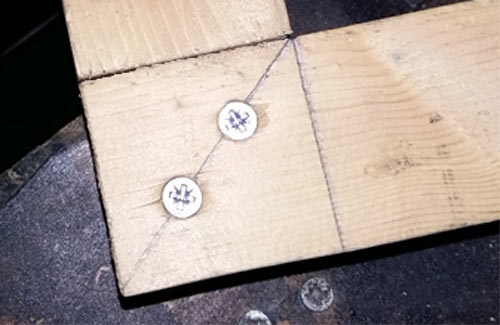
Bridle joint successfully fixed together using screws
Once you have chosen your fixing and your bridle joint is now complete, pat yourself on the back and go and make a nice cup of tea, job done!
If you would like to know about all the other different types of timber joints, check out our other projects below.
- Timber Joints – The Bridle Joint
- Timber Joints – Halved Joints
- Timber Joints – Mortise and Tenon Joints
- Timber Joints – Dovetail Joints
- Timber Joints – Finger Or Comb Joint
- Timber Joints – Shoulder / Rebate / Lapped Joint

