Having adequate lighting outside your home is always a great idea for numerous reasons, but the main ones include lighting dark areas to prevent would-be burglars and providing decent lighting for entertaining.
With this in mind, this guide looks at how an external wall light is installed and wired up.
Regulations for Exterior Wall Lights
Whenever electricity is involved there are always a hefty amount of rules and regulations governing what can be done and, importantly, by who. When it comes to wiring up exterior wall lights, this is no different, there are strict rules that need to be followed to ensure any work is done to a certain standard.
As we all know, water, moisture and electricity don’t mix at all and when there is the chance that the 2 may meet, the regulations are even more rigorous. With this in mind, no one other than a Part P registered electrician is allowed to work on or install mains-powered lighting outdoors. These rules are in accordance to BS 7671 wiring regulations.
Failure to comply to these rules can mean that your home insurance is invalid and in the event that it causes any issues, it may not pay out if it’s found that any work has been undertaken by someone not qualified to do it.
Further more, as exterior lights are subjected to water and moisture due to rain and the likes, at the very minimum they should be IP44 rated which means they can resist moisture and the splashing of rain, but not pressurised water. More information on IP ratings and what they mean can be found in our bathroom lighting project here.
For more tips and help staying safe when working with and around electricity, see our electrical safety project here.
Types of Exterior Wall Lights
As with all things, especially when it comes to the design side of things, there is a vast array of options to choose form to suit the colossal range of styles, sizes, tastes that need to be satisfied.
With this in mind there are essentially 3 different types of exterior wall light; the traditional light, the modern contemporary light and the security light.
- Traditional: Traditional exterior lights tend to be either the lantern-type or the down hanging type. These styles are generally Georgian or Victorian and appear as the traditional coach lantern light
- Modern/Contemporary: Modern and contemporary exterior lights are generally quite minimal in appearance and come in a range of types including down lighters, up and down lighters, standard wall lights, bollards and a great many others
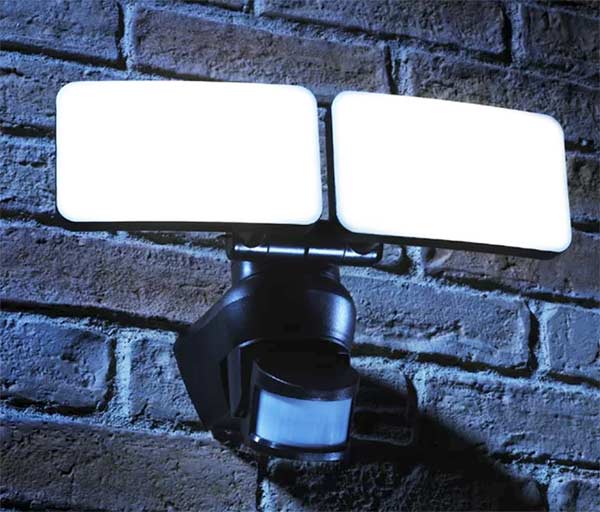
- Security: Security lights are generally wall-mounted and feature either 1 or 2 bright flood lights, capable of illuminating a wide area. They normally also feature a PIR so they turn on automatically when movement is detected
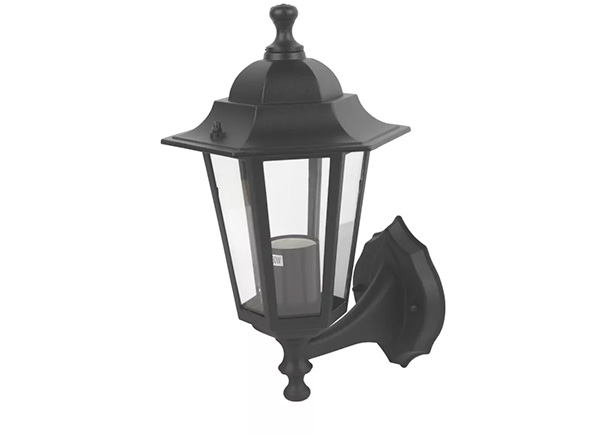
Traditional style coach lamp
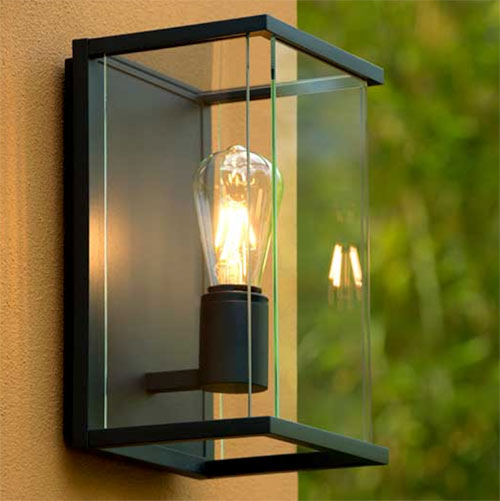
Modern wall light – Image courtesy of lighting-direct.co.uk
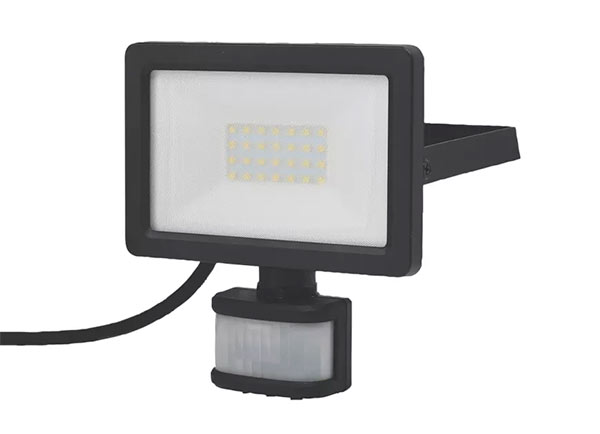
LED security flood light
The above is only a very brief run down on exterior light styles as there are literally hundreds, but most fall into one of the above style-types.
It’s also worthy to note that traditionally, exterior wall lights would have used either a standard incandescent bulb or a halogen bulb, but today most now use an LED bulb, which last much longer and are a huge amount cheaper to run.
Additionally, as stated above, any exterior wall lights should also be at minimum IP44 rated, to ensure that no water or moisture is allowed to get in and cause potential shorting and associated dangers.
Tools and Materials for Wiring Exterior Wall Lights
In order for exterior wall lights to be installed correctly by a qualified professional, the following tools and materials will be required.
- Desired external light(s) of your choice
- Enough electrical cable to run from source out to all of your lights (should be either 1mm or 1.5mm twin and earth)
- Earth sleeve
- Round PVC conduit, fittings and clips – enough to run from source out to each light, if running externally
- PVC capping or trunking to run in chase – if running internally in a chase
- Drill/driver
- Wall plugs
- 8x 30mm screws
- Selection of drill bits
- Core bit/long drill bit to drill through wall (unless you already have an accessible power source outside)
- Wire cutters
- Wire strippers
- Hacksaw
- Exterior sealant plus sealant gun – Fill around hole through wall
- Concrete nails for fixing capping/conduit in chase
- Hammer
- 5 amp junction box
- Small flat head screwdriver
- Philips screwdriver
- Single gang 1 way switch
- Trunking – if running wires down to switch as surface mounted
How to Wire Exterior Wall Lights
For the purposes of this example, we are going to run through the process of installing a single exterior security light with a PIR sensor to turn it on and off.
If you wanted to add a series of lights to your property and also feature a switch to turn them on and off when required, this follows pretty much the same process and principles as the example below.
To fit an exterior security light of the non-metallic type, with PIR sensor and double insulated, to the exterior wall at the side of the front door, the procedure would be as follows.
Step 1 – Mark Light Position
The first job to do is to mark the position where you are going to fix the light on the exterior of your home. Ensure it’s in a place that will illuminate any required areas.
Another thing to consider when placing your light is where you are going to get power from. Although you may have an ideal location for your light, if running power to it is going to be a nightmare you may want to consider moving is to another location where a power source (existing cable in the loft etc.) is more accessible.
For this example, a feed from a nearby accessible cable in the loft is going to be tapped into using a junction box. It will then run through the exterior wall and into the new light.
If running any distance to the light, it will need to be run in suitable conduit to your new light location.
There are other methods which can be used, but which one is best will very much depend on your electrician.
Mark the location of where the light is going. Hold the light unit or back plate up to the wall and make a pencil mark on the bricks or render, tracing the shape of the back plate and the fixing holes.
Some units incorporate machine screws with domed headed nuts, which will secure the unit and leave a nice finish. Also mark the entry point of the wire you are going to use to power the unit, so you know where holes need to be drilled.
Step 2 – Drill Cable Hole Through Wall
The next job is to then drill out the power cable hole through the house wall so that it’s easy to see where the new cable will run from the existing light circuit cable in the loft to the light install location.
Ideally this will be at the install location so that the supply cable comes out behind the light and can be wired straight into the back of it.
Before you start, you need to determine the length of drill bit you will need to penetrate from one side of the wall to the other.
If your property is a post-war build, it is likely to be a cavity wall type. The depth of the cavities have varied over the years from 13mm (half inch) to 100mm (4 inches). You will need to measure the thickness of the wall.
The easiest way to do this is by accessing the loft, go to the edge of the roof line and look at the top of the wall plate. Using a tape measure, measure the width of both wall skins and the cavity.
For solid wall construction, you should choose a 300mm (12 inch) drill bit and 400mm (16 inch) for the majority of cavity walls.
In terms of the size of the hole, a 10mm diameter drill bit should suffice, as you will only need 1.0mm twin and earth wire for this unit.
Having determined the point at which you are going to drill though the wall, with a centre punch or other pointed object tap an indentation in the wall with a hammer, to prevent the drill bit slipping from the mark.
Drilling through from outside to inside or vice-versa is not really critical, what is important is that you do not break out a chunk of brickwork or plasterwork, when breaking through.
Knowing the thickness of your wall, from the tip of your drill bit, measure this distance and affix some insulation tape minus 10 – 15mm to the drill bit.
Whether you use a conventional hammer drill or a percussion drill usually with an SDS type chuck, the idea is to turn off the hammer action when the tape marking reaches the wall edge and the final few millimetres is with rotary action only. This should prevent any significant break out from either side.
Step 3 – Plan Power Supply Cable Route
The next job is to access the power supply for the light and decide how cable is to be run. Before doing anything, make sure that the circuit you are working on has been isolated in your consumer unit or fuse box!
Once in the loft, a suitable existing lighting circuit cable is located. The closer to the install location for the exterior light the better.
Ensure that the chosen cable is an actual supply cable and not a switch cable.
If you can run cable internally all the way to the install location, this is best as the supply cable can then run straight into the back of the light.
If this isn’t possible then when the cable exits the property it will need to be run in exterior PVC conduit out to where the light will be installed.
To ensure that the light can be independently switched off without relying on the PIR sensor a switch also needs to be installed so the supply cable will need to run from the existing supply down to a switch, back up and then on to the light.
Step 4 – Install Switch
The switch needs to be installed in an easily accessible location. Ideally this will be on the ground floor near to the front door but if the power is being taken form a cable in the loft, running down through the house to a switch may be more hassle than it’s worth so a suitable location upstairs may be better.
If there is an airing or storage cupboard then this would be an ideal location.
To run the cable there are 2 choices:
- In a Chase: If running in a visible area this is the most visually appealing method as the cable is hidden in the wall but does involve chopping a channel in the wall so it’s quite messy. For a full run down on what’s involved, see our chasing and filling walls project here
- In Trunking: This is the easiest but as the trunking is surface mounted, it will be visible and in all honesty, it’s not that attractive. However if running inside a cupboard of some kind it’s ideal
Which ever method is selected, the switch is fixed in place, 1mm twin and earth cable is run down from the supply location. The cable is then cut and it’s then wired up with the live brown in the COM terminal, the other end of the live brown in the L1 terminal and the 2 neutrals are connected together in a 5 amp wiring block.
An alternative method of wiring the switch would be to use the junction box. With this a single wire is run down to the switch from the junction box. The brown live is connected to COM and the blue neutral to L1 as the switched live (with brown tape wrapped around to indicate so).
It would then run to the live terminal in the junction box which when turned on would activate the light.
Once connected up, the face plate for the switch is then securely screwed on to the pattress box, securing it in place.
The other end of the cable is then run back up the trunking or chase and over to where it exits the building to the light.
As commented above, if there is a run between where the cable exits the building to the light it will need to be run in PVC conduit so that it is protected.
Run the cable down inside the conduit, fix conduit clips to the wall (ensuring they are straight and level using a spirit level) and then run it to where the light will be sited.
At the end and end cap is generally used to run the cable into the cable glad on the light.
If the cable is run in from the rear then generally it is sealed and protected by the fixing plate at the rear of the light, but to be sure, it’s a great idea to just cover around the hole and the cable with some silicone sealant to prevent any water and moisture ingress into the loft area.
Step 5 – Fix Exterior Light to Wall and Wire up
Exterior lights are usually fixed to the wall using a metal plate, with screws and rawl plugs. Simply drill out the fixing holes marked above using a suitable sized drill, insert wall plugs and then screw the light to the wall using suitable screws (normally 8 x 40mm).
For more help on fixing things to walls, see our project on fixing to masonry here.
Before it’s fixed in place fully, ensure the supply cable runs nicely through the lights wall plate with no snags or kinks, or into the entry gland if fixed from the front.
Finally, the supply cable is cut to length, the outer sheath and inner cores stripped and each is connected to it’s relevant terminal block – Live brown to live, neutral blue to neutral, inside the light fixture.
Once done, the light is then fully secured to the wall.
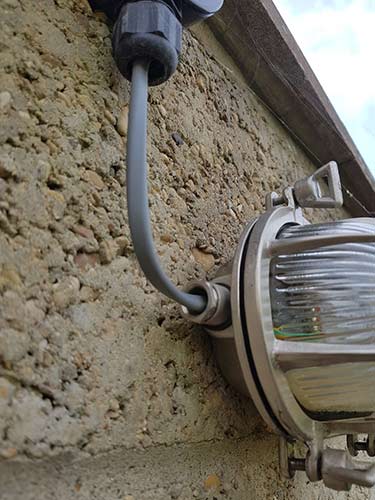
External security light fixed to wall
Step 6 – Connect up Supply Cable
Once the exterior light is fully wired up and installed, the final job is to then connect the other end of the supply cable into the existing supply.
Prepare the new wiring to be partnered to the existing wire by stripping the outer sheath and then stripping 10mm from the end of each core wire.
Before doing anything, first check that the circuit you’re working on is still isolated!
The supply cable is then cut where the proposed join will be made, both ends of the cut cable are stripped accordingly and then they are joined together using a 5 amp junction box ensuring that all lives are in one terminal, all neutrals in another and then all earths together in another.
The supply cable for the light is then also stripped and each core connected to it’s relevant terminal in the junction box e.g. brown live to the other brown lives, blue neutral to the other blue neutrals and earth to the other earths.
Once all wired, the junction box body is screwed down to a joist and the cap is then screwed firmly in place.
Step 7 – Test Exterior Light
When everything is correctly connected up, the electrician will then turn the power back on, turn the switch on, fully test absolutely everything and then issue a minor works certificate to confirm everything is working as it should do.
Once completed you should then be left with a beautifully installed exterior wall light, that turns itself on and off via an inbuilt PIR sensor and also independently via a switch if needed.
It’s also worthy to not that some exterior lights will have adjustment for the length of time they stay on and the distance from where they operate when an object is detected. The electrician should set this however full adjustment instructions should be included in the manufacturers instructions.
Newly installed PIR external security wall light