Like many tasks, such as ceramic tiling, the quality of the final result depends heavily on the preparation done beforehand.
Preparation involves more than just surface cleaning and debris removal. It also includes practicing and equipping yourself with the necessary tools and knowledge. With proper preparation, you can achieve a tiling job you’ll take pride in!
Preparing Walls for Tiling
Before tiling, strip away any old wallpaper and loose paint to ensure proper adhesion of the tiles to the wall. Cleaning with sugar soap removes grease and grime.
New plaster, as it’s so porous, should be sealed to allow the tile adhesive time to cure correctly before all the moisture is drawn out due to the porosity. This is done using a mist coat of watered down emulsion paint, mixed to a ratio of 50/50 (50% water, 50% paint) before tiling.
Absorbent surfaces can be sealed with diluted PVA building adhesive, as follows – ensure it’s fully cured before starting:
- 1 part adhesive
- 4 parts water
If you are tiling over existing tiles, this is certainly possible. See our tiling over tiles project for more information.
Ensure any and all chases for concealed shower pipes and cables are filled before starting.
It’s also worth mentioned that today there are other options available other than tiling. Shower panels are one of these and have increased greatly in quality and ease of use over the years. It’s also possible to tile over them under certain circumstances.
Choosing Tile Sizes for Walls and Floors
Porcelain and ceramic tiles come in a huge range of colours, sizes, and designs, available at DIY stores and tile shops across the country. Before selecting, check the wall’s flatness with a spirit level. If it’s wavy, opt for smaller tiles as these will follow the curves much better.
Ensure at least 85% of the tile’s back touches the surface for proper adhesion. Large tiles on uneven walls leave air gaps, leading to loose tiles as heat expands the air behind them.
Additionally, drilling into tiles with gaps is challenging and can cause cracks very easily.
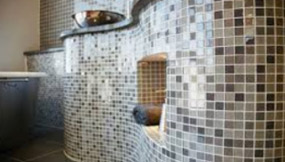
For wavy, undulating surfaces, smaller tiles are best. For flat walls, use larger tiles – Image courtesy of Houzz
Choosing Your Tile Design
Tile design and colour are subjective and totally up to you, so take your time exploring different options to find what appeals to you. A Google search or a bit of time on Pinterest always yields some good inspiration.
Consider combination tiles, which feature plain backgrounds with decorative accents. These can create patterns or images on the wall at a lower cost than using multiple tile types.
Hand-painted and glazed tiles can add excitement to a tiled wall, especially those that complement modern bathroom suites.
Common wall tile sizes include:
- 150 x 150mm (6 x 6 inches)
- 200 x 200mm (8 x 8 inches)
- 200 x 250mm (8 x 10 inches)
- 200 x 300mm (8 x 12 inches)
For aesthetics and practicality, opt for larger tiles in large rooms and smaller tiles in small rooms.
Don’t be afraid to experiment with tile layouts. Consider laying tiles diagonally or in a half-bond pattern for added visual interest.
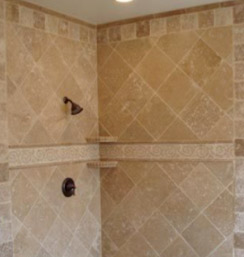
Laying tiles at angles or in non-traditional patterns can enhance a room’s depth – Image courtesy of Decor Tiles, Pinterest
Calculating Wall and Floor Tile Quantities
The easiest method is to use a tile calculator to determine the number of tiles needed. Measure the height and width of the wall or floor space to calculate the total area to be tiled and then work out how many of your chosen tiles will be needed to cover it.
For each dimension, count any partial tiles as whole ones. Multiply the height by the width to find the total number of tiles required.
Consider door and window areas, but don’t deduct the full window area if you’re tiling around it. Typically, deduct two-thirds of the window area to allow for reveals and cills.
For accuracy and to accommodate for any mistakes and breakages (there always are), add 10% to the total tile count.

Consider doors, windows, and wastage when calculating tile quantities
Buy all tiles from the same batch to avoid colour variations. Upon purchase, mix tiles from different boxes to distribute colour differences.
Use plastic spacers during installation to maintain consistent spacing for grouting, but don’t leave them in the wall!
Measure multiple points for width and height to accommodate slight irregularities in walls, floors, and ceilings.
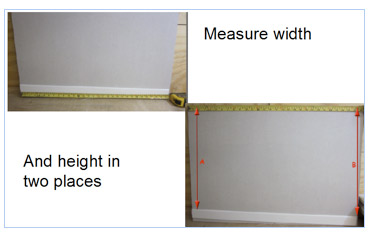
Measure the wall height and width in two places to calculate tile quantities
Ceramic Tiling Adhesives and Grout
The success of your tiling hinges on the adhesives you choose. Always use the appropriate adhesive for the job, especially in wet areas like bathrooms.
Opt for water-resistant, non-slip tile adhesive for bathroom walls. Though slightly pricier, it ensures long-term durability.
Follow the instructions on the adhesive container precisely. Grout, used to fill tile gaps, should also be water resistant in bathrooms. It’s available pre-mixed or as powder for easy mixing.
The powder varieties tend to be cheaper and provide a greater quantity, however you do have to mix it yourself and it’s imperative that it’s mixed to the right consistency.
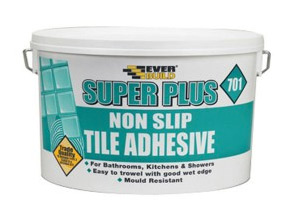
Non slip, water resistant tile adhesives are the best to use for bathroom wall tiling
Calculating Tile Volumes (Without a Tile Calculator)
Example: For a wall measuring 2.7m long and 2.2m high, using 150 x 150mm tiles: Divide wall height by tile height: 2200 ÷ 150 = 14.67 (15 tiles). Then divide wall length by tile width: 2700 ÷ 150 = 18.
In this case, you’ll need 15 x 18 = 270 tiles. Add 10% (27) for a total of 297 tiles. Check tile boxes for quantities. Additionally, verify adhesive and grout coverage listed on containers before purchase.
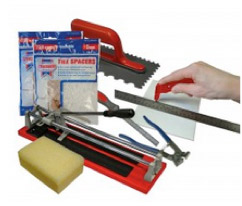
The right tools for your floor and wall tiling make the job easier
Tools and Products Needed for Ceramic Tiling
In order to lay ceramic tiles correctly, the following tools and products are essential
- Spirit level
- Plumb bob
- TileTracker Kit (if using)
- Enough of your chosen type of tile
- Enough tile adhesive
- Enough tile grout
- Good quality tile cutter (electric or hand operated)
- Tiling trowel
- Tile spacers of correct size e.g. 2mm, 5mm etc.
- Good quality masonry or tile drill bits
- Wall plugs
- Screws
- Tape measure
- Market pen
- Piece of timber for gauge rod
Fixing Ceramic Tiles to Your Wall
Now that you know all about how to work out the amount tiles needed, how to come up with a great design and what tools you are going to need, it’s time to get some on teh wall or floor.
Step 1 – Making a Gauging Rod
To start, create a measuring gauge using a piece of timber, 18mm x 44mm, approximately 1.8 or 2.4m long. Mark it with exact tile widths, including spaces (around 2mm for 2mm spacers, 5 for 5mm spacers).
This gauge helps determine tile placement, avoiding challenging cuts.
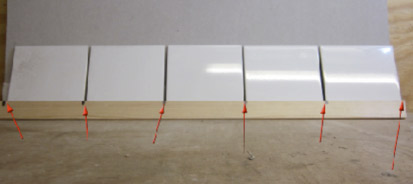
See where the tile cuts will fit on the walls by using a gauge rod
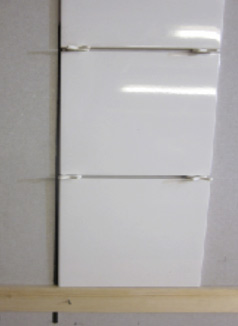
Step 2, Method 1: Suretile’s TileTracker for Laying Your First Course
When it comes to laying the first course of tiles level, there are two common methods. The traditional approach involves using a timber batten fixed lightly to the walls and you tile off of that. However, a newer method, introduced by Suretile, is the TileTracker system.
TileTracker offers an easy setup for levelling tiles.
TileTracker comprises straight aluminium bars with adjustable legs, making them freestanding without the need for screws or nails. The legs adjust easily, ensuring perfect levelling of the aluminium edges around the bathroom and providing a level base to tile from.
Freestanding TileTracker eliminates the need for wall fixtures.
These bars can be placed atop the bath to ensure a level row of tiles. With four different bar sizes available, you can start tiling from any point in the bathroom.
Unlike the batten method, TileTracker doesn’t require puncturing the walls, which is advantageous if you’ve invested in a tanking system for your shower room. Avoiding wall punctures prevents potential weak points and leaks.
Innovate and easy to use tile spacers for perfectly spaced grout lines
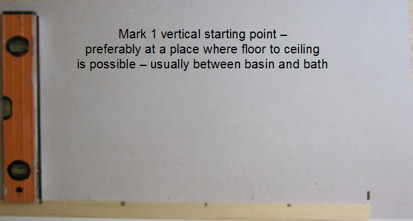
Step 2, Method 2: Using a Batten for the First Line of Tiles
For a precise starting point in tiling, affix a straight timber horizontally to the wall, positioning its top edge just above the highest floor or skirting board level.
Verify the batten’s truly horizontal using a spirit level and then drill and screw it or nail it to the wall using wall plugs, screws or masonry nails. This full-width batten sets the starting level for tiling, ensuring straight lines even on uneven floors. Keep the nails partially driven as they will need removal later.
Fixing a batten to the wall will ensure your tiles start pefectly level
Step 3 – Finding the Midpoint of the Wall
Vertical measurement with the gauge made from the batten mentioned above ensures an even tile layout at the top and bottom of the wall, avoiding narrow strips that are tricky to cut and look odd.
If needed, adjust the battens position horizontally by raising or lowering for equal spacing at the wall’s top and bottom. Locate the midpoint along the batten’s width by measuring and mark it.
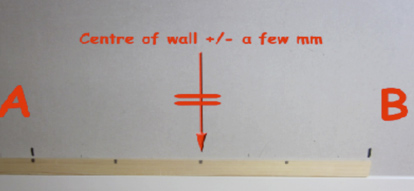
Setting the midpoint facilitates wall tiling
Using the gauge horizontally, identify where the last whole tile will be placed near the wall’s end and mark it on the batten.
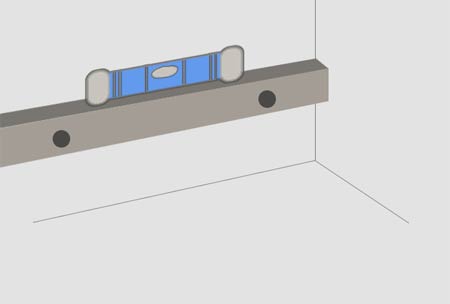
Use a level or a plumb line to ensure your tiles are completely upright
Step 4 – Achieving Straight Rows and Columns of Tiles
Lower a plumb line until it touches the last mark on the horizontal batten. Mark the wall at several points along the string’s path, directly behind it, then connect these marks using a spirit level.

Using a plumb line for a straight wall line
Test-fit some tiles with spacers into the corner created by the batten and the vertical line to ensure they align correctly.
Ceramic tiles roughly layed in corner, using tiles spacers to space them
Step 5 – Applying Tile Adhesive with a Notched Trowel
Begin tiling from the corner and work inward. Following the adhesive instructions, spread about one square meter at a time, then comb it out using a notched trowel (as shown below).
Press tiles firmly into the adhesive, wiggle them slightly to compress the adhesive ridges, using spacers between them. Work horizontally and vertically to place all full tiles, then allow 24 hours for drying.
Carefully remove the battens and cut tiles to fit along the edges. If space is limited, apply adhesive directly to the back of cut tiles instead of the wall.
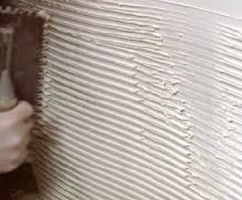
Tile adhesive should be a uniform thickness achieved by using a notched trowel
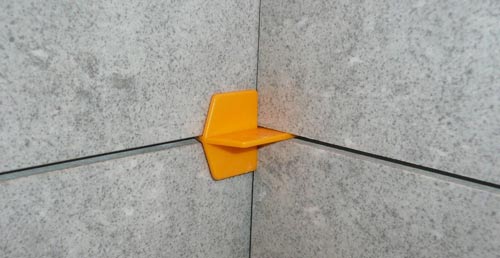
Step 6 – Using and Removing Tile Spacers
Remember to remove tile spacers after tiling, do not leave them in the wall! It’s crucial for grout to completely fill the joints, ensuring waterproofing. Leaving spacers can lead to thinner grout coverage, increasing the risk of water penetration over time.
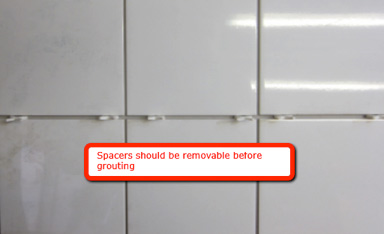
Leaving tile spacers in between tiles takes up space meant for grout
Step 7 – Cutting Ceramic and Porcelain Tiles
Various tile cutters are available for different tile cutting needs. From hand-held cutters to table saws, choose the right tool for your project. Simple scoring and snapping works for straight cuts, while pincers or pliers are handy for corners and curves.
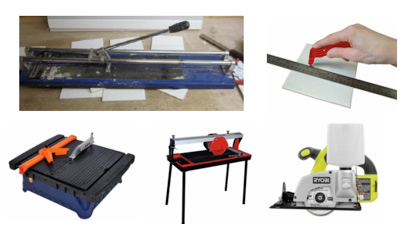
Tile cutters range from basic handheld tools to large table saws
For straight cuts, score the tile’s surface with a cutter and snap along the line.
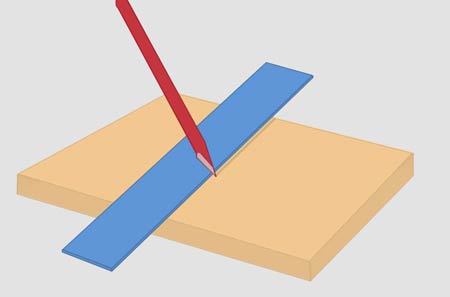
Scoring tile glaze ready to cut
Once scored, place the tile over a couple of match sticks or similar and gently press either side to snap the tile.

Break tile along score line
Pincers or pliers are useful for shaping corners or curves into shape to fit around any obstructions. As above, always score the shape before snipping away.
After tiling and everything has cured (24 hours), remove spacers and fill joints with grout for a finished look.
Consider investing in accurate tile cutters for minimal waste and better results.
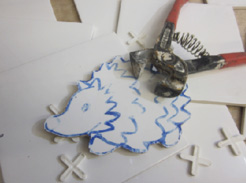
Really fine cuts, such as this hedgehog, can be achieved by using tiling nips
Step 8 – Sealing Joints After Tiling
To prevent moisture from seeping behind tiles, any joints have to be sealed with a good quality silicone sealant. For help doing this, see our using a sealant gun project for full instructions.
To seal any joints, the basic process is as follows:
- Insert the caulk tube into a caulking gun.
- Cut the nozzle at an angle.
- Apply sealant along the joint.
- Smooth out using a wet finger or a sealant smoothing tool.
Ensure joints are fully filled for a neat finish. Using a wet finger generally gives the best results. Wet your finger and gently drag it down over the sealant, pushing it into etc joint and smoothing it at the same time.
Using a specific sealant tool is a little easier if you have never done this job before. Generally, several different shaped sponged blades are supplied so you need to choose the right shaped blade.
Which ever method you choose, start at the top and work down, stopping periodically to wipe off excess onto an old rag.
Tiling a wall or floor can be rewarding, even for beginners. With patience and methodical work, achieving professional results is within reach for anyone new to DIY.