Drilling holes in plasterboard, masonry, timber, and concrete is a routine task for builders and DIY enthusiasts. However, drilling through metal requires different techniques for achieving clean, accurate holes.
Here are some essential tips and tricks for drilling perfect holes in various types of metal.
Best Metal Drill Bits: A Simple Guide
Drilling through metal doesn’t require expensive, specialised drill bits. A quality High-Speed Steel (HSS) drill bit will usually do the job.
While standard HSS bits work well, it’s wise to invest in higher-quality options. Better bits make the task faster, easier, and safer. Avoid cheap bits, as they dull quickly, can bind in the material, and might even shatter during use. A quality HSS metal drill bit set, when cared for, can last a long time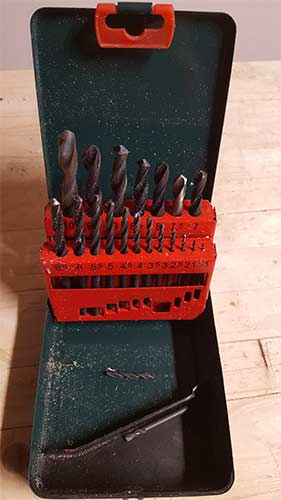
Most of the time, you’ll be drilling mild steel. However, for tougher metals like stainless steel or cast iron, consider using stronger drill bits. Here’s a quick rundown of metal drill bits, ranked by strength:
- High-Speed Steel (HSS) Twist Bits: Standard bits suitable for metal, plastic, timber, and more.
- Titanium-Coated HSS Bits: Tougher and longer-lasting than regular HSS bits due to their titanium coating.
- Cobalt Drill Bits: Ideal for harder metals like stainless steel and hardened steel.
- Solid Carbide Drill Bits: Extremely hard, often used in industrial settings; they’re durable but brittle.
- Step Drill Bit/Cone Drill Bit: Useful for drilling holes of various sizes in sheet metal.
In summary, HSS drill bits are versatile and a must-have for any toolkit. However, for tougher metals, choose a bit designed for the material you’re working with.
Drill Bit Parts: A Quick Overview
After exploring the best drill bits for metal, let’s break down the parts of a drill bit itself.
Standard drill bits, often called “fluted” bits, have two spiral flutes running along the length of the bit’s body.
A drill bit consists of three main parts: the shank, the body, and the tip (or point). The main parts of a drill bit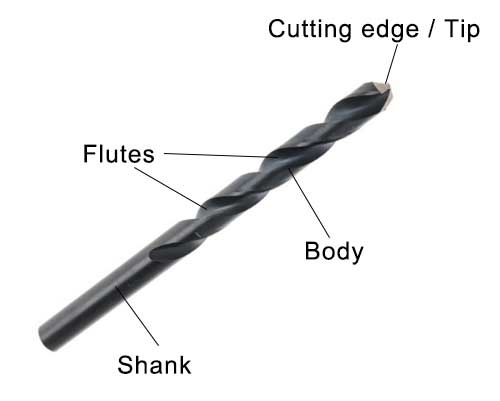
Each part of a drill bit plays a specific role in creating a clean, accurate hole:
- Shank: The shank is inserted into the drill’s chuck, ensuring the bit rotates with the drill.
- Body: The body includes the flutes, which help remove material (swarf), allow lubricant to reach the cutting edge, and define the hole’s width.
- Tip/Point/Cutting Edge: The tip is the cutting part. As it rotates, it bites into the surface, removing material to create the hole.
Essential Tools for Drilling Metal
Drilling through metal requires more than just a set of HSS drill bits. Here’s a quick rundown of the tools you’ll need:
- A powerful drill
- High-quality drill bits
- Clamps
- Lubricant
- Protective gloves
- Safety goggles
When selecting a drill, a standard power drill with at least 700 watts (or 18V for cordless) is sufficient. It’s crucial that your drill has adjustable speed control to handle metal effectively.
If available, a pillar drill is the ideal tool for drilling metal. It allows you to secure your workpiece firmly and ensures precise, square holes. The controlled pressure from the handle reduces heat, extending the life of your drill bits. The versatile pillar drill, a valuable tool for any workshop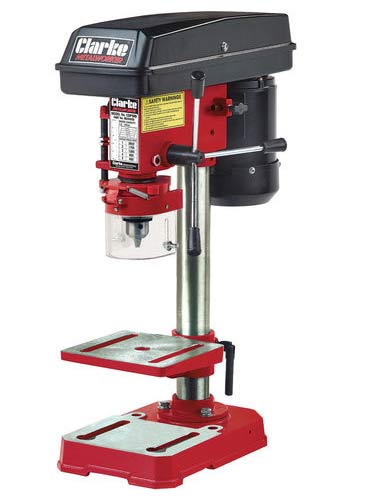
Now, let’s discuss the other essential tools.
If you’re using a handheld drill, clamps are vital to keep your workpiece stable. Movement can cause the drill bit to misalign, leading to inaccurate holes and potential damage to the bit.
Lubrication is also key. It minimises heat build-up, preventing bit dulling and damage to the material.
Finally, safety gear is non-negotiable. Always wear gloves and full eye protection when drilling metal. Flying metal shards can cause serious injuries, so these precautions are absolutely crucial.
Should I Use Oil When Drilling Metal?
Yes, you should always use drilling or tapping fluid when drilling metal. If you’re working with thin metals or aluminium, a 3-in-1 oil can be a suitable alternative.
The main purpose of drilling fluid is to reduce heat buildup, which can easily dull or damage your drill bits.
Drilling fluid lubricates the areas where the drill bit and metal rub together, but not the cutting edges, allowing the bit to cut efficiently while minimising friction.
Standard oils like engine oil aren’t ideal because they’re designed to withstand high pressures and temperatures without breaking down. This creates a barrier that hinders the cutting process, reducing efficiency.
To extend the life of your drill bits and ensure accurate, clean holes, always use the correct lubricant.
What Drill Speeds Should You Use When Drilling Metal?
Heat buildup is a major concern when drilling metal. While lubrication helps control heat, speed plays a crucial role too.
The faster the drill bit rotates, the more friction, and therefore heat it generates. Excessive heat can burn off the lubricant, making the problem worse.
Managing heat, preserving your tools, and achieving a clean hole depend on using the right drilling speed.
There isn’t a universal drilling speed for all metals; it varies based on the type of metal and drill bit size. As a general rule, harder metals and larger bits require slower speeds.
Here’s a basic guide to drilling speeds for different metals:
- Stainless Steel – Slow speed, 300-400 RPM
- Copper – Slow speed, 300-400 RPM
- Aluminium – Higher speed, around 1500 RPM
- Mild Steel – Medium speed, 700-1000 RPM
- Cast Iron – Very slow speed, 200-300 RPM
If you see smoke or the metal starts to darken, you’re drilling too fast. Reduce the speed by half and continue.
How to Drill Metal
By now, you should know the right drill, drill bit, lubrication, and speed for drilling metal.
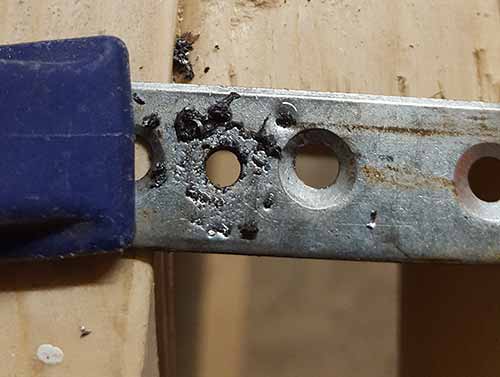
In this guide, we’ll drill a hole through a mild steel mending plate and then countersink it for a screw head.
Our goal is a 6mm hole, but we’ll start with a 4mm bit and gradually increase the size. Mild steel mending plate that requires an additional hole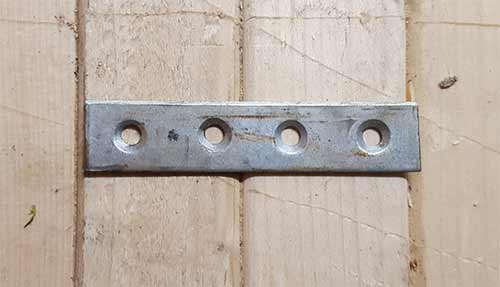
Step 1 – Mark the Drilling Point
Before you start drilling, precisely mark the spot you need to drill. Use a tape measure and pencil to pinpoint the location.
Next, take a small centre punch (around 2mm) and place its tip on your mark. Tap it lightly with a hammer to create a small indentation.
This indentation helps the drill bit stay in place, preventing it from slipping or skidding as you start drilling. Indentation made with a centre punch to keep the drill bit steady.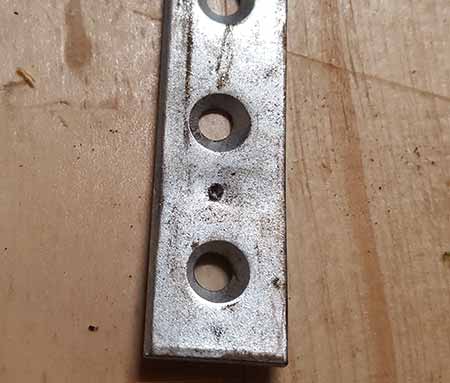
Tip: No punches? A screw can work as a substitute, though it’s not perfect.
Step 2 – Secure Your Workpiece
With your drilling point marked, the next step is to secure your workpiece so it stays steady during drilling.
Place the item flat on a stable surface like a workbench or Workmate. Use strong clamps to hold it firmly in place.
If you’re working with a small item, such as a mending plate, ensure there’s enough space between the clamps and your drilling point for easy access with the drill.
Avoid cramped spaces to minimise the risk of mistakes or injury. Workpiece securely clamped up ready for drilling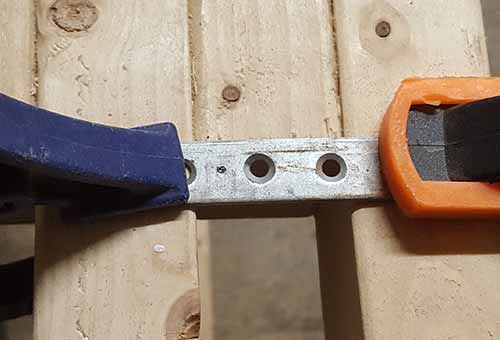
Step 3 – Apply Lubrication
Before drilling, apply lubrication to minimise heat build-up and reduce the risk of damaging the drill bit.
In this example, we’re using multi-purpose oil.
Place a few drops directly on the punch point and around the drilling area. Drilling point lubricated using multi-purpose oil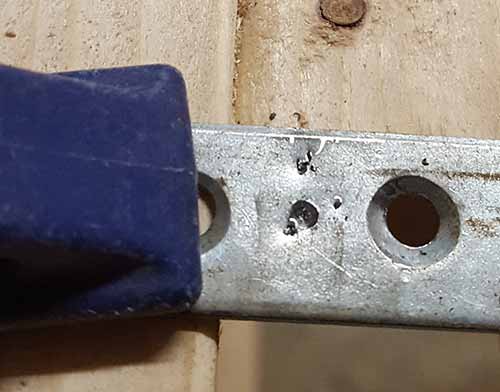
Step 4 – Drill the Initial Small Hole
With everything set, it’s time to drill the initial hole. We’ll start with a 4mm drill bit and later expand to 6mm.
Insert the 4mm bit into your drill, making sure the chuck is tightly secured. Position the bit’s tip over the punch mark. 4mm drill bit ready to drill the pilot hole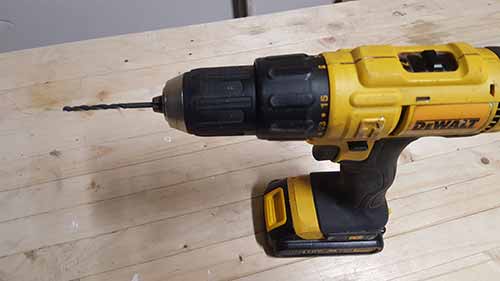
Hold the drill as vertically upright as possible. Start at a low speed to let the bit gradually cut into the metal. For an 18V cordless drill with variable speed, begin slow and increase speed to about 800rpm as needed.
Pause periodically to check for discolouration, which indicates excessive heat, and add lubrication if necessary. Once the hole is fully drilled, remove the bit and inspect the hole, cleaning away any debris.
Completed 4mm pilot hole
Replace the 4mm bit with the 6mm bit, and add more lubrication around the pilot hole. Position the 6mm bit slightly off-centre from the pilot hole to avoid digging into it aggressively.
Start the drill at a low speed, gradually increasing until you reach the desired RPM. Once the hole is drilled, remove the bit and set the drill aside. Final 6mm hole size completed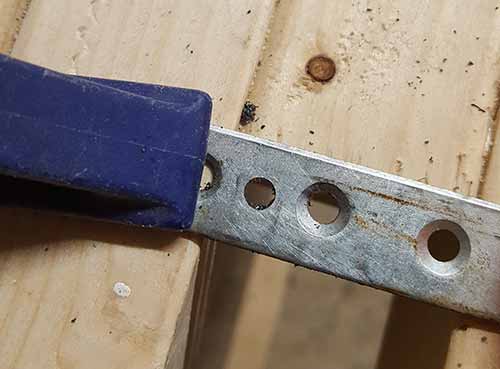
Once done, give everything a very good wipe down, making sure you remove any swarf and excess lubrication.
Step 5 – Drill a Countersink for Screw Heads
Next, you’ll need to drill a countersink so the screw head sits flush with the surface. Use a countersink bit, which is conical and wider than a standard drill bit, to create this recess.
Ensure you apply plenty of lubrication around the existing hole before starting. Use an HSS or cobalt countersink bit, not a mild steel one designed for wood.
Drill at a slow speed and keep your drill perfectly upright to avoid a crooked countersink. Proper alignment ensures a clean and precise finish. Creating a countersink in a mild steel mending plate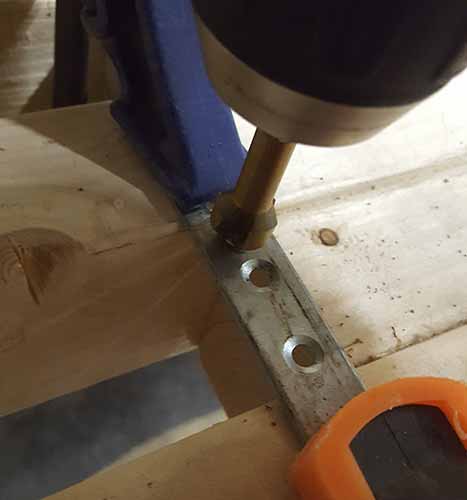
For detailed guidance on drilling countersinks and pilot holes, check out our project guide.
Step 6 – Clean Up and Deburr the Hole
After drilling and countersinking, you’ll likely have sharp edges or “burrs” around the hole. These need to be removed for a smooth finish.
While specialised deburring tools are available, a file will usually do the job. Alternatively, use a drill bit slightly larger than your hole. Place the tip in the hole and twist to remove burrs. Using a drill bit to remove burrs from a hole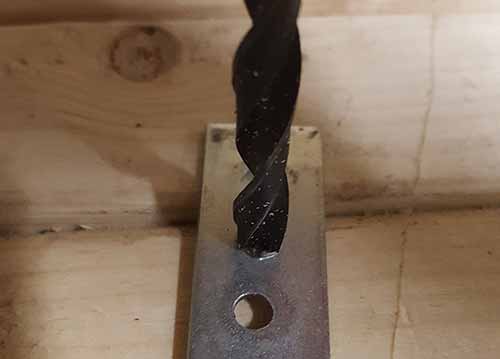
After deburring, clean off any swarf and inspect your work. Your project is now complete. Great job! New hole successfully drilled and countersink added to allow screw heads to sit flat with the surrounding area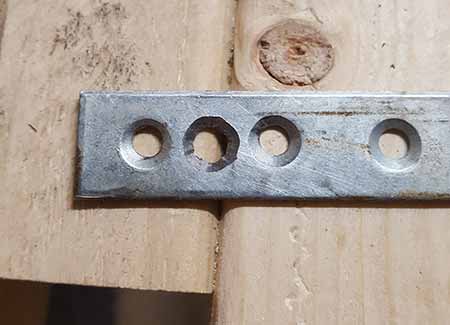
How to Drill Through Steel Beams and Thick, Hard Metals
Drilling through hardened steel, RSJ joists, or similar hard metals requires special techniques compared to mild steel. Here are key points to consider:
Drilling Speed: Use a slow drilling speed to manage heat and avoid damage.
Drill Bit: Opt for a high-quality drill bit, such as carbide or cobalt, designed for hard metals.
Lubrication: Always use proper cutting fluid, not just 3-in-1 oil, to minimise heat and wear. This is an absolute must!
Drill Type: A powerful corded drill or a high-capacity cordless drill is ideal. While some cordless drills can handle the task, they often drain quickly. For best results, use a pillar drill, which offers better control and power. Pillar or bench drill for precise metal drilling
If you can’t use a pillar drill, consider a mag drill. It provides the precision of a pillar drill but is portable and can be used in various positions, including overhead. Its magnetic base keeps the drill steady, ensuring totally accurate holes.
For critical applications like steel beams, accuracy is absolutely crucial to maintain structural integrity. A mag drill ensures precise, reliable drilling even in challenging and awkward conditions. The extremely versatile and useful mag drill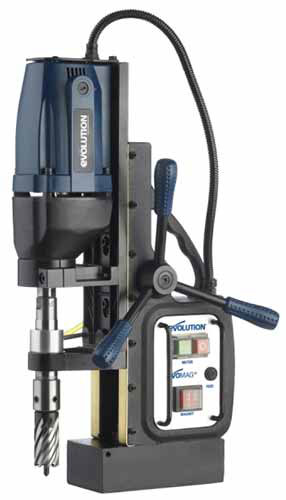
Drilling Through Sheet Metal and Thin Metal
Drilling through thin metal can be challenging due to its flexibility. As you drill, the metal may deform e.g. bend and/or twist, making it difficult to fix. Here’s how to get it right:
Prevent Deformation: To keep the metal flat, sandwich it between two pieces of wood and that are firmly clamped together. This prevents bending and ensures a clean hole.
Use a Step Drill Bit: A step drill bit is ideal for thin metal. Its conical shape lets you drill various sizes without deforming the metal. Step bits typically range from 4mm to 20mm and create smooth, rounded holes.
Support the Metal: Place a sturdy piece of wood beneath the metal while drilling. This supports the metal and prevents bending from the pressure of the drill. Again, ensure it’s firmly clamped. The very useful step drill bit
Drilling through most types of metal is a fairly straight forward task and can be done by anyone, however to get the correct finish it is essential that you use the correct tool for the job!