Fitting a roof window or Velux window as they are also known is certainly not as difficult as most people imagine and in most cases can be installed completely from inside the loft space, without the need to use expensive scaffolding.
To find out exactly what’s involved in fitting a Velux window, read on below.
What is a Velux Window?
A Velux window is a form of window that’s installed in a roof in order to provide light and ventilation to a loft space, stairwell or other area with a high ceiling. As a window, not only does it allow light it but it can also be opened for ventilation.
The name Velux is actually the brand name of the Danish company that first patented them and made them as popular as they are today.
Velux windows are known by a range of different names including skylights and roof windows, however they do all differ slightly in that skylights tend to be fixed and don’t open and only allow light in and roof windows, like Veluxes, do open providing both light and ventillation.
The main difference between roof windows and Veluxes is effectively just the name and the fact that Velux is a brand name, they both do pretty much the same thing.
Roof windows or Veluxes come in standard sizes which are designed to fit with the minimum amount of removal of existing roof structure although, of course some is required. They range from 550mm x 780mm all the way up to 1800mm x 780mm and many sizes in between.
If you are looking to purchase a Velux or roof window, one thing you will have to remember is that you also need to purchase the correct flashing kit for the size of window you have.
Pretty much all roof windows can be installed in roof pitches between 20° and 85°, are manufactured from sealed, solid laminated softwood with a 24mm low E double glazed sealed unit already installed, so all you have to do is install it into your roof.
If you have had a loft conversion in your home then chances are, the day time lighting is being provided by a roof window.
Likewise if you have had your loft boarded for storage then again to provide the required light in the space to locate items, installing a Velux is a great way to go, as long term it will also save you the cost of running an electric light.
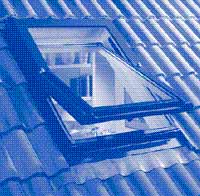
Velux Roof window
Parts of a Velux Window
When fitting a Velux window, it’s useful to know what parts are being referred to, so here follows a list of the core parts of a Velux window:
- Barrelbolt: This allows the window to be fixed and held open and also secured in one position while cleaning the outside of the glass
- Ventilation opening: Once opened, this allow a little air to flow in, much like trickle vents on standard double glazed units
- Lock mechanism: The moveable part of the lock fixes to the ventilation flap
- Double glazed unit: This piece of glass fills the sash frame and allows light in, in exactly the same ways as any other window does and also keeps any cold air out
- Frame: The frame holds the sash in place and allows it to open and close
- Sash: The sash is held in the frame by the hinges and keeps the glass secure and in place
- Hinge: These allow the sash to open within the frame. They can be central positioned allowing the window to pivot open or top fixed allowing it to open from the top
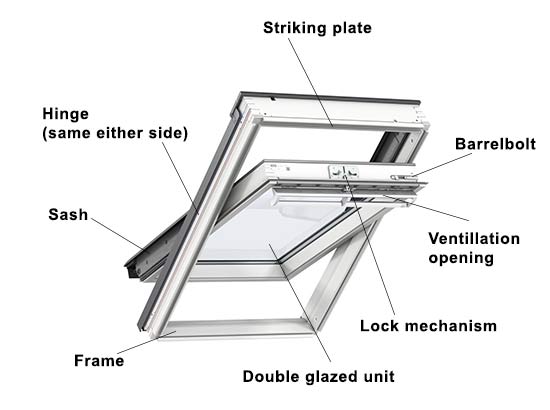
Parts of a Velux roof window
Regulations for Velux Windows
In terms of the regulations that govern the installation of a Velux windows, it very much depends on what the space is being used for.
If just to provide light in a loft space, unless you yourself are FENSA registered or you are using a FENSA registered tradesman to install your window, you will need to contact your local building control office before any work takes place.
They will need to inspect the installation before and after to ensure that any structural and insulation changes do not negatively impact the property.
In pretty much all cases at least one rafter will need to be cut to accommodate the new window so any and all new bracing will need to be inspected to ensure it hasn’t negatively affected the ability of the roof to remain upright.
Likewise, removing tiles and replacing them with glass could potentially change how the roof retains heat and maintains its existing levels of insulation and how it complies to Part L of the Building Regulations, so it needs to be checked to ensure that the heat you generate cannot escape.
For more information, contact your local building control office and they will be able to offer you all the help and advice you need.
One other point that needs to be considered is if the Velux is going to be used is a loft conversion, then it may also need to be used as a means of escape and if this is the case then there are a whole heap of other regulations that need to be adhered to.
In this case, any specifications for Velux windows will be stated in the plans and by building control and these will need to be followed fully to ensure that any building work is allowed to pass.
How to Fit a Velux Window
In most cases a Velux window can be fitted entirely from the inside, no need to walk around on the roof or hire expensive scaffolding, but in the example below there were a few other jobs that needed doing on the roof so we erected some to make everything a little easier.
Regardless of whether your window is built by Velux, Fakro or any of the other manufacturer, full installation instructions come with each window, but some advanced details will also help and these are detailed below.
Step 1 – Inspect Window
Before fitting anything, first remove your roof window from its packaging and fully inspect it to ensure that it is intact and there is no damage. Due to their size and weight they can easily get dropped and damaged so ensure this isn’t the case for your window.
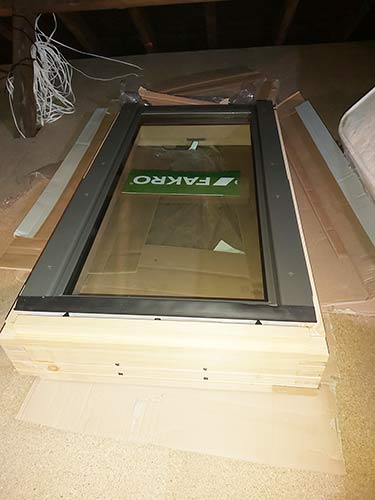
Un-package and check window for any damage
Step 2 – Erect Scaffolding
As commented, you don’t need to use scaffolding to install a Velux window, however we did in this case, so once you’ve checked all is well with the window, if you’re using some yourself you can then go ahead and get yours put up or you can arrange for a local scaffolding company to erect some for you, however this may cost.
The most cost effective solution is to hire a tower scaffold from your local hire shop.
If using a tower scaffold, ensure that you erect it correctly and that it is 100% level on all corners so there is no movement or rocking. Also ensure that you have the stabilising arms correctly installed to prevent it toppling over.
For full help and tips on how to use scaffolding safely, see our project here.
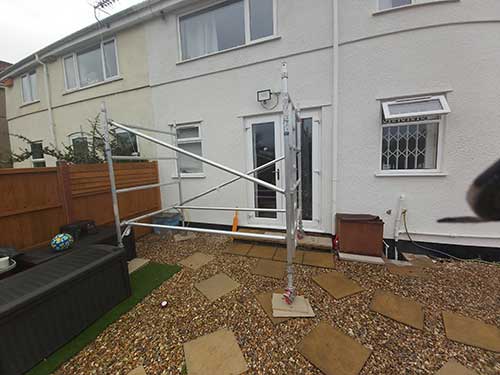
Erecting tower scaffold on a flat and level base
Step 3 – Settle on Install Location
The next job is to now decide on exactly where your Velux window is going to go. This may have already been decided for you by building control, depending on the type of roof and trusses you have, whether this is for a loft conversion or whether there are any specific conservation area rules.
If not then you will need to decide yourself. South facing is best so that it gets sun all day and to minimise the amount of work and cutting needed, try to position it so the top of the window falls just below a line in the tiles. This is sometimes easier said than done but well worth doing if you can.
As we have mentioned, all Velux and roof windows are built to fit standard rafter and joist spacing’s so yours should fit between 2 sets of rafters with gap around it. The size of gap will depend on the size of Velux being installed.
One other point to consider is that it’s also a good idea to ensure the base of the window will sit roughly 75mm or so above a section of batten. This ensures there is enough room to replace the tile and ensure the gap isn’t too big for the flashing to bridge.
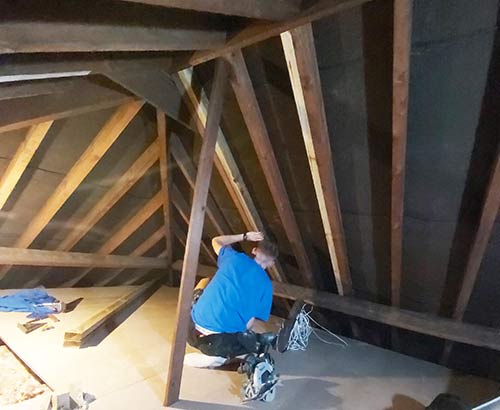
Install location for Velux window
Trying to settle on a location where the top and bottom of the window are perfectly situated sometimes just isn’t possible so in this instance it’s better to go with the top.
Step 4 – Insert Timbers and Bracing and Mark Exact Install Site
As commented, all roof windows and Velux windows are made to fit standard rafter and joist spacing’s and also take into account the fact that they have to be reinforced to account for the fact that sections of rafter will need to be removed to fit the window in, so the actual install gap will be around 180mm – 220mm wider than the actual window.
With this in mind the next job is to cut and fix 2 lengths of 3 x 2 or 4 x 2, 2.4 metre timber, depending on the size of existing rafters to the inside of the install area. Remember to mitre the top ends so they fit flush against the ridge board. Screw then firmly every 300mm or so down the length.
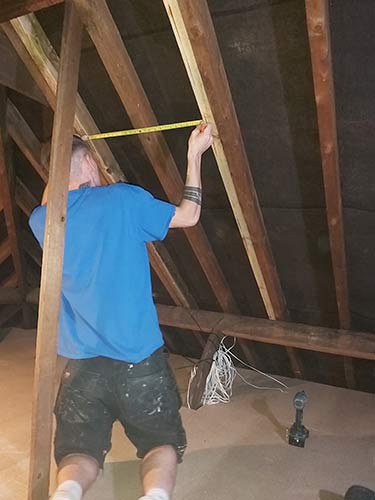
Fix side bracing timbers to existing rafters
Once these are fixed you then need to find the exact install site and mark this on the rafters so that you know where the horizontal cross braces are going to go to form the actual frame for the window.
This can be tricky to do but try and look behind the felt or membrane and see where the tile lines line up. If you can get it just below a tile line then as commented, this will minimise any cutting.
Mark this at the top and then measure down the length of the window plus around 80mm (40mm gap top and bottom) and mark this down the rafter.
Lay a length of timber across each mark, with the mark on the front face of the timber and mark its thickness, front and back across all the rafters is crosses. This will show you exactly where you need to make your cut, on the back marking, so you can insert the cross bracing and the window will still fit in.
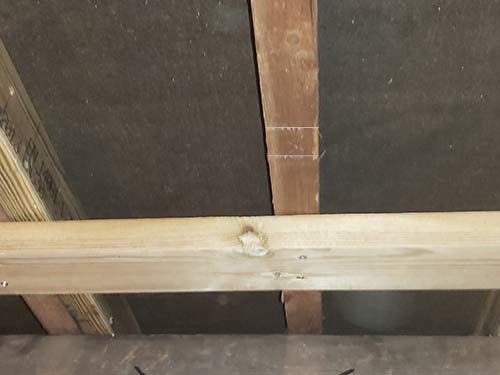
Mark timber thickness and cutting point across rafters top and bottom
Next, fix a few lengths of 3 x 2 or 4 x 2 timber top and bottom around 300mm down and up from your cutting lines across as many rafters as they reach and screw them firmly in place, using 2 screws in each timber. This will brace the roof while you cut the rafter to fit the window, before any correct bracing is fixed in place.
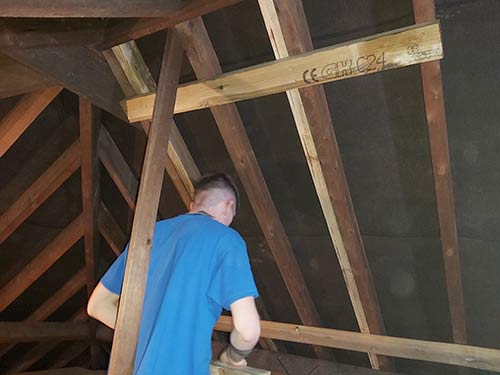
Bracing timbers fixed top and bottom to support cut rafter
Step 5 – Cut Joist and Insert Cross Bracing
Once all braced up you can now cut out any rafters in the way. Before doing so you will need to remove any tiles. This can be a little tricky.
If you have scaffolding start by removing a strip of tiles up to the install location. To remove a tile slide you hand gently underneath it and lift up so that the lip on the back clears the batten and once it does gently wiggle and slide it forwards and out.
Be careful when lifting them as it will lift the tiles all around it also and you want to avoid breaking any, but once the first one’s out the rest are a little easier.
As you climb up, use the battens as a ladder and try not to stand on the felt and rip it.
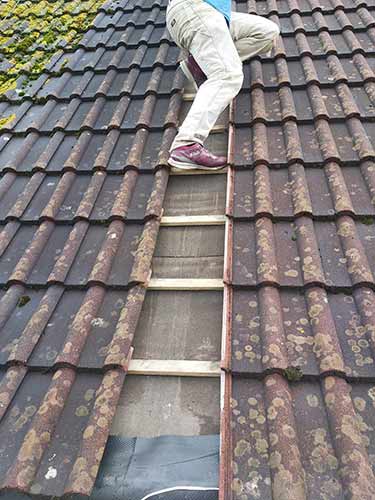
Clear a strip of tiles up to the install location
To find out exactly which tiles need to be removed have someone inside gently push out on the bottom centre tile at the base of where the window will go so that you know which to remove. Once you know, work your way to the top and then sides removing tiles as you go. Stack them neatly on the scaffold.
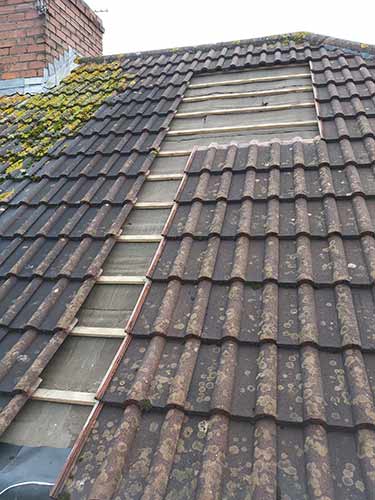
Tiles totally removed for Velux window
If you’re working from inside, cut away any felt or membrane so you can see the tiles. Gently push out on a centre tile and lift it over the batten and slide it down, holding on to it firmly so it doesn’t fall and then pull it inside. Repeat for the remaining tiles.
Once tiles are clear, cut away any rafters that need removing, making sure you cut the rear mark and also that any cuts are totally square!
Once removed, measure and cut 2 cross pieces using the correct sized timber and screw them in place. In this example we have used some joist hangers to hold the bracing due to the thickness of the timbers at the sides.
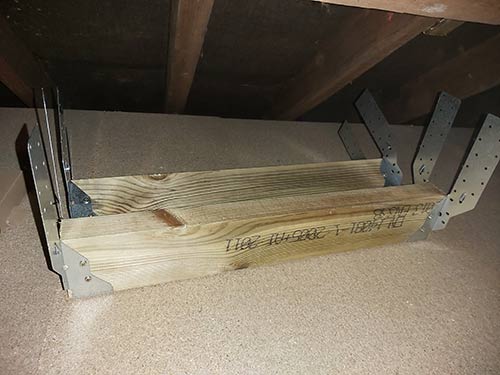
Cross bracing cut and joist hangers fixed
Position each cross brace in place and bend the joist hangers wings over and screw them fully into position through every hole.
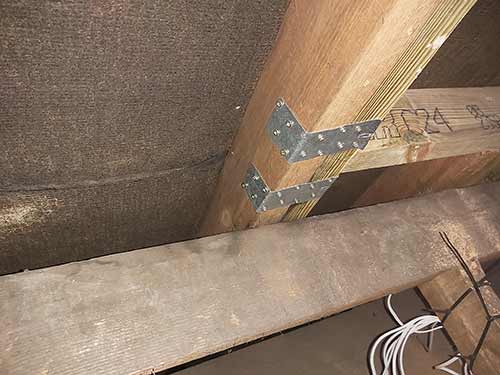
Joist hangers fully screwed up
Finally, using Timbafix or similar strong timber screws, screw the bracing in place diagonally through the side of the front face and also through the sides and down into the cut ends of the rafter that was removed in at least 2 locations.
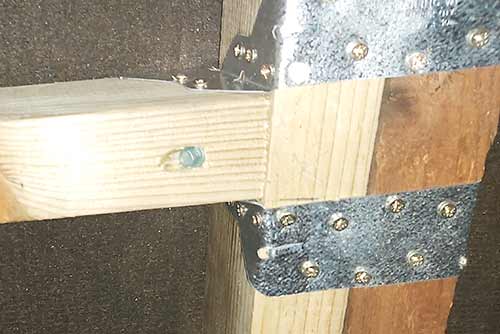
Timbafix screw used to screw through side of cross brace
Step 6 – Cut out Velux Window Hole
With everything braced up, use a utility knife to cut away any felt or membrane to open up a hole and then use a handsaw to cut away any battens that cross the hole.
Ensure the cut ends of each batten are nailed to the rafter and if not nail them in place.
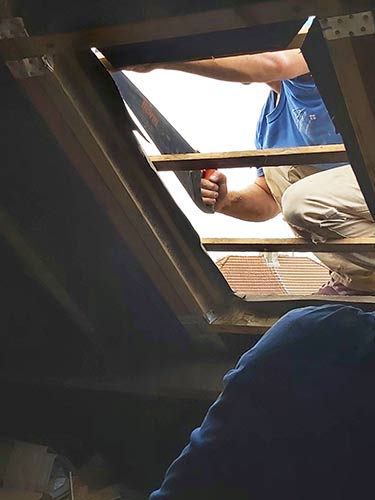
Cut away felt and battens and make hole for Velux window
When you cut away the felt or membrane ensure you leave enough material, around 75mm – 100mm to make some flaps. These flaps will be folded back around the rafters and fixed so that they line the timbers of the opening.
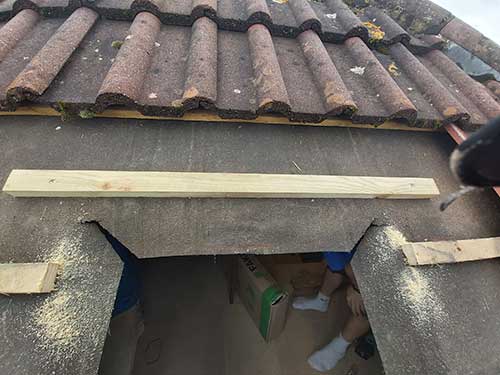
Cut flaps in felt or membrane to fold back around timbers that form hole
Step 7 – Fix Brackets to Velux Frame
Before the Velux window can be dropped in place in the hole and installed the brackets will first need fixing to its frame. They don’t come pre-installed due to the fact their install position can vary depending on what flashing kit is used.
To fix the brackets in place, first refer to the manufacturers instructions that come with the window. In there is should state exactly where on the frame they need to be fixed. You will also need to know the type of flashing kit you have so check the packing or instructions that are supplied with it.
Somewhere there will be a code or letter for the flashing kit and once you’ve found this, the instructions will state where the brackets need to be fixed.
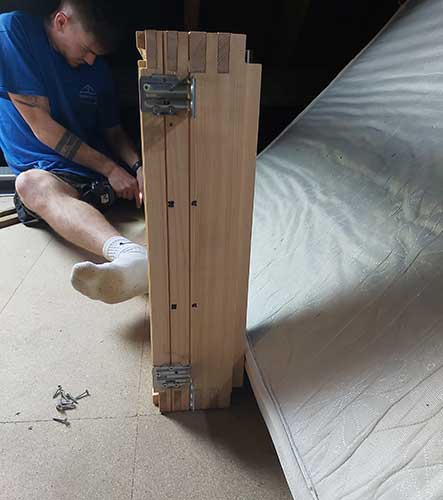
Brackets fixed to frame of Velux window
Step 8 – Install Window
Once the brackets are fixed to the frame the window can then be dropped into place in the hole. Once in position, adjust it so there is an even gap around the outside of the frame and also ensure it’s totally square.
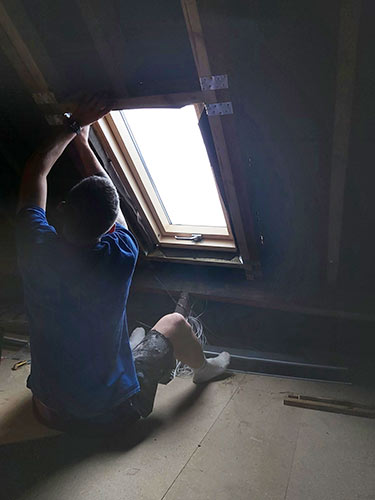
Insert Velux window in hole and position
Once fully position, screw it up using the fixings provided.
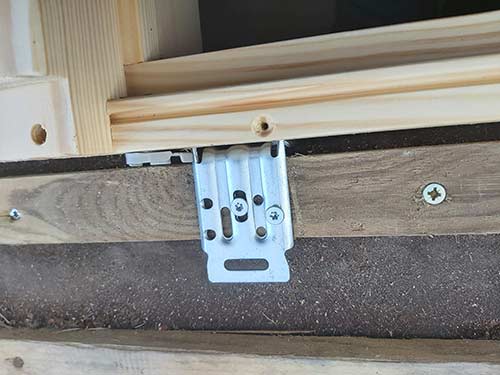
Screw window brackets up firmly and secure window in place in hole
Step 9 – Install Felt or Membrane
The next job is to then cut and fix a roofing membrane “skirt” around the window that’s fixed to the frame and overlaps the existing felt or membrane. This will ensure that if any water gets into the frame it can run out of the weep holes in the corners and then down over the existing felt and not back into the loft space.
Starting at the bottom, cut a piece of membrane as wide as the window plus around 400 – 500mm on either side. Place this against the bottom up stand of the frame and then staple it in place.

Flatten it out over the top of the battens and down under the tiles below. As you staple it, fold it around the battens and staple either side.
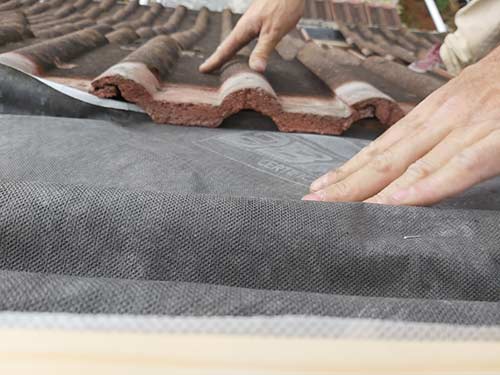
Slot membrane under tile below and staple in place
Once the bottom is done, cut 2 further pieces of membrane the length of the window plus about 200mm at either end and fix these in place at either side of the window, ensuring they over lap the section at the bottom you just installed. Again staple them to the up stand of the frame.
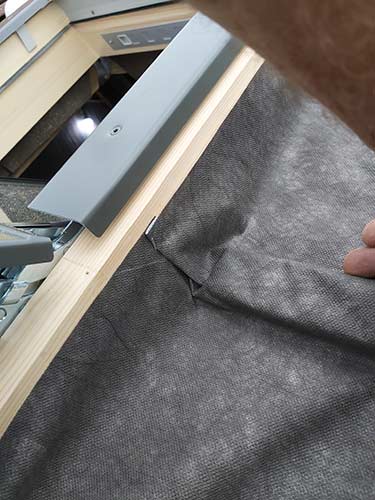
Side pieces of membrane stapled in place to Velux frame
As before, flatten them out over the top of the battens, fold them around the sides and staple them in place to give a bit of slack so that the rear lip of each tile can still be placed over the batten without breaking it.

Where the ends of the membrane fall on each batten, gently cut to create flaps that then allow you to fold them under the base of each batten and then staple them up.
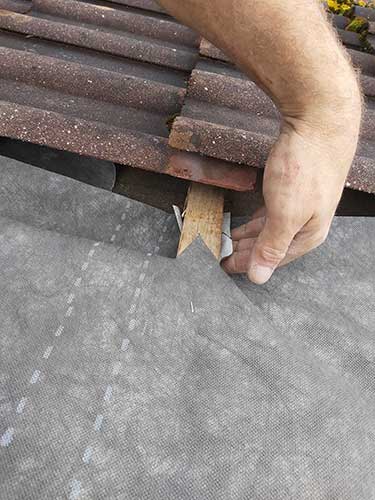
Cut and fold the ends of each piece of membrane
Finally, cut a piece of membrane for the top, again around 400mm wider either side and about 300mm in height. Fix this in place so it overlaps the sides and again staple it to the up stand at the rear of the frame and slightly around each side.
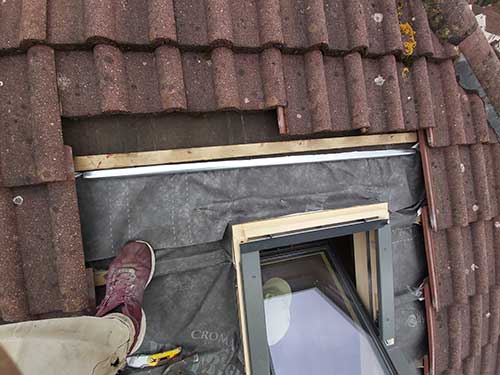
Fix top piece of membrane in place around top of Velux frame
Some flashing kits, as this one does, include a thin aluminimum/metal section that needs to sit above the window frame with the membrane skirt butting up to it. This is effectively a gutter that catches any water and channels it back over the newly installed membrane as opposed to anywhere near the hole that the window sits in. Screw this in place through any fixing holes ensuring it slants down allowing any water to flow.
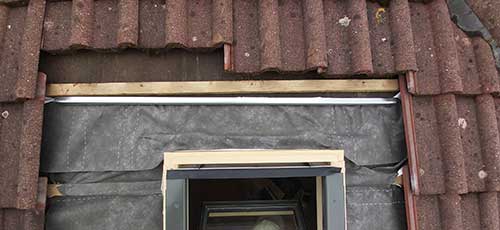
Top section of water gutter included with flashing kit
Step 10 – Install Flashing
Once the membrane is installed the flashing can then be fixed in place. This is the final waterproofing barrier for the window and will ensure and water run off from the window and the tiles is channeled down and onto the tiles below.
It’s installed in a similar way to the membrane in that the bottom section is fitted first. It sits around the base of the frame with the bottom flexible section sitting over the tiles below.
First, replace any tiles that need refitting at the base so the flashing can sit nicely over it. To prevent a large “step” use a grinder and stone cutting or diamond disc to cut the contours of the tiles down so that they fade in and gradually rise.
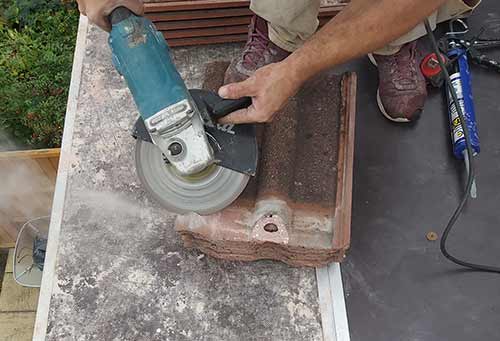
Cut the tile contours so they gradually fade in and rise
Once positioned, it is then screwed to the frame through the fixing holes provided.
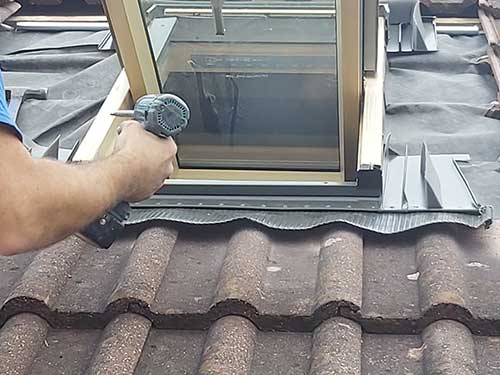
Fixing bottom section of flashing in place
The flexible sections are then gently shaped so they sit over the contours of the tiles. Use a lead hammer or similar soft tool, or the cushioned butt of a hammer to do so.
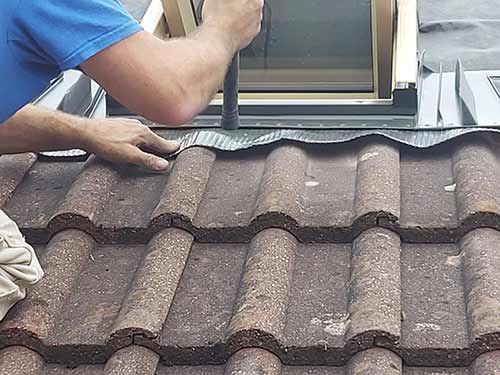
Shaping flexible section of flashing around tile contours
Once the bottom flashing is fixed in place, the sides are then fixed in the same manner, again ensuring they sit over the top of the bottom section. Depending on the manufacturer, flashing kits are fitted in a variety of different ways so refer to the manufacturers guidelines for fine details.
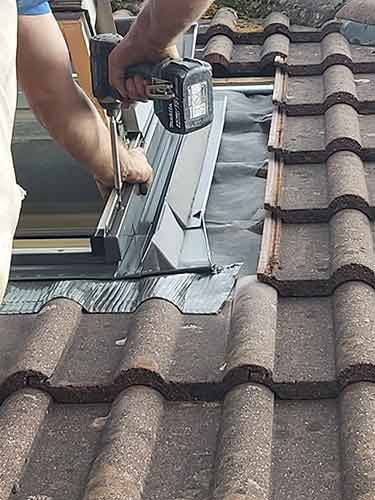
Screwing side sections of flashing in place
Once screwed at the sides there should be some small clips that clip over the sides and allow you to nail them to the battens, ensure these are also in place.
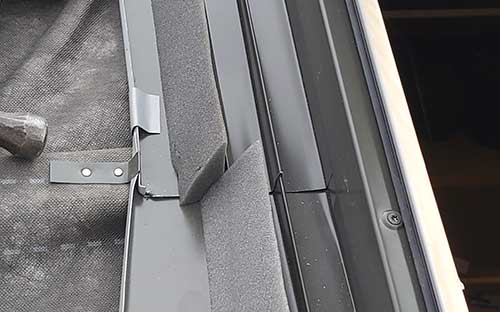
Ensure side fixing clips are also nailed in place
Lastly, the top piece of flashing is then secured in place, ensuring it sits tight to the frame and is fully screwed and secured using the screws provided through each available fixing hole.
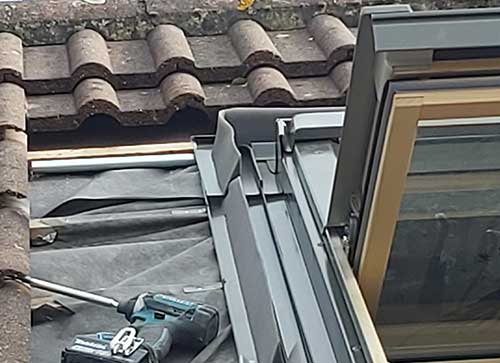
Top section of flashing fixed in place
In terms how the flashing actually work, each tile, when fitted in place, will over lap the flashing and sit around 25mm away from the frame of the Velux window. Any water flowing over them will then drop on to the flashing, flow down it and then off of the bottom flashing on to the tiles it sits over.
The triangular sections of foam that you can see fitted to our flashing plug the gap between the underside of each tile and the flashing, preventing any moisture, dust and debris blowing up under and over the flashing itself.
Step 11 – Reinstall Tiles
The final job now is to refit the tiles back on the roof. Start by putting back any whole tiles in the same way that you removed them. Gently lift the existing tiles and slot them back under, either sitting the lip back over the batten or slipping the interlocking sections back together.
When all the whole tiles are fitted, you’re then left with the cuts. For tiles to the side, use a tape measure to measure from the inside edge of the interlocking section out to the edge of the window frame and then deduct 25mm.
Using a 9 inch grinder (or 4 inch if you don’t have one) and a stone cutting disc or preferably a diamond tipped cutting disc, measure and mark the tile and then cut it to size.
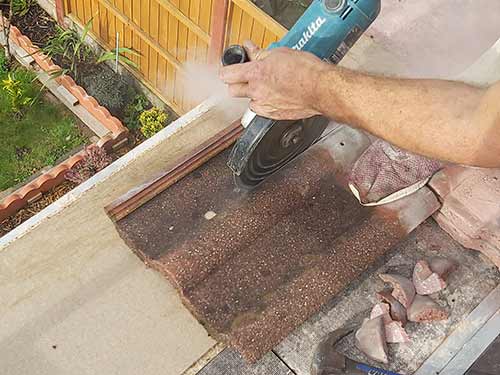
Cut tile to size
Repeat this process for any other tiles. For top and bottom tiles, remember to measure from the back of the lip on the underside of the tile or the back of the batten for your cutting measurement as this is the part that will run down to the frame.
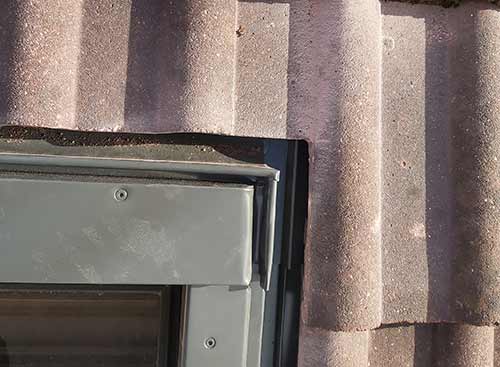
Cut and fit tiles to leave a 25mm gap between them and the frame
Once all of the tiles have been cut and fitted you are then pretty much done. Remove the bracing timbers from inside and any spare tiles on the scaffold will need to be moved and stacked before the scaffolding is taken down. Good work!
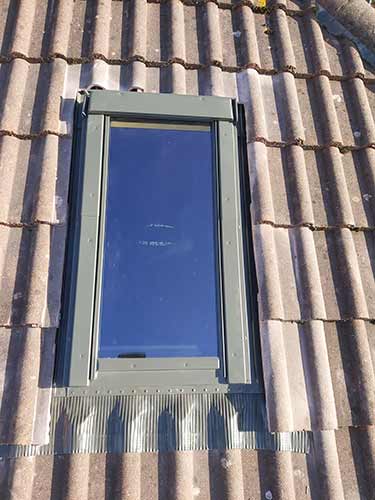
Velux window successfully fitted
If you are wanting to provide additional light into a ground floor room space it may be a good idea to look at a sun tunnel. Check out our project on sun tunnels that includes full installation instructions and a description of what they actually do.

