Decoupage can be a very easy craft to undertake, and with patience and persistence your hard work can really pay off and you can use it to give your old, worn-out furniture, trinkets, or accessories a new colourful lease of life.
Decoupage is a great way to upcycle old furniture without having to fork out an arm and a leg. You can get beautiful, custom-made designs without the designer price tag.
It is also great for personalised handmade gifts to give to your friends and family. And if you are looking for something fun and easy to keep the little ones occupied on a rainy day then this is a perfect activity for them. Just watch out for the mess!
An Introduction to Decoupage
What is decoupage? Decoupage is the craft of applying images or paper-like materials or fabrics onto a three-dimensional object such as a box, or a photo frame, or a chest of drawers.
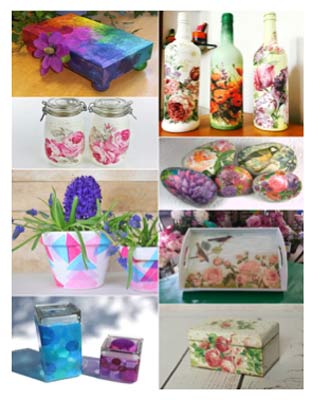
The item you choose to decoupage is entirely up to you, you could choose to re-vamp an old piece of furniture like a chair, a small table, or a lamp, or you could choose to do an object such as a jewellery box, a tea tray, or a glass bottle.

Decoupage chest of drawers and bottle
The term Decoupage [pronounced: dey-koo-pahzh] comes from the French découper, which means “to cut out.” It originated in France in the 17th century and by the mid-20th century, it had made its way across the rest of Europe and America. It is now considered a very popular means of interior decorating and craft.
Decoupage is a relatively easy craft to learn, and once you have the basics down the possibilities of what you can do with it are practically endless. There are many different ways one can decoupage, and it depends, obviously, on the materials used and the object that is being covered.
Types of items/furniture used in Decoupage
The objects you can decoupage can usually be split into two categories; furniture and decorative. For instance, you could decoupage an old chair that has seen better days, a chest of drawers that is worn and plain, or a bookshelf that you want to add some colour to. On the other side are the purely decorative items; a glass vase, a photo frame, or a trinket box for example.
The best material to decoupage onto is wood (more specifically, soft-woods), but you can also decoupage glass, clay, terracotta, ceramics, cardboard, and metal. An example of the types of items you can decoupage are:
- Vases or plant pots – Plates, trays, mugs, or bowls
- Lamps and lampshades Photo frames
- Hardcover book (or paperback if you’re careful) – Glass or plastic bottles
- Bookshelves, cupboards, wardrobes, drawers Chairs, tables, desks
You can decoupage a great range of different objects
There are of course more, as pretty much anything you can think of is suitable for decoupage (with the exception of certain objects such as electronics, eating utensils, and other such kitchenware).
Types of Materials used in Decoupage
The types of materials that you can use to decoupage have a little more limitation, as they have to be thin enough that the glue can soak through and malleable enough to work with, but that doesn’t mean that there aren’t still quite a few you can choose from.
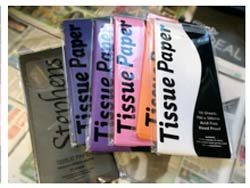
- Tissue Paper Paper Napkins
- Book pages – Comic book pages
- Magazines or Catalogues – Newspaper
- Greeting Cards – Sheet music
- Maps – Rice paper
- Wapping Paper – Wallpaper (thin)
- Fabric (thin) – Card Stock (thin)
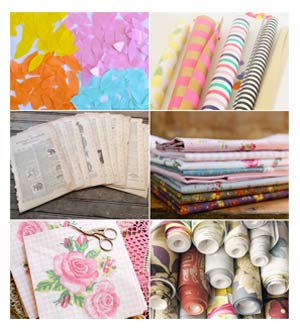
Selection of materials needed for decoupage
There is also decoupage paper, which is specifically designed with decoupage in mind and they can come in a variation of block colours or with patterns or designs. There is pretty much something for everyone.
Different types of materials require different preparation before you can start decoupaging.
With most, you simply only have to cut or tear the material – depending on your needs – while others involve a little more effort.
With napkins, you simply have to remove the extra ply. Napkins usually come with two or three plies and to get the best results with decoupage (and to minimize any possible wrinkling) you only need the top layer of ply – the one with the design on it.
With other heavier types of materials such as fabrics or wallpaper you need to make sure that they are pliant enough to work with around corners, bends, and curves, and that they are not too thick as that could become problematic later on.
The simplest way to do this is to buy cheap fabrics and wallpaper as those are usually thinner and therefore easier to use.
However, cheap often means low-quality which can be susceptible to tearing, so you need to be gentle and patient when working with them.
If you do decide to go with higher-end fabrics or wallpaper then try to either choose as thin as possible, or a good tip is to soak your fabric/wallpaper in water for about five to ten minutes (depending on the thickness) until they become flexible enough to work with.
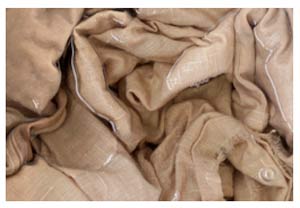
Any old material can be used in a creative way
How to Decoupage
There are two main ways to decoupage and pretty much each method falls within either one of these categories. As we mentioned above découper means to “cut out”, therefore the most obvious way to decoupage is to cut out – either with scissors and/or a craft knife – around the images or motifs you wish to use and then place them on your item. You can either layer your materials over each other in a collage or let the surface of the item you are decoupaging show through.
With the collage method, the most popular way is to tear your material rather than using precise cuts.
This offers a more “handmade” feel to the finished product and quite often can blend your decoupage together in a way that seems like it’s been painted on.
Whichever method you choose is personal to you and if you need inspiration there are thousands of blog posts about decoupage and photos on Pinterest.
Because the materials used for decoupage are usually quite thin, the surface of the item you are decoupaging can quite often show through.
If this is a look you like then that’s no problem, however, if it’s not, or perhaps you just wanted a new colour underneath, then painting your item first is a good way to go.
Sand down your item first if needed, such as with varnished or painted wood, clean with a damp, lint-free cloth to remove any leftover mess, and then paint.
Some materials may need to be primed first, such as glass, metal, or terracotta as these materials are either too smooth to give the adhesive something to stick to or too porous which sucks the moisture out of the glue before it can do its job.
We have projects on how to prepare different materials for painting such as how to prepare wood for painting, how to prepare metal for paint, and also how to correctly prepare ceramic and glass for paint.
There are also a few different kinds of glue you can use for this. The cheapest option is to use watered down PVA as you would for paper maché work (the usual measurements are one-part glue to one part water), but there are other options available.
The most popular one seems to be Mod Podge as not only does it come in a variety of finishes from matte to gloss, you can also get ones that are dishwasher safe and for outdoor use which provide just that extra bit of water resistance.
Spray adhesive can also work, but for best results use this for larger projects such as big furniture and in a well-ventilated area.
In the example we’ve demonstrated below, we used a specially designed decoupage medium as it was thinner that Mod Podge (which can be quite gloopy) and therefore was easier to use with the thin tissue paper which can easily rip with the Mod Podge thickness.
Make sure to choose the right adhesive for your project. When buying online always check the reviews to see what other people are saying, and always read the labels to make sure you know exactly what you are getting.
Once you have your item primed, painted, and ready to go, and you have all of you materials and tools – see our basic tools and material list below – you are ready to start decoupaging!
Step-By-Step Guide on How to Decoupage a Wooden Box
We took it upon ourselves to give you a step-by-step tutorial on how to decoupage a wooden box with various coloured tissue paper.
Below we will show you each step we took to decoupage this box, plus the materials and tools we used to do it.
With this guide, you can take the basic steps and the information we gave you above to help you get on and do your own decoupage project or two!
Choose Item/Surface to Cover
We’ve chosen a simple wooden box with a lid which you can buy cheap at any craft store. We removed the hinges and latch to give us a smooth, uninterrupted area to work on.
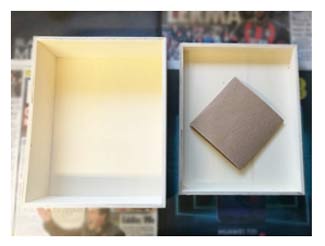
Sand the box down first if you need to
Choose Materials/Images to Use
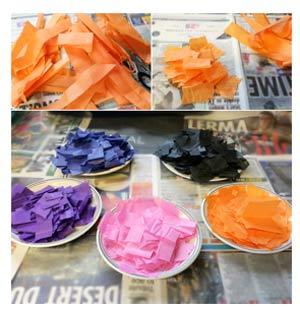
We chose these pretty coloured tissue paper. We were going for a sunset colour palette and chose colours that complimented each other.
Tissue paper ready for using in decoupage project
Gather Supplies and Protect Your Workspace
Here we have the materials and tools we used. As well as the box and the tissue paper, we also have:
- Decoupage Glue
- Craft Paint in White and Black
- Medium-grit Sandpaper (fine works well too)
- Sponge Brushes in a variety of sizes
- Scissors
- Craft Knife
- Paint Brush(s)
- Ruler
- Paint Tray or Small Pots or Bowls
- Lint-Free Cloth
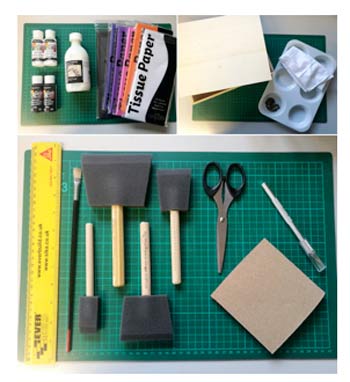
Before starting a decoupage project, get all of your kit ready
Most of these supplies can be found in any craft or art shop, or online. Lay down newspaper or a dust rag to protect your work area. It may also be a good idea to wear an apron over your clothes or to wear clothes you don’t mind getting speckled with paint or glue. Remember to have clean hands and to roll up your sleeves and tie up your hair (if necessary).
Sand Down Box (if needed)
Firstly we sanded down our box. As it was unfinished wood it didn’t need a lot of sanding and this was mainly to get rid of any splinters and roughness that was left on the wood.
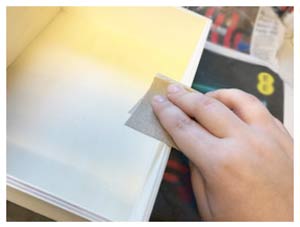
Before painting, do a final clean down to remove and dust or debris
Clean, Dry, Prime, Then Paint (if preferred)
After sanding we used the paintbrush to sweep away the dust fibres and then using a damp, lint-free cloth wiped away any leftover fibres and dust.
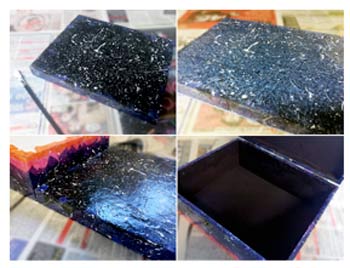
Once dry, we painted the box to give us a clean, unblemished surface to work on as tissue paper becomes very see-through when wet.
We used white (outside) and black (inside) craft paint for this. Start on the inside in the corners and edges before painting up the sides and then the bottom.
Do this for both the lid and box so that when the second one is drying, you can start on the outside of the first. Do the sides first and then the top.
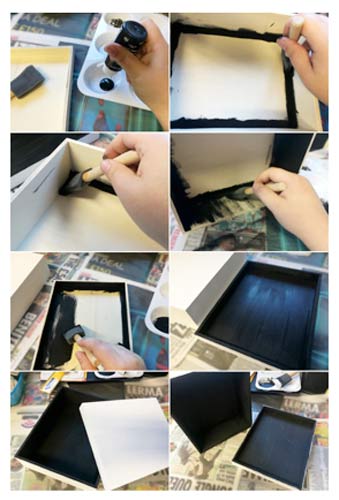
Work through each stage of painting your decoupage project
Prep Images/Materials to go on the Object (tear/cut/rip)
Cut or tear your tissue paper into strips and then each strip into rectangles, roughly one to two centimetres long. We needed only one sheet of tissue paper as they were quite large, but continue tearing/cutting until you feel like you have enough.
Prepare al of your tissue paper
Brush Glue on the Surface of the Object
Pour the glue into small pot or bowl to use as an adhesive and varnish, then using the sponge brush apply it to your box in small sections so it doesn’t dry out.
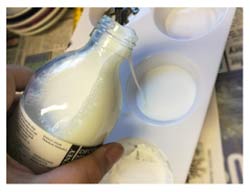
Paint on the glue to stick on tissue paper
Place Image/Material on the Object
Carefully add the tissue paper over the glue you just applied and brush over more glue, gently smoothing it out as you go.
Continue to apply more layers as you go, brushing the glue onto the surface of the box first and then over the tissue as well.
Unless you are going for a uniformed look, place the tissue squares in different directions to create a textured layer look.
This will also add different depths to the build-up of colour due to the semi-transparent nature of tissue paper. Dab or brush away any excess glue if needed.
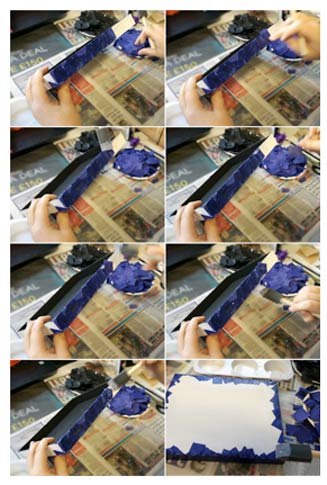
Stick the tissue paper on to the glue surface
If like us you have used multiple colours, start with the lighter colours first, as once you start to blend the layers of colours, any lighter colour will be difficult to see well over a darker colour.
Stick tissue paper on in stages and layers to create a pattern
Adding Varnish
Once you’ve finished and you are happy with the look of your box, brush a layer of glue over the whole item/surface and leave to dry.
Once touch dry add another thin layer of glue as a varnish and allow to cure for at least 24 hours.
If you wish, you can keep adding more layers of varnish until you are satisfied, however one layer should be sufficient.
Once you varnish has cured it will form a hardened, water-proof layer over the whole box and give you a subtle sheen on the finish.
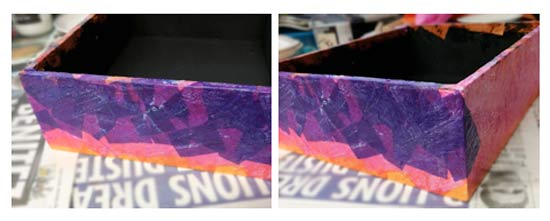
Add Finishing Touches (if needed)
We finished off the box by adding a second coat of black paint to the inside of the box to cover the tissue paper that overlapped the rim of the box.
This also gave the paint a stronger finish that just one coat. We also used the paintbrush to flick white paint over the surface of the lid and a little on the sides of the box to add a “starry” effect to complete the sunset look.
We let it dry and then decided to give the whole box another coating of glue to seal the whole thing.
Flick on whte paint to create a splattered effect
With these basic steps, you can go on to do any sort of decoupage you want. There are of course slight variations on some steps but if you wish to do a specific sort of decoupage, or you are using materials that we haven’t covered above, then there are plenty of other resources out there.
You can find how-to books at the library or in most craft stores, and there is an abundance of blogs and tutorial videos on the web.
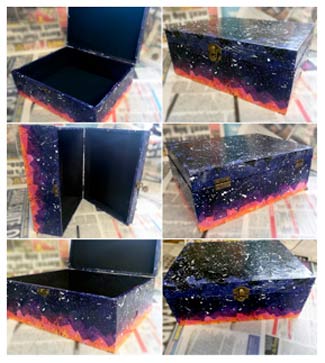
Finished decoupage project box
We would love to see any decoupage projects you do, so please don’t hesitate to share them with us!
Happy Decoupaging!