Dealing with radiator or heating system issues can be frustrating and intimidating. Many opt to hire a plumber for help.
Yet, armed with some basic knowledge, tackling simple problems yourself can save both time and money.
Below, we have listed some common heating system issues and how they can be resolved, in most cases, on a DIY basis.
How Does a Heating System Work?
Before we go into how to resolve any issues you may be having with your radiators, it’s important to understand exactly how your heating system works, as once you do, you’ll find it much easier to diagnose any issues and pin point the cause quickly.
In a conventional heating system, the heating source such as a boiler, immersion heater, back boiler etc. heats the water in the system and then via a pump, pumps the heated water around the various radiators attached to it.
When the hot water reaches a radiator, the pressure in the system pumps it around all of the various channels within it, which in turn heats up the surface. The cooling water then exits the radiator and is returned to the boiler or heat source for re-heating.
In terms of how the actual radiators work to heat your room, they operate in 2 ways – through convection and radiation.
In terms of convection, this is where electromagnetic waves are used to transfer heat energy form the radiator to the air. This process supplies a small amount of the heat provided.
The bulk of heat supplied by a radiator is done through a process called convection. This is where the emitted heat, heats the air around teh radiator. This hot air then rises, drawing in cold air that in turn is then heated. This cycle creates vertical currents that gradually permeate through a room, warming it up!
Hopefully now that you understand how your heating system works to heat the air in your home, you can then quickly spot areas where this is failing and identify the issue that’s causing it, allowing you to fix it quickly.
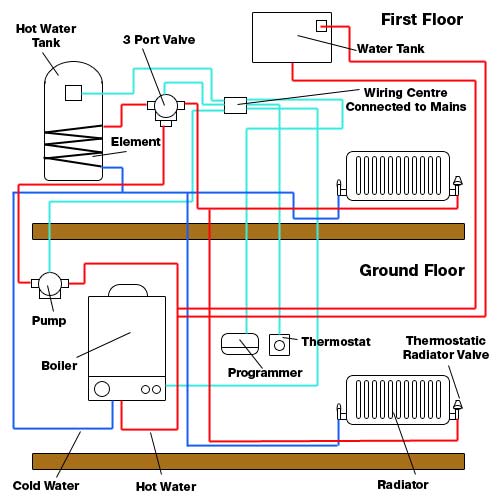
Heating system diagram with immersion and boiler
Checks Before Investigating Radiator Issues
Before diving into more complicated radiator issue fixes, run through these initial checks to rule out other issues first:
- Ensure your room thermostat is set higher than the current room temperature to activate the heating system.
- Verify that your heating system programmer is correctly scheduled (e.g. am and not pm) and not set to “off”.
- Check if the boiler is switched on, either at the unit or the socket supplying it.
- Inspect the consumer unit for a tripped MCB breaker, indicating a potential electrical issue.
- If you have an older boiler, check if the pilot light is lit; if not, it may need relighting.
- Monitor the boiler pressure, aiming for around 1 – 2 bar (ideally 1.5 bar); if low, use the filling loop or other method to top it up and reinstate the pressure.
- Unusual noises from the boiler could signify significant problems, prompting professional assistance.
If all the above checks out, the issue likely lies within your radiators or associated pipework.
A Note on Bleeding Radiators
Before we go any further it’s important to mention about bleeding as this can in some cases, quickly resolve numerous issues, so before undertaking anything else it’s always a good idea just to run around quickly and bleed them.
If you are unfamiliar with the term “bleeding”, then what we mean by this is releasing any trapped air to ensure that the water in your heating system can flow freely around your radiators and heat them quickly and efficiently.
This is done by releasing the bleed valve found on every radiator (normally at the top) on each radiator so the air can escape, restoring your heating system to its former glory. As this can be done in seconds for each radiator, it should be one of your first jobs. For a full explanation on this process, see our bleeding radiators project.
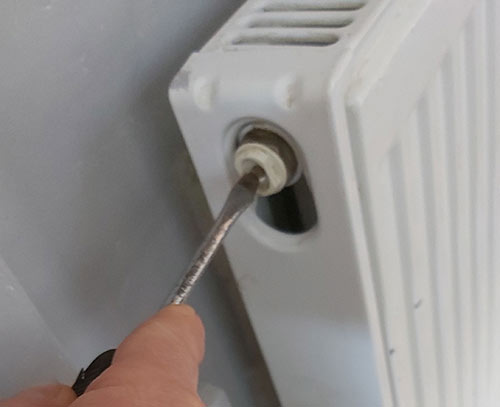
Undoing the bleed screw on a radiator
A Note on Flushing a Heating System
Similar to bleeding, flushing is another process that can be carried out on your heating system that can, for some symptoms, cure a range of different issues, however it’s not as much as a simple process as bleeding and is quite a bit more involved.
Over time, rust and debris can build up in a heating system creating a black sludge-like substance that can then easily block radiators, pipes and many other heating system elements.
The process of flushing uses high pressure water in order to blow any such substance out of your system and radiators, leaving it once again clean and clear and firing on all cylinders!
This is quite an involved process and also a messy one, so if you are not comfortable with doing it yourself, call the professionals in. To find out more, see our power flushing central heating project.
Tools and Products Needed for Resolving Radiator Issues
In order to run through the following checks to resolve issues with your heating system, you may need some or all of the following tools and products:
- Shallow tray for draining
- Selection of old rags, towels and cloths
- Bucket
- Radiator bleed key or flat blade screwdriver
- 2x large adjustable spanners or Stilson grips
- Hosepipe
- Inhibitor
- Sludge remover
- Selection of spanners
- Replacement ball valve
- Replacement central heating pump
- Replacement Lockshield/TRV valves
- Replacement radiator
- Selection of copper pipe fittings
- Soldering iron and flux
- Pushfit fittings and PVC pipework
- Pipe clips
Diagnosing Heating System and Radiator Problems
If your radiators and associated pipework seem to be the issue, the next step is to diagnose and pinpoint the exact cause of the problem.
Here are common heating system and radiator problems along with tips to fix them or provide information to your heating engineer, potentially saving you money on repair costs.
Top of Radiator Cold and the Bottom Hot
If you notice the top of your radiator is cold while the bottom is hot, it’s likely due to trapped air preventing proper water circulation and heating.
To fix this, use a radiator key to open the bleed valve, typically located at the top of the radiator. Place a cloth under the valve to catch any water. Slowly loosen the valve until you hear hissing, indicating air escaping. Once water starts flowing steadily, tighten the valve.
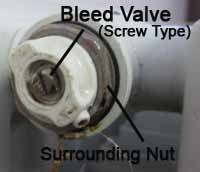
Bleed valve on side of radiator
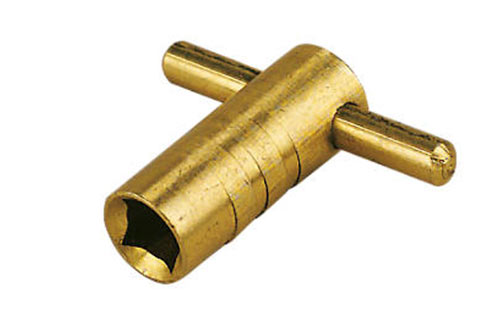
Radiator key for bleeding a radiator
For a ful, detailed explanation of how to do this see our bleeding a radiator project here.
If you find yourself bleeding your radiators frequently, it’s a sign of a larger issue requiring a professional central heating engineer.
Top of Radiator Hot and the Bottom Cold
If you notice the bottom of your radiator is cold while the top is hot, it’s likely due to rust and sludge buildup in your heating system over time.
This sludge, a mix of rust and dirt, can block components and create issues throughout the system. The buildup prevents proper water circulation, leaving the bottom of the radiator cold.
To address this, you can use a sludge remover and cleaner, which breaks down the sludge. To find out how to add them see our project here on adding heating system inhibitor.
Despite this fairly easy fix, this is often a temporary solution, as the dissolved sludge remains in the system and can settle and cause the same issues again.
For a permanent fix, power flushing your heating system is the only way to go. This involves draining the system and pumping high pressure clean water through it to remove the sludge and deposits and then refilling again ready for use.
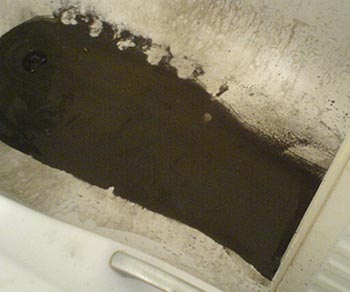
Black sludge from heating system – Image courtesy of radiatorsludge.co.uk
Cold Spot in the Middle of the Radiator
Finding a cold area in the middle of your radiator, while the rest is warm, likely indicates, again, sludge and rust buildup in your heating system.
To address this, consider using a sludge and rust remover designed for heating systems, which can help clear the buildup. Instructions for adding these cleaners to your system can be found below.
For a thorough solution, draining and power flushing your heating system is recommended. This process involves pumping water through the system to remove the sludge and debris. Check out our linked project above for DIY instructions.
Hot Downstairs, Cold Upstairs Radiators?
If your downstairs radiators are hot while the upstairs ones remain cold, it’s likely your system’s feed and expansion tank in the loft is empty (if you have one).
This tank supplies cold top up water to your system and allows for expansion. Check the tank’s ball valve; if it fails to release water when pressed down, it’s likely the cause. If water does come out, this isn’t the issue so call a professional.
Address this quickly to prevent further issues occurring like airlocks.
To fix it, the ball valve will need to be replaced. This is a manageable DIY task as long as you’ve turned off the water supply.
After replacement, the valve will open and fill the tank, but ensure the tank doesn’t fill completely to leave room for system expansion.
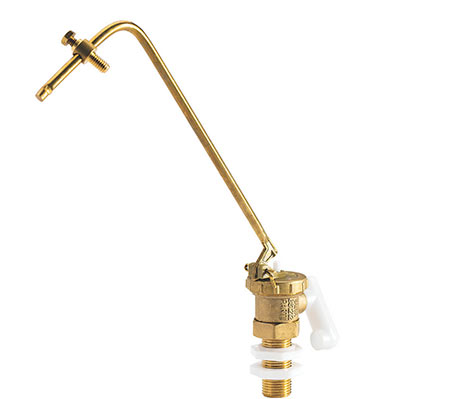
Float valve for feed and expansion tank
Hot Upstairs, Cold Downstairs Radiators
If your upstairs radiators are hot while the downstairs ones remain cold, it’s likely, but not always, a faulty central heating pump.
The pump circulates hot water from your boiler to the radiators and back. Replacing it can be done on a DIY basis, but if you’re unsure always get professional help.
Sometimes, after draining and refilling your system, air can lock the pump, causing malfunction and making it appear as if the pump has failed.
To bleed the pump, turn off the heating and power, open the gate valve before the pump, and unscrew the pump’s large screw until water flows and then screw it back in. For more information on bleeding central heating pumps see this guide here.
Turn on the heating, and test the downstairs radiators. If they heat up, problem solved. If not, bleed the pump again or call a professional.
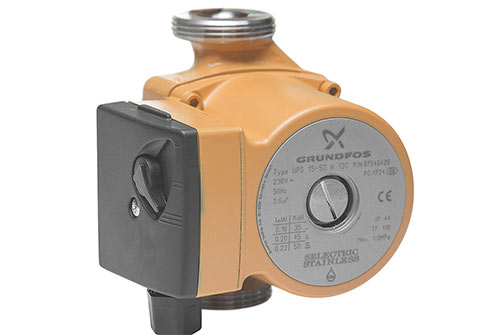
Grundfos central heating pump with bleed screw on the front
No Radiators Heating Up
In severe cases, some heating systems may run without any radiators getting warm.
This is often due to rust and sludge buildup, blocking water flow throughout the system.
The blockage could be localized in the boiler or affect the entire system.
To resolve this, the system needs to be drained and power flushed. Refer to the provided links for instructions or hire a heating engineer for assistance.
Faulty TRV Valve
If one or a few of your radiators aren’t heating up properly or remain cold when the heating is on, it could be due to a faulty thermostatic valve (TRV), or it might simply be turned off.
First, check the TRV valve to ensure it’s set to a temperature above zero. If it is, but the radiator is still cold, the valve may be seized closed.
To check, remove the white plastic cover of the TRV and see if the pin at the centre moves freely when wiggled. If it’s stuck, gently tap the end of the pin with a small hammer to free it. If it remains stuck, you may need to replace the TRV.
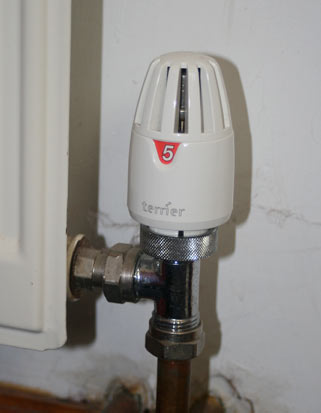
Thermostatic radiator valve
Just one Radiator Cold
If you have an issue with just one radiator that isn’t heating it, in most cases this will be something fairly straight forward to resolve and a lot of the time it’s something as simple as the fact that one or both of the valves supplying it have been turned off.
In order to resolve it, it’s generally just a simple matter of opening the closed valve(s) up and allowing hot water to flow. One thing to be aware of however is that the amount that each valve is open can affect the balance of the system and if it’s opened to the point it’s allowing in too much hot water it can cause other s to heat incorrectly, resulting in the need for the system to be balanced once more.
One final potential cause can be that the TRV valve has failed, it’s rare, but it can happen. In this case you would simply replace the valve and if that resolves the issue, you know what the cause was.
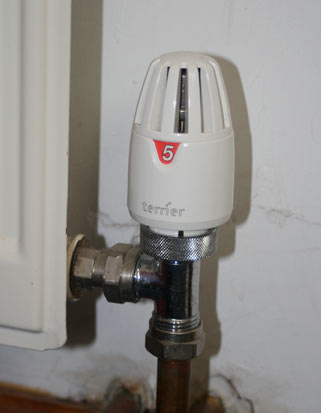
Faulty TRV valve needing replacement
Uneven Heating: Radiators Closer to the Boiler Get Warmer
If you notice that radiators closer to your boiler heat up faster than those farther away, your heating system likely needs balancing.
Temporarily, you can adjust the valves on the radiators near the boiler to restrict their flow and allow more hot water to reach the ones farther away.
For a permanent solution, consider balancing your heating system. You can hire a heating engineer or learn how to do it yourself by following our balancing heating systems guide.
Air Locks in Radiators and Heating System
When air enters a radiator, it can cause parts to go cold, usually affecting the same radiator consistently until the air is bled out.
In some cases, larger amounts of air can enter the heating system, causing different radiators to go cold at different times.
To fix this, try bleeding all your radiators to remove the air. If the issue persists, it’s best to call in professionals.
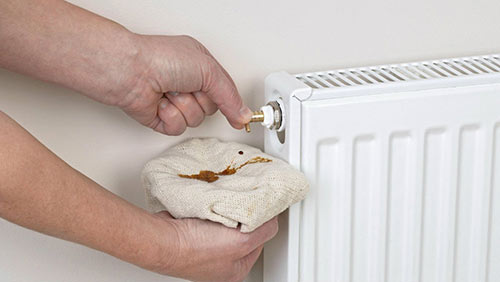
Bleeding a radiator to remove air locks
Leaking Radiator(s)
Radiators can develop leaks, especially if rust inhibitors aren’t used, leading to internal rust and eventual bursts. If this occurs, the radiator needs replacement. Learn how to replace a radiator using our handy guide.
If you can’t replace it immediately, isolate the radiator by turning off both valves to prevent further issues. Place a drain tray underneath to catch any leaking water until it’s fixed.
Sometimes, newly replaced radiators may have leaking valves. Tighten them gently to stop the leak. If it persists, isolate and drain the radiator, then refit each valve with PTFE tape.
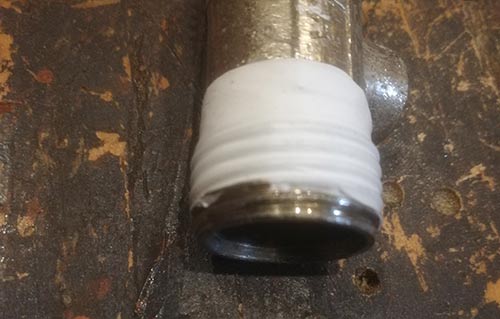
PTFE tape wrapped around radiator valve
Leaking Pipework
Heating pipework can develop leaks, often at joints or from the pipes themselves if they split or burst or get knocked and damaged.
If the leak is at a compression joint, try gently tightening it. Avoid over-tightening, as it can worsen the leak. Learn more about compression joints in our project guide.
If the leak is from a soldered joint, it needs to be re-soldered or replaced with another soldered or compression joint.
In some cases, pipes can develop weak spots over time and eventually burst. If this happens, the pipe needs replacement. Learn how to repair a burst pipe in our easy to follow guide.
Gurgling Sound in Radiators or Pipework
If you hear a gurgling sound from your radiators or pipework while the heating is on, it’s a sign of air in your system.
To fix this, you need to bleed all your radiators to remove the air. Learn how to bleed a radiator using our DIY guide.
If that does not resolve the issue, this can be a sign of more serious problems, so you will need to get a professional heating engineer in.
Banging or Knocking in Pipework
If you hear banging or knocking sounds when your heating system is running, it’s likely coming from the pipework.
This usually occurs when pipe clips come loose, break of or are missing, causing pipes to knock against walls or other pipes when the system is working.
To fix this, reattach any loose clips or install new ones to secure the pipes and prevent movement and noise.
Adding Sludge and Rust Remover (Inhibitor) to Your Heating System
To tackle rust and sludge buildup in your heating system temporarily and get it back on track, consider adding a sludge and rust remover. This solution effectively breaks down buildup, restoring your heating and radiators to proper function.
The method of adding the solution depends on your heating system type:
Adding Sludge and Rust Remover to Your Open Vented Heating System
For open vented systems, directly add the sludge and rust cleaner to the feed and expansion tank in the loft. Ensure you target the correct tank, distinguishing it from the hot water storage tank, typically larger in size. Refer to our guide on adding inhibitor to your heating system for detailed instructions.
Verify that you’re using the appropriate product for your system type, as some chemicals may harm your system.
Adding Sludge and Rust Remover to Sealed Heating Systems
For sealed systems, adding sludge and rust remover is slightly more complex, but modern products simplify the process.
It can be accomplished by draining a radiator and adding the remover or using the system filling loop for fully sealed systems. Refer to the adding inhibitor project guide for detailed assistance.
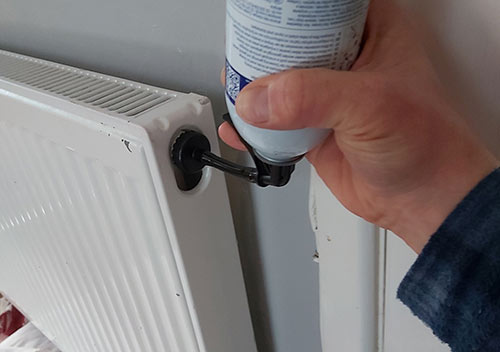
Adding sludge and rust remover to a heating system can be done similarly to adding inhibitor.
Diagnosing radiator and heating system problems can seem a bit daunting if you have never done it before, however once you have you will see that some issues can easily and quickly be resolved by you, saving you both time and money.

