Here at DIY Doctor we have been searching high and low for a brick waterproofer that will make damp proofing external brick walls easy without stopping the brickwork breathing.
A great many of our users have emailed us with questions on how best to undertake external brick waterproofing.
In the past we’ve always advised you to not apply an exterior damp proof paint or coating unless its makers could promise that it would allow the brickwork to breathe, allowing the damp in your walls to dry out rather than trapping it in the walls.
Waterproofing Your Exterior Brick Walls Helps Solve any External Damp Issues
When your external walls are exposed to a water source such as rain, this water can enter your masonry, in some cases travelling laterally from your external walls to your internal walls.
It may be that cracks in your bricks or pointing are letting the water in, or your prevailing weather conditions may just mean that your walls stay damp without getting the opportunity to dry out.
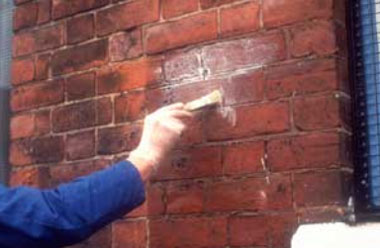
Dryseal waterproofer is one of the best ways to keep your masonry waterproof
The Consequences of External Damp
Any cracks in your pointing and brickwork can cause a difference in the water absorbency of different areas of your walls – some areas will absorb more water than others. This can form damp patches in what is known as penetrating dampness.
Alternatively, it can be that some areas of your wall are more exposed or more susceptible to letting water in, despite being sound and this can also cause damp patches or a uniformly damp area to form.
This can spread to your internal walls too, resulting in patches of damp on your internal walls.
These patches might contain ‘salts’ which have washed out of the brickwork and which form white, crunchy deposits which can erupt through your paint and blow your plaster.
The damp patches can also be ‘cold spots’ on your wall, as damp patches lose heat 3 times faster than the surrounding wall.
These cold spots can cause moisture from your internal air to form condensation, making the area even damper and encouraging the development of black mould spots.
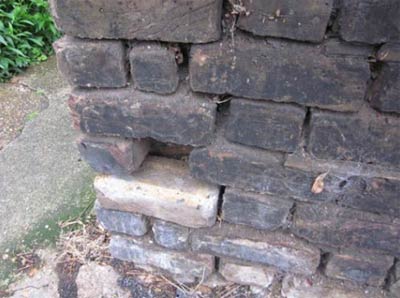
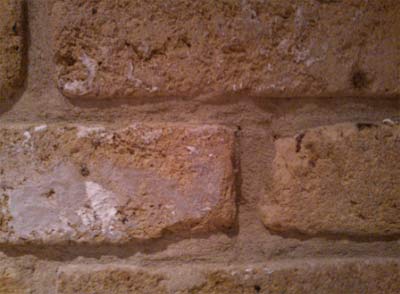
Missing bricks and cracks in masonry can allow damp into the wall
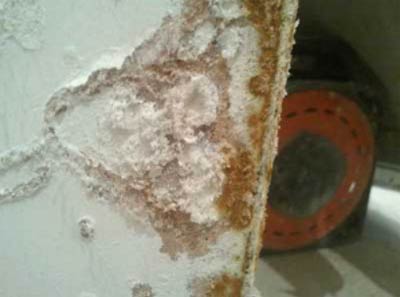
Damp walls can cause salt deposits to appear – these can blow your plaster
In terms of damage to your external walls, if any water that has gotten into your brickwork freezes, it will expand outwards within the brick, creating cracks (or more cracks) in your brickwork.
This is called Feeze-Thaw action, which allows more water in, gradually making the problem worse and destabilising the face of your brickwork – this is known as spalling.
Mould and moss can also grow on damp areas on your outside walls, which can also damage the face of your brickwork.
Other Causes of Damp in Your Walls
If you think your damp issues may be caused by water coming in from the ground in the form of rising damp, check out our Rising Damp project page which discusses installing a horizontal Damp Proof Course in your walls to limit this.
If your damp issues are occurring around window or door frames, check out our Vertical Damp Proof Course project page instead for information on damp proofing around window and door frames.
If your interior floors are below ground level, meaning that a significant proportion of your interior wall is below your damp proof course and you’re having damp issues in this area, check out our Tanking project page which will show you how to waterproof or ‘tank’ this internal wall area.
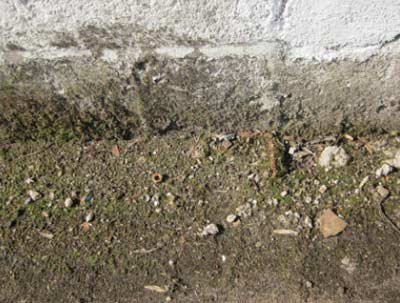
If your damp is affecting the lower area of your wall it may be being caused by Rising Damp rather than External Damp
Checking Your Wall for Faults
There are many reasons why your external brick walls might be getting damp, and not all of these problems can be solved by using a brick waterproofer.
A waterproofer is usually only used as a solution for sound external walls that are exposed to enough rainfall that they just become damp.
If water is getting into the walls because of a fault of some kind, such as cracks in your bricks or pointing, then you will need to fix this before applying any waterproofer.
In this case, once you have fixed the issue, you can apply waterproofer as a preventative measure against future damage.
There are a few reasons why your masonry may have faults and each of these causes will have its own solution, which we will discuss here.
There are a few checks that you can carry out to identify any places in your brickwork where water may be coming in, and also to identify the cause of these faults.
Check your external walls for any faults that may be letting damp in to your external walls
Rusted or Dirty Wall Ties
If you have cavity walls, there are ties between them securing the inner and outer walls together and providing stability which can rust over time, causing them to expand and crack your brickwork and mortar.
These cracks then allow water into the brickwork from outside, creating damp patches in your walls.
Wall ties can become dirty when mortar is dropped onto them during the building process.
This is a problem because they can act as a bridge for damp that has accumulated in an external wall to travel across the cavity to the internal wall, again creating a damp or cold patch.
You can check for rusted or dirty wall ties by using a metal detector on your outside wall wherever your damp issues are or wherever you can spot faulty brickwork.
If you do find a wall tie near the affected area you can check its condition by removing the bricks from the external area near the tie (do not remove more than two without consulting with a surveyor) – more information on how to remove these bricks is available in our Replacing a Brick project.
Once you have removed your bricks, you can check your tie. If it is rusted or dirty you can either clean it or replace it. Information on how to replace the tie is available on our Replacing a Wall Tie project.
Once you have replaced your wall tie you can put your bricks back and repoint them. Guidance on how to do this is again available in our Replacing a Brick project linked above.
Check your wall ties for rusting and dirt as this may be allowing damp to travel through your walls
Cracks Caused by Spalling
As mentioned above, if a lot of water gets into your brickwork and freezes this can cause the face of your brickwork to chip off, damaging your wall and making it more susceptible to further water ingress.
You can repair any damage caused by spalling again by fully replacing any spalled bricks as laid out in our Replacing a Brick project mentioned above.
Freeze Thaw action and spalling can occur on any wall and there are preventative measures that can be taken while building new walls, especially garden walls where spalling is a constant problem. Follow this link to the Brick Development Association to find out more about wall details, coping and capping details and cold roof junction details.
‘Normal’ Cracks in Your Brickwork and Pointing
You can sometimes get cracks in your external brick walls that simply happen – these can be cracks in the bricks themselves or cracks in the pointing between the bricks.
You can fix any cracked bricks by replacing them with new ones (as mentioned above). If your pointing is cracked, you can replace this by following the instructions in our Repointing Brickwork project page.
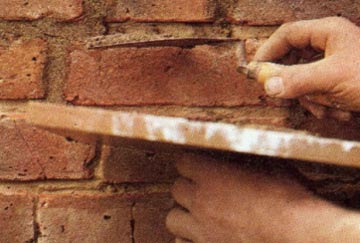
Repointing mortar joints where cracked and also when a brick has been replaced
Once your brickwork has been made good using these solutions you can then proceed with your brick waterproofing using a good brick waterproofer such as Dryseal waterproofer to damp proof your external walls and prevent any damp and associated damage from occurring in the future.
Damp Proof Your External Walls With Dryseal
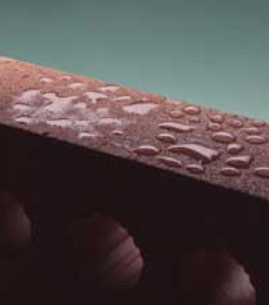
Dryseal waterproofer effectively waterproofs your brickwork
As we talked about earlier, here at DIY Doctor we only recommend using a brick waterproofer that allows your brickwork to breathe, as without this the damp already in your walls can’t evaporate and allow your wall to dry out.
Dryseal waterproofer is both an effective and breathable formulation, and so we can recommend it for waterproofing your outside walls.
Dryseal waterproofer is a solvent free, water-thinnable siloxane/silicone emulsion based damp proofing paint. It is highly alkali resistant, is absorbed deeply into your brickwork and cures rapidly to form an effective water repellent layer.
It’s water based and eco-friendly, and is also a great adhesive base for micro-porous paints.
You can dilute Dryseal down and it will still reduce the water absorbance of your masonry without blocking the pores in the brick or stone, allowing your damp external walls to dry out properly.
After you’ve waterproofed your outside walls you’ll need to treat any damp on your internal walls.
If your plaster is sound, once the walls have dried out you should be able to treat them with a salt neutraliser or an anti-mould cleaner to get rid of any salt deposits or mould spots before redecorating.
If your plaster isn’t sound, you’ll need to strip it back to 30cm above the highest damp point, wait for the wall to dry, treat it with a salt neutraliser or anti-mould cleaner and then replaster and redecorate.
If you want to be sure that your salts and mould won’t return, you can apply a waterproof render or fit a mesh membrane to your wall before replastering.
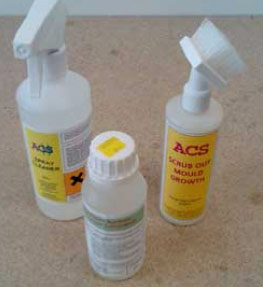
Treat your internal walls with anti-mould cleaner and salt neutraliser before redecorating to prevent the reappearance of salt deposits and mould
If you’re looking to damp proof your internal walls because an area of your wall is below your damp proof course, i.e. your floor level is below ground, you can do this by tanking, which involves applying a liquid or solid damp proof layer to your internal wall below your DPC. To find out more about tanking visit our Tanking project page.
As we have mentioned at the top of this page, it’s not advisable to coat your external walls with waterproofing solution.
However if they are constantly exposed to water and damp then in this situation an external waterproofer can be used, however it must be ensured that the walls surface remains breathable.