
Your kitchen and bathroom experience more heat and moisture than any other rooms in your home. These constant changes in temperature and humidity can quickly lead to condensation damp, and poor air quality.
The best way to control this is with effective ventilation and extraction. These systems remove warm, moist air and replace it with fresh, clean air. To learn more, see our complete guide below on installing a cooker hood extraction system.

Steam and water vapour rising from a pan on a hob
Why Do You Need Ventilation in Kitchens and Bathrooms?
Kitchens and bathrooms produce large amounts of warm, moist air from cooking, bathing, showering and the likes. Without proper ventilation, this moisture builds up and leads to condensation, damp and eventually black mould.
Activities like boiling water, using a kettle or taking a hot shower release steam and heat into the room. When this warm, humid air hits colder walls or ceilings, it turns into water droplets. This process is known as condensation.
In an average UK home, everyday washing and cooking can generate around four litres of moisture in the air each day. If this moisture is not removed fairly quickly, it can damage plaster, paint and timber and may also affect your health.
Modern homes are built to be more energy efficient, with insulation and double glazing that reduce natural airflow. While this helps retain heat, it also traps moist air inside, making mechanical ventilation even more important.
Effective extraction systems help control humidity, protect your home from mould, and improve indoor air quality. To learn more, see our guide on condensation and how to prevent it.
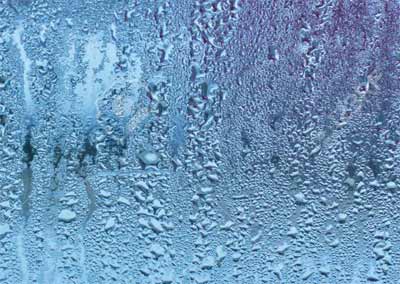
Lots of condensation collecting on a window pane
Ventilation and Extraction in Kitchens
There are two main ways to ventilate a kitchen: natural ventilation by opening a window or mechanical ventilation using an extractor fan or cooker hood.
Opening a window is the simplest and cheapest option. It allows steam and humid air to escape while you cook, helping to reduce condensation.
However, this isn’t always practical, especially in cold weather when opening windows means losing heat and comfort.
The most effective solution is a cooker hood. This is fitted above the hob and uses a built-in extractor fan to pull steam, smells and moisture away from the cooking area and vent them outside.
Modern cooker hoods also include integrated lights, so even though they sit above the hob, they improve visibility rather than reduce it.
While there are many styles and designs available, all cooker hoods work in the same way: they actively remove moist air to keep your kitchen fresh, dry and well ventilated.
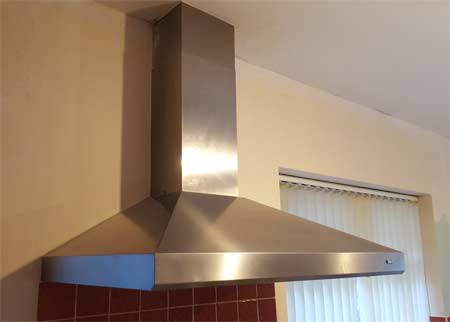
A cooker hood in place above a gas hob
What to Think About Before Installing a Cooker Hood
The type of cooker hood you choose will determine how it is mounted and where the ducting must run to reach an external wall for venting.
Before buying, carefully check the installation area to make sure there is enough space for the hood and ducting. You should inspect both inside and outside the wall where it will be fitted.
For example, gas pipes often run along external walls. If these are in the way, they must only be moved by a Gas Safe registered engineer.
You should also scan the wall with a cable, pipe and stud detector to avoid drilling into hidden services.
For help with using a stud detector, see our project here.
Extractor power is another key factor. The hood must be strong enough to remove all steam, grease, and odours effectively. Manufacturers list airflow in cubic metres per hour (m³/h) and should be stated in the instructions or on the manufacturers website.
If not provided, calculate it using this simple formula:
Kitchen volume × 10 (Length × Width × Height × 10). For example: 5m × 3m × 2.5m = 37.5 × 10 = 375 m³/h minimum extraction rate.
Finally, consider hood size. For gas hobs, the hood should be at least the same width. For induction hobs, it’s best to choose a wider hood, as vapour spreads outwards as well as upwards.
What Different Types of Cooker Hood are There?
There are several types of cooker hood available, each designed to suit different kitchen layouts, space requirements and styles:
- Integrated cooker hoods: These are built into a wall cabinet above the hob, staying hidden until pulled out or switched on. They are ideal for minimalist kitchens where appliances are kept out of sight.
- Visor or standard cooker hoods: Compact and practical, these are fitted under wall units. They are always visible but take up little space, making them perfect for smaller kitchens.
- Chimney cooker hoods: A popular choice in modern homes, these combine a standard hood with a vertical chimney that hides the ducting. They are ideal for venting through ceilings or loft spaces.
- Island cooker hoods: Designed for kitchen islands, these are mounted to the ceiling above the hob and either sit high up or extend down using a chimney section.
- Designer cooker hoods: These are statement pieces created to match specific interior styles. They focus on appearance as much as performance and are usually the most expensive option.
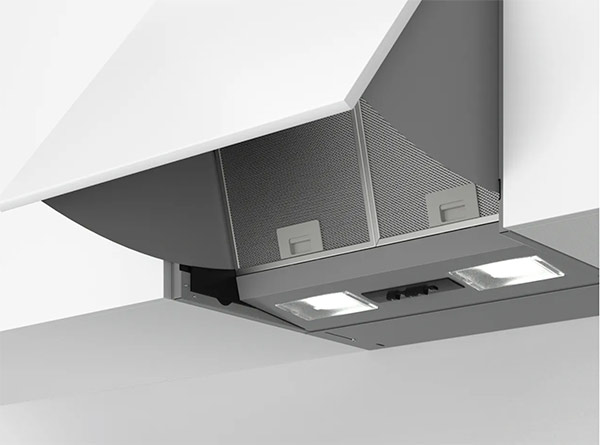
Integrated cooker hood
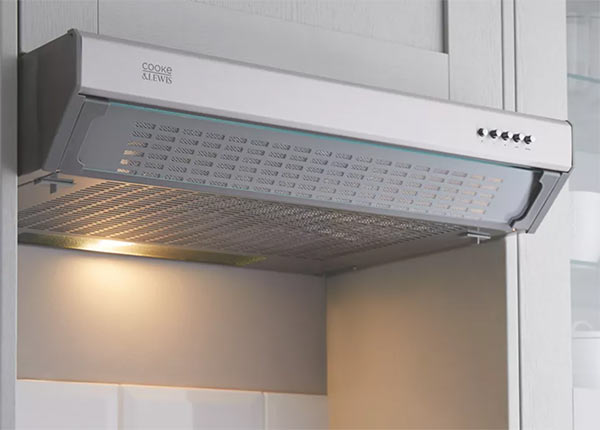
Standard or conventional cooker hood
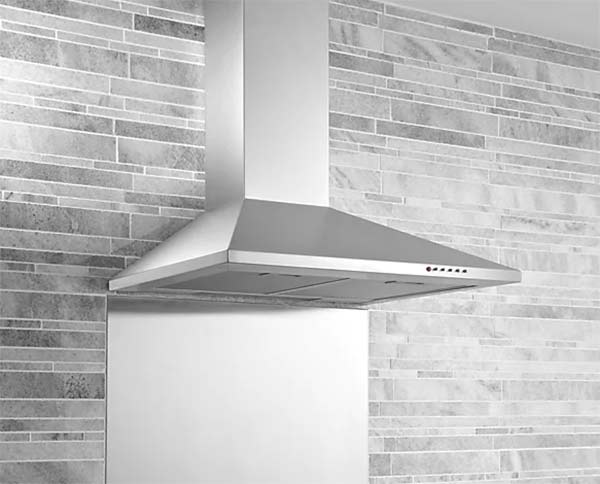
Chimney cooker hood
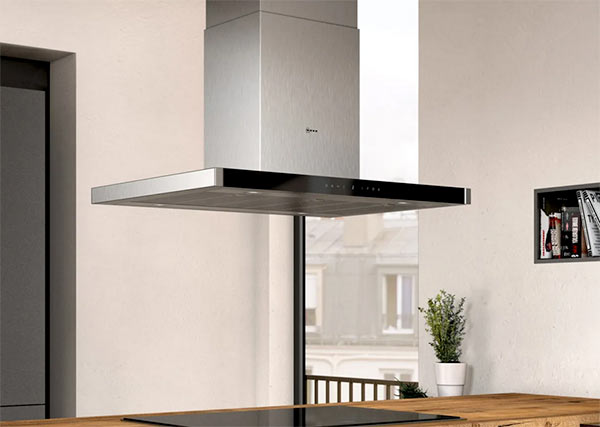
Island cooker hood
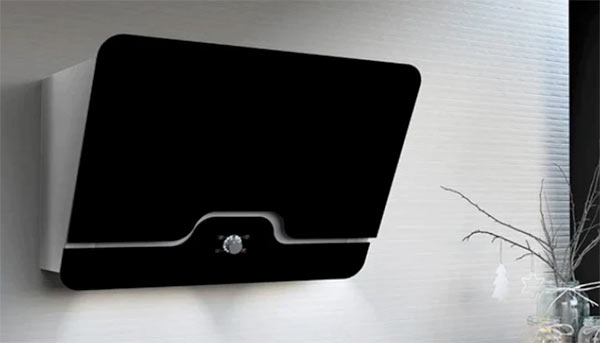
Designer cooker hood
All cooker hoods fall into one of two categories: air extraction or air recirculation.
Extraction hoods remove steam, grease and cooking smells and vent them outside. Recirculation hoods filter the air through grease and charcoal filters, then release the cleaned warm air back into the kitchen.
Both systems have pros and cons. Extraction removes heat from the room, which can be wasteful in winter, while recirculation keeps heat inside but may feel uncomfortable in hot weather. There is no single best option—it depends on your home and personal preference.
Note: If you have any gas appliances in your kitchen, you must use an extraction hood. Recirculating hoods are not suitable for gas installations.
When choosing a hood, always check the EU energy label. Go for the most efficient model you can, ideally A++ on the old scale or at least D or E on the newer system.
Modern cooker hoods should also feature LED lighting instead of halogen. LEDs are brighter, use less energy and last much longer.
Noise is another key factor. Hood noise is measured in decibels (dB). Around 60dB is considered quiet, similar to normal conversation or background restaurant noise.
What Heights Can My Cooker Hood Be Fixed At?
For a cooker hood to work efficiently, it must be installed at the correct height above the hob.
The recommended fitting heights are:
- Minimum 550mm above an electric cooker
- Minimum 650mm above a gas cooker
- Maximum 800mm above both gas and electric cookers
Installing your hood within these limits ensures safe operation and the best possible extraction performance.
What Are the Main Venting Options?
Once a cooker hood extracts air from your kitchen, it must be vented outside through suitable ducting.
There are several types of vent pipes available, but you should always follow the manufacturer’s installation instructions to choose the correct one.
The duct size is also critical. Most systems require pipework between 100mm and 150mm in diameter. Using the wrong size can reduce airflow and increase noise, so always match the ducting to the hood’s specifications for best performance.
Rectangular Flat Channel Pipework
Rectangular flat channel pipework is a modern venting option that has become popular in recent years. Its flat, slim design makes it ideal for installations where space is limited.
It is sized to fit neatly through a standard house brick, making it easy to vent directly through an external wall.
Because it is rigid with a smooth internal surface, air flows efficiently and moisture is less likely to build up, reducing the risk of mould compared to flexible ducting.
Always make sure the channel size matches your cooker hood’s airflow requirements to maintain effective and quiet extraction.
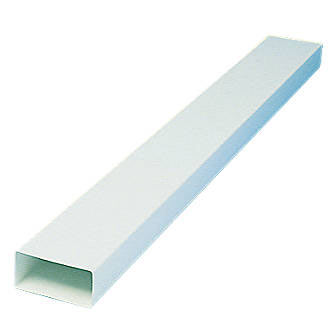
Rectangular flat channel ducting
Circular 100mm–150mm Flexible Ducting
Flexible circular ducting is the most common venting option for cooker hoods. Made from PVC or aluminium, it is easy to extend and bend, making it ideal for routing air through awkward spaces.
The main drawback is that it must be pulled tight and kept as straight as possible. Any sagging or creases can trap grease and moisture, which may lead to mould and reduced airflow over time.
Where possible, choose PVC ducting. It is usually quieter than aluminium, which can amplify noise as air moves through the pipe.
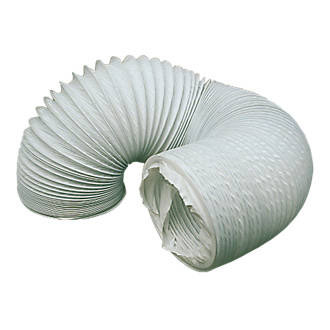
100mm flexible pvc duct
Soil Pipe / 150mm Round Ducting
Soil pipe can be used for ventilation, but it is not always the most practical option. Because it is rigid, it can be difficult to position and usually requires adaptor fittings to connect to other duct types.
It is only available in a 150mm diameter, which makes it suitable for high-powered extractor fans that need greater airflow.
For best results, purpose-made 150mm round ducting is usually a better choice. It is designed specifically for ventilation systems and is widely available from UK DIY stores and ventilation suppliers.
Most cooker hoods are supplied with the correct ducting, so you may not need to buy any extra. If not, always check the manufacturer’s guidance to ensure you use the correct pipe size and type.
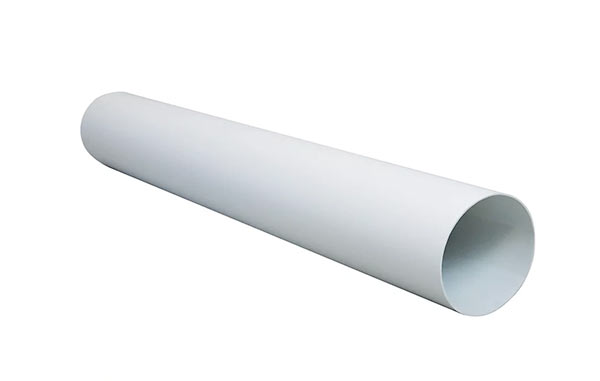
150mm round ducting pipe
Can You Vent into the Cavity?
It might seem easier to vent your cooker hood into the cavity wall, but this is a major mistake. Here’s why:
The purpose of ventilation is to remove humid, moisture-laden air from your kitchen and release it outside. Dumping it into a cavity just transfers the moisture, creating damp problems inside walls and potentially damaging plaster and paintwork.
Warm, moist air can also rise into your loft, leading to condensation, mould and even rot in the timber structures that support your roof.
Always vent directly outside to protect your home and maintain healthy indoor air quality.
Tools and Products Need for Installing a Cooker Hood
To correctly and successfully install a cooker hood in your kitchen you will need the following tools and products:
- Chosen cooker hood kit – should come with everything you need to install
- SDS drill
- Core drill bit – if drilling through a wall
- Set of hole saws – if cutting through ceiling or other plaster board surface
- Drill/driver
- Required screws – if not included with kit
- Hammer
- Bolster – if going through wall for adjustment
- Cold chisel – if going through wall for adjustment
- Electrical socket
- Fused spur
- Required length of cable
- Electrical side cutters
- Electrical pliers
- Electrical screwdrivers
- Selection of drill bits
- Wall plugs
- Screws
- Chase cutter angle grinder and stone cutting disc – If chasing in any cables
- Lots of dust sheets
Installing a Cooker Hood
In this guide, we’ll focus on installing an externally venting chimney cooker hood, which is a popular choice in UK homes.
Externally venting hoods require a route for air to exit your home, either through a wall or via the loft and out through a soffit or vent tile.
If you have basic DIY and electrical skills, this installation is manageable. If not, it’s safer to hire a professional to ensure correct and safe fitting.
Step 1 – Measure and Mark the Centre Points
Start by deciding the height of your cooker hood above your hob. This may depend on your ceiling height and the chimney section of the hood.
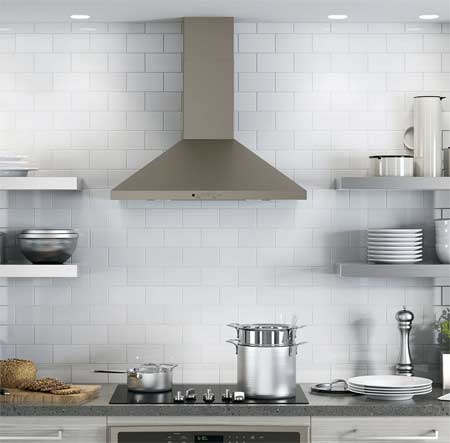
Chimney-type cooker hood fitted flush to the ceiling
Mark two points on the wall at the chosen height, one on each side of the cooker. Use a spirit level to ensure these points are perfectly horizontal and draw a light pencil line between them as a reference for hood height.
Next, find the centre of your hob. Measure its width, divide by two, and mark this midpoint on the wall. Use a spirit level to draw a vertical line from this point up to your horizontal line. The intersection is the exact centre for your hood.
Finally, mark the centre of the hood itself by measuring its width, dividing by two, and noting the midpoint on the rear. This will help you align the hood perfectly with the wall marks.
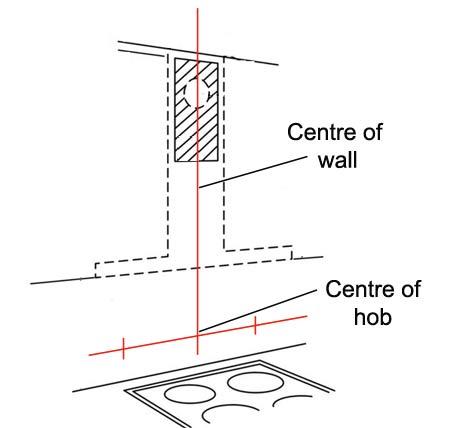
Centre of the hob marked on wall and centre line marked up the wall
Step 2 – Mark Fixing Points for the Hood and Ducting
Every cooker hood comes with its own fixings and brackets, so always check the manufacturer’s instructions first. While designs vary, the installation principles are usually pretty much the same.
Most kits include diagrams showing fixing points, but these often don’t line up with your wall. The easiest approach is to temporarily lift the hood into place and mark the fixings directly on your wall.
For hoods with integrated ducting, the hood is screwed to the wall while the ducting is supported on brackets. The final duct section covers the vent and is also secured with wall brackets.
Get a helper to hold the hood steady, ensuring the centre aligns with your vertical line and the top is level with your horizontal line. Use a pencil to mark each fixing point. Once marked, remove the hood and ducting and set them aside safely.
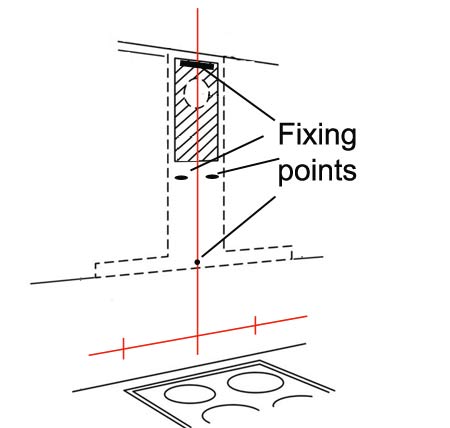
Fixing points marked on wall ready for drilling
Step 3 – Drill Fixing Points
Once all fixing points are marked, drill the holes. Check your hood instructions for the correct drill bit size, usually 6–8mm.
For solid masonry walls, use a masonry drill bit with a combi drill or driver. Learn more about drills and drivers here.
For plasterboard walls, use appropriate fixings. See our plasterboard fixings guide.
After drilling, clear each hole of dust by running the drill in and out a few times, then insert wall plugs as instructed.
Step 4 – Test Fit and Mark Vent Hole
Before cutting any vent holes, it’s important to test fit your hood and ducting. With help, lift the hood into place and lightly secure it. This lets you see exactly where the top of the duct exits the hood and where additional ducting will run to the outside.
There are two main venting options:
- Through the Wall: Drill a hole directly through an external wall and connect the ducting to a vent outside. This provides the most efficient airflow.
- Over the Wall via Soffit: For bungalows or high ceilings, ducting can run up through the ceiling, into the loft, and down through the soffit. This avoids large wall holes but may create sharp bends, trapping moisture and causing mould.
For best results, venting should be as straight as possible to force warm, moist air away from the property. Going directly through the wall is usually the easiest and most effective option.
Some hoods come with a template for marking your vent hole. If not, check the manufacturer’s instructions, holes are usually 120mm or 150mm in diameter.
Mark the duct width on the wall, find the centre, and draw a straight vertical line using a spirit level. Measure 400–600mm from the top of the hood duct and mark the vent hole position.
Ensure there’s enough space for additional ducting with smooth bends. Once marked, remove the hood and ducting and store safely before drilling.
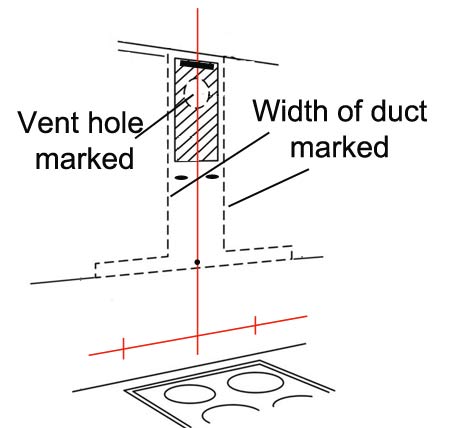
Outline of the ducting marked on the wall as well as the vent hole position
Step 5 – Drilling the Vent Hole
To create the vent, you’ll need a 110mm diamond core bit, designed to cut cleanly through solid masonry.
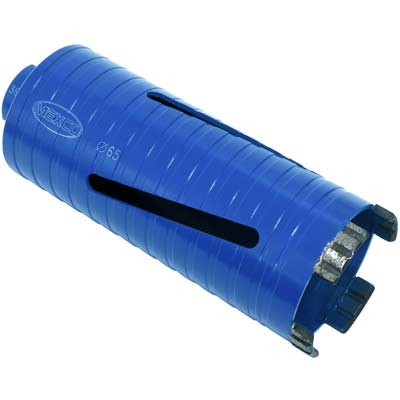
110mm diamond core bit for use with SDS drill
This size requires a powerful SDS drill, at least 800W. If you don’t own one, you can hire the drill and core bit from a local tool hire shop, just explain the job to get the right equipment.
Drilling creates a lot of dust, so clear the area and protect anything nearby that can’t be moved. Position the drill so the centre bit aligns with your vent hole mark.
Start slowly, keeping the drill level, and let the bit do the work. Periodically stop to check progress and let the drill cool.
When you are about 15–20mm from breaking through, stop drilling from the inside and move outside. Drill from the outside in to prevent large chunks of masonry from breaking off, ensuring a neat, tidy hole.
If using rectangular channel ducting, you may need to remove a brick. See our guide on removing and replacing a brick here.
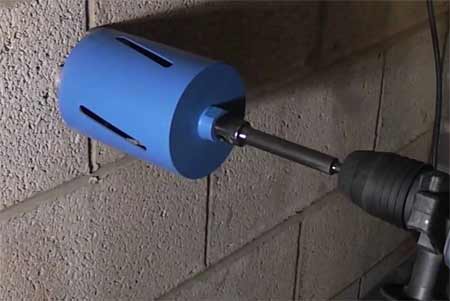
Using a core drill – Image courtesy of youtube.com
Step 6 – Install External Vent and Ducting
With your vent hole ready, it’s time to install the external duct. Most hood kits include an external vent, ducting, and internal wall connection. If yours doesn’t, ensure any additional kit matches your hood’s duct size, typically 100–150mm.
Start by mounting the internal wall plate. Position it over the hole and level it with a spirit level. Mark the fixing points through the plate, then drill and insert wall plugs.
Attach the section of pipe that runs through the wall to the plate. Use the supplied fixings or a strong zip tie, making sure the pipe is secure. Thread the pipe through the wall, then screw the internal plate into place.
Outside, attach the external plate. Pull the pipe as taut as possible and trim any excess before securing it. A slack pipe can reduce extraction efficiency and increase the risk of mould, so make it as straight and tight as possible.
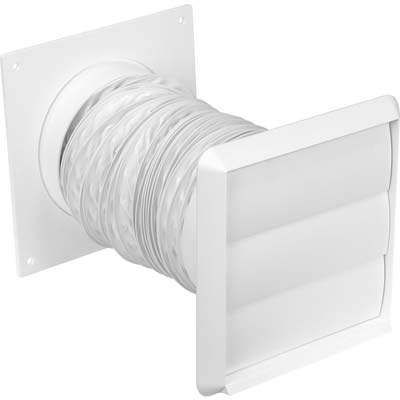
Complete through-the-wall cooker hood vent kit
Step 7 – Install the Power Supply
Before fixing the hood in place, you need to connect power for the fan and light. There are two common options:
- Fused Spur: Tap into a nearby lighting or socket circuit using a junction box. Add a 3 amp fused unit to protect the hood. Example: Existing circuit -> Junction Box -> Fused Spur -> Hood.
- Plug and Socket: Install a new socket in the top ducting or loft area. Fit a 3‑pin plug with a 3 amp fuse to the hood and plug it in.
The fused spur is usually the most practical option. Ensure you can access a nearby circuit safely, ideally from the loft or ceiling space.
Before any electrical work, isolate the circuit completely to avoid live wires. See our electrical safety guide here.
Technically, you’re creating a spur socket from an existing circuit. For full instructions, check our spur socket guide and radial circuit project for safe wiring procedures.
For a low-power hood, 1 mm² or 1.5 mm² flat cable is sufficient. If your hood doesn’t reach the ceiling, hide any exposed wires by chasing them into the wall: cut a shallow channel (around 20 mm wide × 10–15 mm deep), lay the cable, and fill with plaster or cement. Learn more about chasing and filling here.
Electrical work should ideally be certified with a minor works certificate by a Part P registered electrician, so hiring a professional for this step is strongly recommended.
Step 8 – Secure the Hood and Ducting
With the vent hole drilled, power ready and fixings prepared, it’s time to mount the hood and ducting.
Get a second pair of hands to help lift the hood and align it with your marked fixing points.
If your hood uses hanging brackets, hang it on the brackets first to hold it in place while you secure the remaining fixings. Start with the fixings nearest the hood, then secure the rest to ensure the hood and lower duct are stable.
Next, connect the power cable to the hood following the manufacturer’s instructions. Ensure the circuit is isolated and the wire is not live before working.
Once connected, switch the circuit back on at the consumer unit and test the hood’s fan and light to confirm they work correctly.
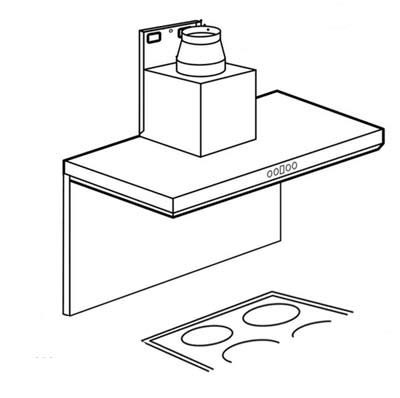
Hood and duct fixed in place on wall
Step 9 – Connect Hood Duct to Internal Vent Plate
We’re nearly finished. One of the last steps is connecting the hood’s top duct to the internal vent plate.
Both openings should have a 100–150mm circular aperture to fit your ducting. PVC is preferable to aluminium, as it’s more durable and quieter, avoiding the echo effect that aluminium can create.
Secure one end of the duct to the hood with cable ties, then run it up to the internal vent plate. Stretch the duct as straight as possible, smooth out any folds and fix it securely to the plate.
Finally, check all connections to ensure they are tight and stable before moving on to the last step.
Step 10 – Fit the Top Duct Cover
The method for mounting the top cover depends on your hood’s manufacturer. Check the instructions for any unique brackets or fixings.
Use your previously marked centre lines to align the cover correctly. Most models have the top section slip over the bottom section for slight height adjustments. Some designs slide inside the bottom section, so confirm with your instructions.
Be careful not to slide the cover up and down once fitted, as this can scratch stainless steel or painted surfaces. Once aligned, secure the cover onto the brackets or mounts and fasten it to the wall.
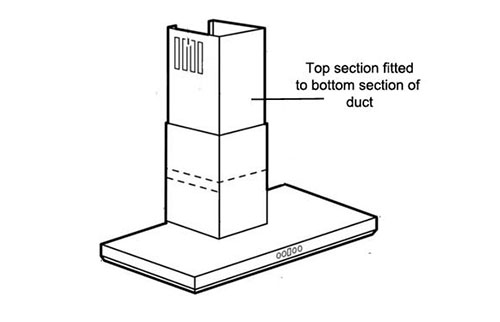
Top section of cooker hood fitted in place
You should now be pretty much done. Just run the fan on all the different settings or speeds to make sure it’s working as it should and finally test the light again.
Installing a cooker hood and ventilation duct is straightforward if you plan carefully and work methodically.
Always prioritise safety, especially when working with electricity. Refer to our linked electrical safety guide for tips and guidance.

 DIY Doctor Ltd,
  0845 6342 179


