Spring is the start of the DIY Year. The busiest time in all DIY Sheds and Home Improvement Outlets is Easter, especially the Easter holidays.
Winter takes its toll. Heavy winds blowing fences down. Driving rain moving roof tiles about to create leaks, ice causing water to freeze in brickwork cracks and blowing the face off bricks, frost creating ripples and splits in paint.
Gutters breaking because they can’t cope with the downfalls and timber frames simply rotting because of the ingress of so much water. All sounds like very bad news!
This section is all about repairing and maintaining existing stuff. If you want a really exciting new Spring project to do, read right down to the end where we show you (courtesy of one of our readers) how to make even the most boring of rooms new and exciting.
The answer to the bad news and big budget damage of winter, is regular maintenance and our series of seasonal Home Improvements and maintenance tips can ensure that you are attending to your homes every need throughout the year rather than waiting until something dramatic happens.
Spending a few pounds regularly on your home is infinitely cheaper than having to fork out for a complete re-roof or a total paint job.

The Spring months are ideal for getting your home up together
Spring is also the time for new life, new ideas. The well-used phrase, “Spring Clean” is because spring is the birth season, the season to kick new things off.
New ideas can spring to life and often transform the home, more about this later down this page, for now let’s focus on the things that may have gone wrong over the winter.
Fencing Repairs and Ideas for new Fencing
Most fencing blows down because of rotten posts. Maybe now is the time to make a change that will last for ever.
Fencing isn’t cheap and to keep doing repairs every couple of years to fence panels – whose price goes up every time the wind blows – gets very costly.
The posts themselves rot for two reasons. One, because they have not been treated properly and the water simply soaks into the wood rotting it from the inside out.
This can be delayed (if you still want to use wooden posts) by treating the timber with a good 5-star wood preserver before you put the posts into the ground.
However, the posts will be at least 75mm square, if not 100mm square, and getting any type of surface applied timber treatment to soak in that far would take months.
Our suggestion is to buy a 5 litre tub of Lumberjack (Pictured below) and tip it into a bucket. Find a way to stand each post in the bucket (without it falling over) overnight.
This will allow as much treatment as possible to soak into the timber without wasting any treatment.

Lumberjack exterior timber treatment
Many fence posts you buy from Timber Merchants and Builders Merchants have been pressure treated which means that the timber treatment has been “forced” into the timber and will therefore penetrate further.
Even if your posts have been pressure treated, it won’t hurt to give them a longer life with the Lumberjack treatment also.
The second reason a fence post rots is because the concrete surrounding it has not been finished properly. The top of the concrete must slope away from the post so water cannot lay on top of the concrete and soak into the post.

The wrong way to concrete a fence post

The right way to install a fence post is with a slope so the water runs away from the post
We have a great project and video on how to deal with fence posts here. If you are going to rebuild your fence, this is the place to start.
How to Work With Composite Fencing
Rather than repair things every year or two, why not think about replacing what you have with a maintenance free composite fence?
The first thing to do is swap the wooden posts for concrete. Take a look at our project page on concrete posts and concrete gravel boards. To find out how to work with these.

Using concrete fence posts to construct a fence
Concrete posts are erected in exactly the same way as wooden posts. The only difference is that they stay there!
Concrete Gravel boards are slid down the groove in the posts. Next comes the composite slats.
Composite fencing (and indeed composite decking-see more later) is made of a mixture of recycled plastic, wood and resin.
It won’t rot, withstands huge winds and, as it already comes in a range of colours, is completely maintenance free.
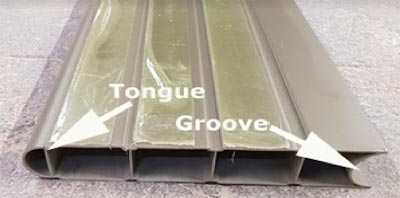
The tongue and groove sections of a composite fence panel
The downside is that it costs roughly twice as much as timber fencing but anyone who has had a fence round their garden for more than 3 or 4 years knows how much it costs to keep a wooden fence in good condition!
Composite slats are 300mm deep (not including the tongue) and simply slot on top of each other. For a standard 6 foot high (1800mm) you will need 6 slats per panel.

Composite fence panels simply slot together
The end result is a great looking fence that will last a lifetime.
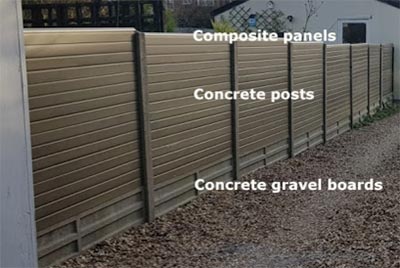
Run of composite fencing successfully installed
Repairing Wooden Fencing
If you would prefer to keep your timber fences, take a look at our DIY Doctor fencing section where you will find tips and tricks on how to work with all kinds of fencing.
Reducing the effect of wind on fence panels
As mentioned at the top, the biggest emeny of wooden fencing is water rotting the posts. The next enemy on the list, and there is not much between them, is wind. Strong winds can blow fences over regardless of how well the posts are stuck into the ground.

Round fence posts can be hit into the ground fairly easily
This is one of the reasons that Farmers do not use concrete to put their fence posts in. They simply bang fencing stakes into the ground and fix the fence to them.
That way, if the wind blows the fence down, they just have to bang the same stake in again without buying any more materials.
Fencing stakes are not for everyone though so lets look at how we can reduce the winds effect on an ordinary panelled fence.
A standard fence panel is usually 6ft (1800mm) high and the same width. This gives a surface area of over 3 square metres. A strong wind, pushing against that, is going to do a lot of damage,
We can reduce this damage by swapping our 6ft high panels for 5ft or even 4ft high panels. Admittedly, we may lose some privacy, but we have also reduced the wind force by 75%.
To keep some of the privacy we have lost, it might be an idea to add a trellace to the top of the fence. By the very nature of the trellacework, we have reduced the wind factor because the wind travells straight through the trellis work, but retained the height.
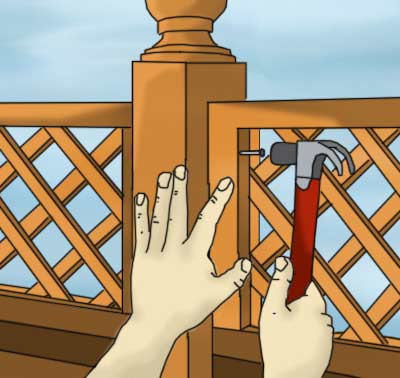
A section of trellis being fixed to the top of a fence panel
Sheds, Roofs and Outbuilding Repairs
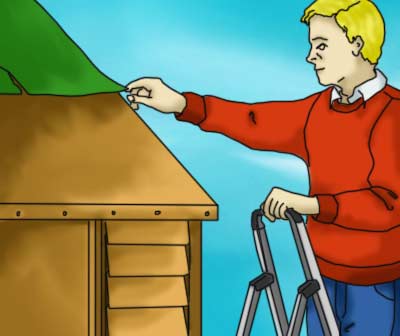
Damaged felt on a shed roof can cause leaks and damage to the items in the shed
Felt roofs on sheds
The wind is also the cause, 99% of the time for the damage caused to the felt applied to most shed roofs.
When you buy a shed, the felt supplied with it is usually wafer thin. If the wind is allowed to get under even one tiny edge it will tear.
This is such a problem that we do not advise putting felt on shed roofs at all! However, that’s our choice, it may not be yours.
Damaged felt on a shed roof can cause leaks and damage to the items in the shed.
Repairing felt roofs successfully can be next to impossible. Much better to pull the old felt off and start again.
Make absolutely sure every single edge is not exposed to any wind. Instead of simply nailing down the edges, put a small batten over them and nail through the batten. This traps every edge and stops the wind blowing up underneath them.
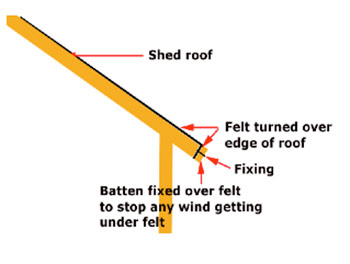
Installing facia boards on your shed prevents wind damage to the felt
You can see just how this works in a great video made for just this on fitting facias to garden shed.
This video is the 2nd part of a video on how to put a rubber roof on your shed. The link to this is a couple of paragraphs down.
The real answer to keeping a shed in totally waterproof condition, year after year, is to use rubber instead of felt for the covering. This type of rubber is called an EPDM roof (Ethylene Propylene Diene Terpolymer) and it is the answer to Building Industry prayers.
No matter which materials a structure is built from it will expand and contract as the temperatures rise and fall.
In the UK, where we can get every single type of weather in 24 hours, the movement can be quite noticeable. The material that moves the most is timber, especially timber that is outside, like the shed.
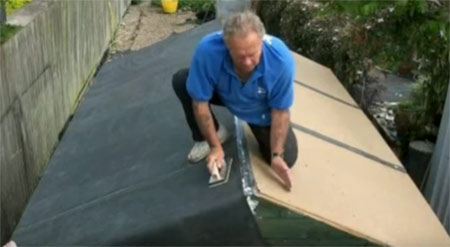
Installing a rubber roof onto a shed
This movement stretches any roofing material, but unlike fibreglass, tin, and old brittle felt, rubber moves with the timber. This stops cracks, splits and leaks occurring.
Rubber is easy to fit, easy to seal and is guaranteed (providing you have fitted it properly) to last for 40 years. Take a look at our project page and video on fitting rubber roofs and see how you feel about making your garden shed last forever!
Also take a look at our project pages on how to protect your sheds, garages and outbuildings throughout the year.
House Roof Maintenance
Use binoculars to have a good look at the roof on your home. Strong winds can dislodge slates and tiles.
Do not attempt to replace tiles without proper access and make sure you stay safe by using proper ladders and towers.
These can be hired at very reasonable prices or, if you want to prepare for every eventuality, you can buy a good set of ladders. Once you own them, you will be surprised at how many times you need them!
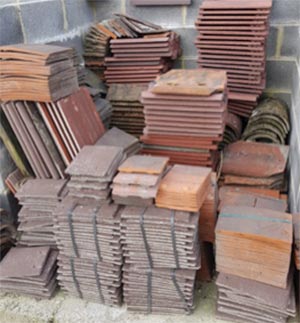
Buy some spare roof tiles, they will always come in handy
We have an excellent project page on how to repair all types of roof here.
You can find out how to use ladders and scaffold safely in our ladder and tower safety project here.
Additionally, take a look at our excellent video on maintaining a roof.
Making your own shed or lean-to
There is a great deal of satisfaction in building your own shed.
Our advice is to work out exactly what you want to use it for first; don’t just get stuck in and build the standard shed.
You may want to put your exercise bike in there, or the running machine, in which case you’ll probably want one end higher than the other to give you head height.
Take some time, draw up and plan, then click though to our project page on making your own shed.
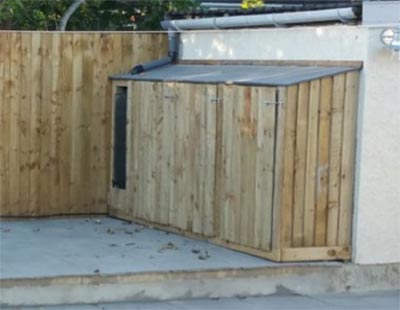
Garden storage lean-to for storing garden tools and out door toys
Painting and treating your wooden shed and fence
There are so many timber treatments on the market these days that it’s impossible to be absolutely sure you have the right one.
Recommendation is the best way to go and we can thoroughly recommend Ronseal’s Fence Life Plus.
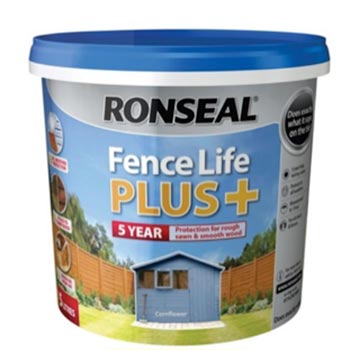
Ronseal Fence Life Plus
Used with a brush or a spray, this stuff really does get into the timber and protect it well. The colour range is great as well.
If you use the link above you will see you can buy it in Oak, Green, Blue, Cedar, Black, Willow, Sunflower and Cornflower.
To give you some idea of how much we rate it, we have used it to protect the timber covering on an old water tower which stands in the middle of an Industrial estate next to our offices, where howling winds and rain are beating it mercilessly. See below!

Decent protection is the key to ensuring external timber lasts as long as possible
Check Your Gutters and Downpipes
The winter will have shown you where your gutters and/or down pipes are leaking and these should be repaired as soon as possible.
Water from leaking gutters and downpipes can run down walls, eroding mortar joints and leaving horrible stains on brickwork and render. We will see how to deal with those later.

Adding an additional downpipe to an existing guttering run
It might now be time to replace any cast iron guttering with plastic or even seamless aluminium gutters which can’t leak, because they have no joints!
Plastic guttering is by far the easiest to deal with and we have a whole section devoted to fitting and repairing plastic guttering. You will also be able to see a video about it on this page.
You can watch some of the DIY Doctor team installing a gutter in this video.
This is also the time, if you are not replacing guttering, to clean it out. This operation may not be as simple as it sounds but you can get some great advice from our project page on cleaning and maintaining guttering..
Building Regulations on Roof Gutters
Whatever type of guttering you have, it may be that yours are overflowing because the water simply can’t get away fast enough.
There are rules for the number of downpipes which should relieve a gutter.
It is common sense to understand that the quicker the water gets out of the gutter, the less likelihood of damage to the gutter and subsequently the property. Take a look at the table below.
Work out your roof area and check if you have enough downpipes. If not, it’s easy to insert another downpipe and you will learn how to do that, including how to fit the drain by looking at our page on plastic guttering, linked to above.

Table showing maximum roof area per gutter downpipe
Cleaning, Restoring and Repointing Patios and Paths
Dirty paving and patios are unsightly and dangerous. A build-up of algae can lead to a very slippery surface. They can be cleaned by scrubbing with a stiff broom and some patio cleaner.
If this has gone on for too many years, it can also be done with a power washer. Take a look at the DIY Doctor project page on power washing patios and decking for tips on using a power washer.
Take care when using a pressure washer on the patio joints as if they are old and worn you can easily damage them further.
If you do not want to use or don’t have a power washer, take a look at the DIY Doctor project page on cleaning paving and patios. Here you will find tips on other products and methods that can be used to clean paving and patios.
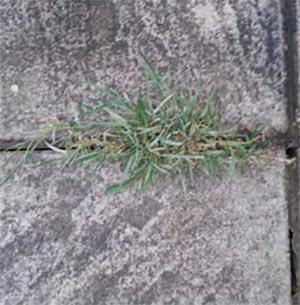
Patio slabs with heavy build up of algae and weeds growing in joints
Spring brings new growth and that might include Weeds growing through badly jointed or damaged joints between your slabs. The above project page can help you deal with this.
Also take a look at this video which features the 401 patio cleaner from Everbuild. This is a great way to get patios sparkling clean. This great product can be bought from our own tool store by clicking on the image below.
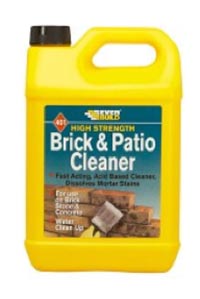
Everbuild 401 brick and patio cleaner
Repointing a Patio Easily
Once the joints have been raked out and the patio itself has been cleaned you can start the job of repointing, and here’s a real fun tip.
Most people put this job off forever because the thought of mixing sand and cement mortar and pointing a whole patio in the same way that you would a brick wall (see below) is far too daunting for them..But you don’t need to!
I’m not going to say this out loud because everyone will want to do it and this tip is only for you. You can find out how to save days and days when pointing a patio simply by seeing our patio pointing project here.
Afterwards, If you want to email and tell us what geniuses we are, please do

Pointing patio slabs
Sealing a Patio
After cleaning, patios can be sealed to prevent future algae growth as well as making the patio look fresh and clean.
The sealer we use to make maintenance much easier is the Path and Patio sealer called Block-Guard from Everbuild.
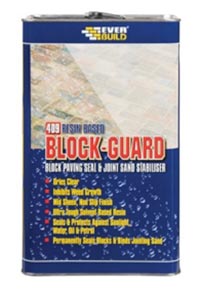
Everbuild Block Guard patio sealer
Using Decking oil, Decking Paint or Decking Stain to Protect Your Decking
If you like the colour of your decking when it’s wet, oil it when it’s dry. This will give new life to the timber and, with regular oiling you will avoid any kind of rot. It will also make cleaning the deck a whole lot easier.
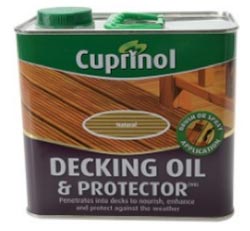
Cuprinol Decking Oil for treating decking
If you’re tired of the way your deck looks you can spruce it up with a bit of decking paint or decking stain. We prefer to use stain as it seems to soak into the timber further thereby giving it more protection.
However, there is a lot to be said for the modern decking paints and these days they don’t seem to sit on the surface as much as they used to.
Much of the success of the application you use, as with everything else in the home improvement industry, depends on the preparation you put into it.
Make sure your decking is 100% clean with either a hand scrub or a power wash, then we think it’s a really good idea to give it the one-over with some deck cleaner.
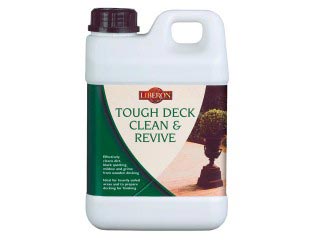
Tough deck clean and revive for cleaning decking
Deck cleaner also acts as a fungicide in many ways, preventing the regrowth of algae and lichen in the pores and grains of the timber. Once cleaned, to are ready to revive your deck with oil, stain or paint.
Anti-Slip Decking
In our experience there is no such thing as non-slip decking. One drop of rain, a couple of mould spores and most decks turn into skating rinks.
However, there is now a great way to stop this happening quite so fast. Blackfriar’s anti slip deck coating combats the slippyness (is that a word?) really well and is certainly worth paying for as the coverage is immense at almost 10 square metres per litre.
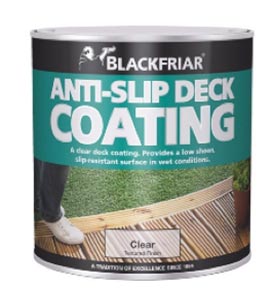
Anti slip deck coating
Scroll to the bottom if you don’t yet have a deck, but want one.
Preparation of Exterior Woodwork for Decorating
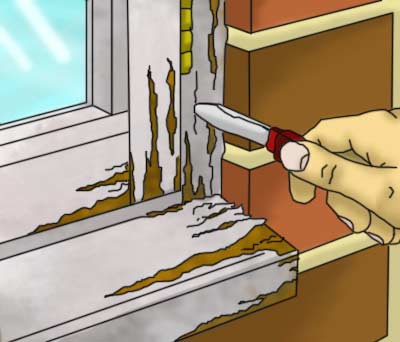
Filling rotten wood in a window frame
Spring is the time to check all of your existing external decorating for defects which can be put right in the Summer when we have got a better chance of two consecutive, dry days!.
Windows, doors, even facia boards and soffit boards which are easily forgotten as we tend not to look up! These items take a little more thought because they are often much more difficult to get to.
When the job of facia and soffit boards seems to be too much, it might be worth thinking about getting uPVC facias and soffits fitted.
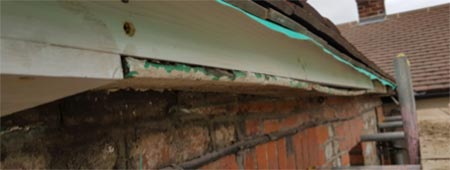
Replacing timber facia and soffit boards
Getting the preparation work done in bits and bobs over the Spring months makes the job seem not quite so arduous.
Paint or varnish on doors and windows can be rubbed down and if any of the wood has been affected by water it is advisable to cut out the damp, rotten timber and fill with a suitable wood filler before redecorating.
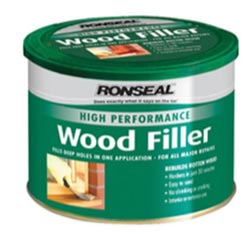
Ronseal professional 2 part wood filler
The Pros use a two part wood filler as it is hard in a couple of minutes and will withstand the rain until painting can be done.
There may be some windows or doors where the paint could do with being stripped back to the wood. Now the time to do it and here is the stuff to do it with!
Go to the DIY Doctor page on stripping paint to get loads of help with stripping your woodwork ready for redecoration.
Pointing, Repointing and Brickwork Repair and Maintenance
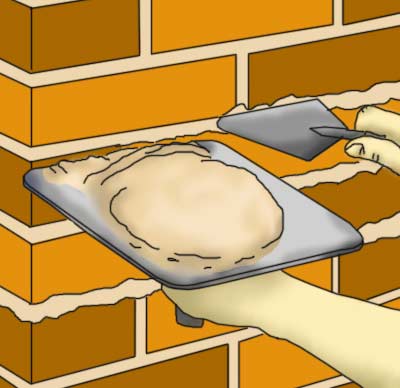
Repointing and repairing brickwork
During cold weather its possible for walls to start losing their face. This is caused by Freeze – Thaw action which can be understood in this project. Defective pointing between bricks is the worst offender and repointing is a good idea the moment you spot any that is not 100%
Rake, or chop out, any defective pointing to a depth of at least 12mm or go down to pointing which is sound. Mix mortar which matches the existing as closely as possible (see project on matching mortar here) and repoint.
This is an idea DIY job which doesn’t have to be done all at once. Set yourself a target for a morning and see how you get on.
The problem with jobs like this is that once they get boring, the work starts to get a bit slap-dash which is counter-productive. Take your time and do it well.
There is a great project page here which shows you the best method to use to repoint areas of brickwork. It also has a great video at the foot of the page.
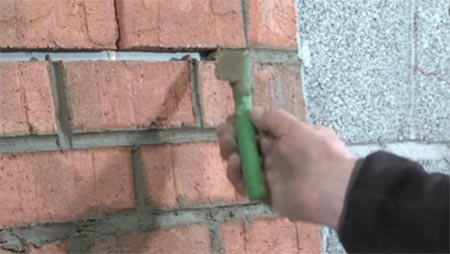
Using a piece of hosepipe to repoint brickwork
Building Patios and Decking
Most people only think about laying a patio or building a deck when the sun starts shining. By the time they have built it, the autumn has arrived.
Start your patio, deck or similar in the winter and spring to be ready for the summer.
Patios do not have to be simply square or rectangular, Builders merchants and DIY stores can provide paving slabs of all shapes and sizes allowing you to design something different and interesting. Take some time to measure and plan the patio you need.
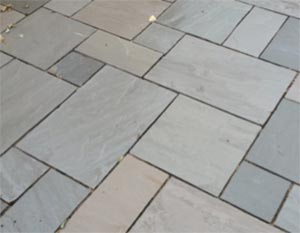
Patios can be laid to all shapes and sizes
Before you actually start laying any slabs, always plan out your patio or decked area accurately and to scale so that you know exactly where everything is to go.

Carefully plan any patio work you will be doing
Remember a patio does not have to be close to the house. There is no reason why it should not be at the bottom of the garden, where the sun offers most heat, and don’t forget to look at our pages on Conservatories, Orangeries and Summerhouses for the ultimate garden.

Conservatories can be a beautiful addition to any home
How to Build and Make the Most of Garden Decking
Decking, like patios, can be any shape or style you like. Timbers cab be cut to curves, holes can be left in the decking through which plants can go.
Areas of deck can be raised and lowered and the most basic of gardens can be transformed into something you can be immensely proud of – a well laid out and well built deck will even add value to your home.
A little bit of imagination can give you an exquisite garden.
Our project page on designing and building decking will help you get the garden you want this Spring.
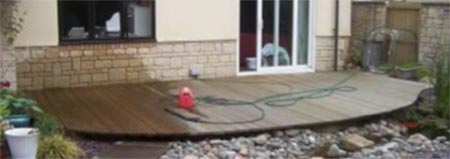
Immaginative decking designed to feature a curved front edge
Spring Decorating and Painting
How would you like to have a go at decorating a wall like this in your house! Or even, with school holidays around the corner, let the kids loose in their bedroom with this idea?

Immaginative paint effect created using masking or painters tape
All you need is a roll of frog tape and your imagination. This particular Frog tape is a low tack painters tape which works best when applied to new emulsion. It forms a gentle bond right along its edges which stops any paint bleed, leaving nice, crisp lines.
Firstly prepare and clean the wall you want to jazz up. Then apply your emulsion base coat. The colour of this base coat is really important as, when the masking tape is pulled off, it will be the “thread” that holds it all together.
For some more ideas of how to get a funky wall or two at home, go to our page on how to get some great paint effects.
We hope we have given you some great ideas for transforming, repairing, renovating or even rebuilding your home this Spring. For other seasonal checks and ideas visit our project pages on:
Home maintenance checks and decorating for Summer
Autumn home maintenance checks and preparing your home for winter
Home maintenance checks and other winter jobs

