As Autumn arrives it’s a good idea to finish all of the outside jobs before the cold weather sets in. This Autumn Maintenance Check Guide helps to ensure that you carry out all those end-of-the-year jobs that will protect and preserve your home and garden as we enter the colder, wetter, Autumn season.
Don’t put off these simple home maintenance jobs that will help to ensure that your house stays warm and dry over the cold winter months. We talk you through the basic home checks and repairs that you can carry out this autumn to help protect your home through the coming winter.
Here are the topics we will cover in the project below:
- Finishing Off Summer Jobs
- Frost Damage
- Heating Checks
- Book a Central Heating Service
- Change Your Old Boiler
- Expansion Tank Maintenance
- Loft Insulation
- Pipework in Your Loft
- Stopcocks and Isolating Valves
- Stop the Drafts in Your Home
- Check Ventilation
- Check Exterior Walls
- Check Air Vents, Air Bricks and Trickle Vents
- Clear Drains, Gutters and Gullies
- Autumn Roof Maintenance
- Check Outside Taps
- Fit a Water Butt
- Autumn Pond Maintenance
- Clean Paths, Patios and Decks
- Treat Timber, Decks, Sheds, Fences and Paving
- Install Exterior Lighting
- Check Home Security
- Clean Chimneys and Flues
- Fit Smoke Detectors
- Dry Lining Walls to Stop Condensation
Frost Damage – Finishing Off Summer Jobs
Render and Mortar
All external decorating including rendering and painting should be finished, and remedial work using sand and cement mortar should be done before the autumn temperature falls, because frost can affect this sort of work badly.
Frost damage will affect the structural integrity of cement and mortar, and you don’t want to be doing the job twice!
On a building site for example, sand and cement work is not allowed to commence unless the temperature is at least 3°C and rising, and we strongly recommend that you also stick to this rule.
This is because ice crystals can form in the water used in the mixture and as the ice freezes and thaws the ice will contract and then expand which destabilises the mortar.
If you were (for example) building a garden wall in such low temperatures then you could find that the mortar will disintegrate and the wall will collapse in a couple of years’ time.
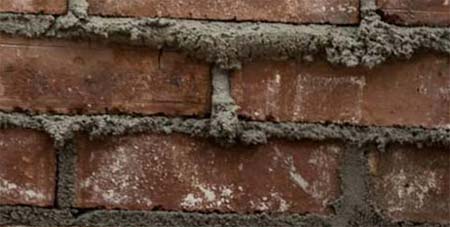
Fresh Mortar needs temperatures above 3 degrees Centigrade to cure
Exterior Painting in Auntumn
Paint manufacturers print recommendations on their products both for storage and usage of paint, and it is best to work within these guidelines to ensure that the finished surface lasts as long as possible, which saves you time and money, and keeps your home looking its best.
Most paints should only be applied when the temperature is not likely to drop below 10°C both while it is being applied, and during its drying time.
So in the autumn this might mean that you can only paint in the middle of the day allowing time for temperatures to rise in the morning and time for the paint to dry before the evening temperature drops below the recommended temperature.
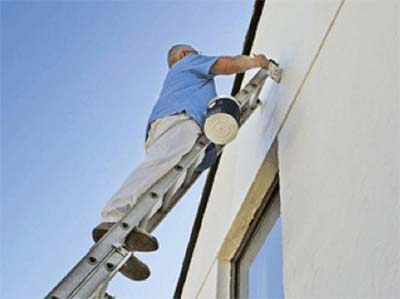
Apply Exterior Paint at Temperatures Above 10 Degrees Celsius
Heating Checks
Now is the time to check your heating is working. Don’t wait until you need it, give it a trial-run in the autumn to make sure that it is working properly.
This means that if you need repairs to your boiler or heating system you can book it in before you really miss your central heating.
It’s likely that you have been using your boiler to heat the hot water over the summer months but if you have only been using your immersion or solar panels it is worth running the boiler now to make sure that it will provide you with hot water when you need it.
Turn up your thermostat to make sure all is working correctly there too. If the radiators are fitted with TRV (Thermostatic Radiator Valves) then open them up fully so you can check the whole system is getting warm.
Once the heating system has been on for half an hour or so check all the radiators have come on and are evenly warm.
If you are finding that your radiators are only hot at the top, or at the bottom then we have a guide on diagnosing radiator faults and bleeding and draining radiators that you might find helpful.
It’s always handy to check your heating in the autumn as some plumbers prices rise during the winter.
Emergency call out fees are always more expensive too, so if you do have a fault you can’t cure and you need to call out a heating engineer then it should be less expensive if you can book it in before it becomes and emergency.
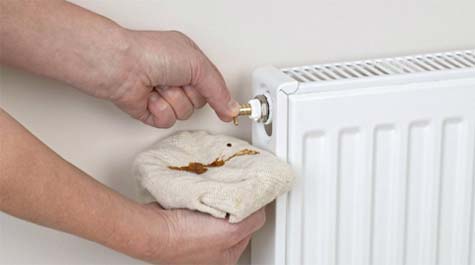
Check your Heating is Working and Bleed Radiators
Book a Central Heating Service
Preparing for the cold weather should be done now and your boiler, or other heating should be serviced (by a competent, registered person) in Summer or Autumn. Do not wait for cold weather to find out that something is not working properly.
Heating engineers get really busy at the beginning of the cold winter weather, as customers turn on their heating and find a pump has seized or a pilot light won’t light.
Beat the rush by booking your annual boiler service in the summer months.
If you haven’t yet had your boiler serviced, it isn’t too late to find a registered local engineer.
We have a section devoted to finding a reliable tradesman where you can enter the details of your job and where you are and you will receive details of reliable trasdespeople who can do the jobs you need.

Don’t wait until winter to service your central heating
Change Your Old Boiler
If your boiler is old and faulty it might make sense to replace it with a new more energy efficient one rather than repairing the old one.
Your boiler could be an old G-rated system if it is more than 10 years old, which means they average around 72% efficiency conversion of fuel into heat as opposed to a new A-rated system which converts fuel at a 90% efficiency.
Your heating engineer will be able to advise you on new boilers that are suitable for your home but you can also do some research of you own online.
By changing your boiler in the autumn you can start making savings on fuel before you hit the most expensive time of the year to heat you home.
Hopefully the weather will be warm enough at this time of year for you to be without heating for a few days while the new boiler is installed.

Autumn or Summer is the Best Time to Change Your Old Boiler
Expansion Tank Maintenance
If you have a feed and expansion tank in the loft you can carry out a simple test to make sure it’s working well, by moving the float arm up and down a couple of times while watching to check the valve lets in water and then shuts the water off (see image below).
If you are not sure what type of heating system you have in your house you can find out more in our Hot Water Systems Project.
This means you can effect your own repairs by, for instance replacing a ball valve, or it will at least save you time and money by finding the fault with your heating system before you call a plumber or heating engineer. Read more about tracing central heating faults in our Projects section.
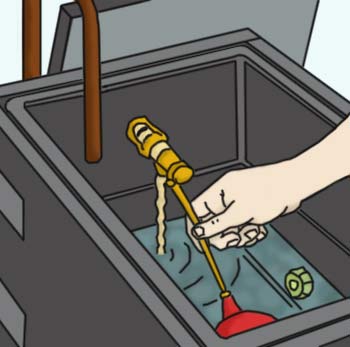
Expansion tank and ball float
Loft Insulation
Autumn is a good time to top up your home insulation because you will immediately start to save money on heating bills.
You may also find there are offers on insulation at this time of year.
From time to time the government releases grants for insulation and it is always worth checking the .Gov website for any information about energy grants.
There is also a handy energy calculator and links to details about the Cold Weather Payment, Green Deal, Affordable Warmth Obligation, Warm Home Discount Scheme and Winter Fuel Payment information.
Loft insulation should be at least 270mm deep and it should not be compressed otherwise it will be far less efficient.
The rockwool type of insulation works by trapping air between the fibres and this is what gives it its thermal properties.
To find out more about the different types of insulation and which would work best for you head over to our Different Types of Loft Insulation Project.
While you are up in your loft checking on the tank (see above) check how much loft insulation you have.
Take a look and make sure you have a depth of at least 270mm of loft insulation.
If you use your loft for storage, (like most of us) this often means raising the level of your loft floor to avoid squashing the insulation. Click here for more information on raising your loft floor.
You should also make sure insulation is laid away from the roof eaves to let in air for loft ventilation, and prevent damp via condensation.
This may seem counter-intuitive as it seem sensible to avoid draughts, however without this airflow condensation can build up and create moisture around the timbers which in turn can cause a build-up of mould and could cause the timbers to rot.
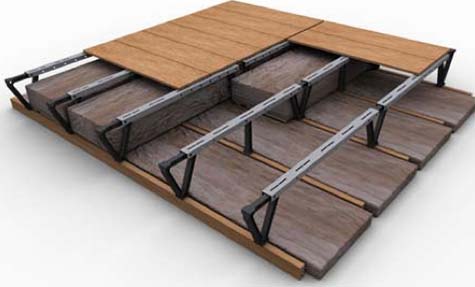
Loftzone loft boarding system allows for more insulation beneath it
Pipework in Your Loft
Take a look to check pipework in the loft is insulated. Pipes can be insulated using purpose-made pipe insulating foam tubes which are really easy to fit.
They are usually a grey coloured dense foam tube with a cut along the length. They simply slot over the pipes and help to prevent them freezing.
There are also special elbow joint insulating materials, which allow you to insulate bends and corners in your pipes, or you can tape insulating foam or tape around the bends. There is a useful Project on Insulating Pipes here.
While it is important to insulate the cold water pipes in your loft, don’t forget that insulating your hot water pipes helps to prevent heat loss to save you money on heating and hot water.
We have loads more advice and information about home insulation in our Projects area.
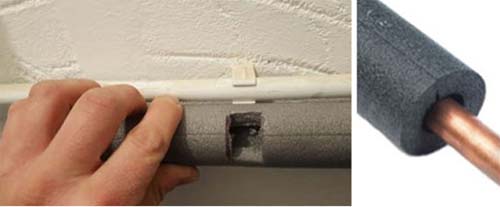
Use Split Foam Insulation to Quickly Insulate Pipes in the Loft
Stopcocks and Isolating Valves
Check your loft for a stopcock and make sure all stopcocks in the whole house are working. Once you have located them give isolating valves (another name for a stopcock) a quick turn and test to make sure they do turn off the supply.
If the stopcock won’t turn it may be jammed. You can try using a small amount of pressure using a pair of grips, but don’t be too forceful – you don’t want to damage the valve.
If it won’t turn with a bit of persuasion you may have to replace the stopcock.
If the stopcock turns easily then fully close the valve and run the water from a cold water tap to make sure the stopcock has actually turned off the water supply.
If it hasn’t affected the water supply you will need to replace the stopcock. You can see how to move or replace a Stopcock here.
Including these checks in your autumn maintenance regime means that if you do get a water leak or a frozen pipe that bursts you can be confident that you can turn off the water supply.
If you do get frozen pipes later in the year we have advice on curing the problem see our Winter Checks page.
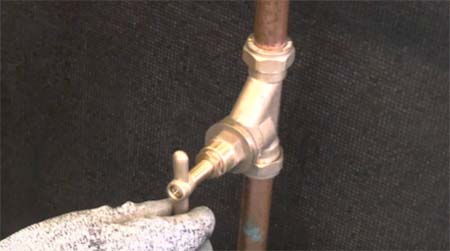
Check Stopcocks are Working
Stop the Drafts in Your Home
One of the easiest ways to DIY and save money on heating bills is to install draught proofing in your home. It is easy and cost effective to do and requires only the minimum skills and tools. Check all door and window draughtproofing, including the letter box.
Letter Box Draughts
You can fit a simple brush-style draught excluder to the back of your door (like the one illustrated above), if you are happy with your current letterbox.
Alternatively if it’s time for a new one there are other models available which have an integral draught proofing system that won’t bend your post!
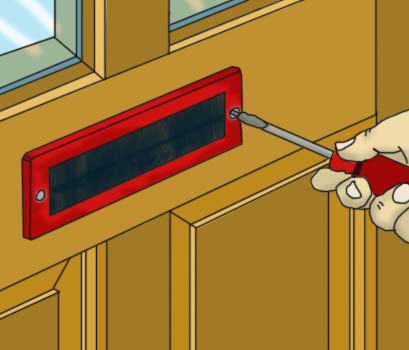
Letter box brush plate for draught proofing
Draughts Under the Door
If you have a draught coming in through the bottom of your door then for a couple of pounds you can fit a threshold strip. Adding a threshold strip to external doors is quick and easy way to stop draughts and save money on heating.
Most doors will be fine with a brush style excluder, but where you have laminate, real wood or tiled floors, an under door excluder may work better.
These are normally made of a soft rubber or foam and they are fitted to the bottom door, to slide along the floor and prevent draughts sneaking in.
This may require you to remove the door to fit them, and if that seems too much work then you could resort to the old-fashioned “snake” that is simply pushed up against the back of the door.
Draughts Through Windows
It is a really easy job to stick self-adhesive draught strips around windows.
They are either stuck around the inside of the opening section of a window or on the section of the fixed window that the opening section closes onto to seal any gaps around the window when it is closed.
Sash windows can be harder to draughtproof, but there are ways of doing it and you can read more about that in our Sash Window Project.
There are lots of ways you can improve insulation in your home, exclude draughts and save money on heating: Read more about Draughproofing and Insulation in our projects here, and get ready for winter this autumn.

Make sure windows and doors are not draughty this autumn
Check Ventilation to Stop Condensation
Autumn is a time that we tend to shut up our houses and the resulting lack of ventilation can cause condensation. While this seems like a minor problem in fact it is one of the most common causes of damp, particularly in modern houses where it is unlikely to be other forms of damp.
In older houses with solid walls, the appearance of damp in the colder months is common. This is usually caused by condensation.
We often have customers on our forum who think they have a roof leak or burst pipe when in fact it is damp caused by condensation, so don’t underestimate it.
Read more about causes and cures for Condensation in our project here.
Condensation can be reduced greatly by making sure rooms are well-ventilated and extractor fans are installed in areas such as kitchens and bathrooms which produce the most water vapour.
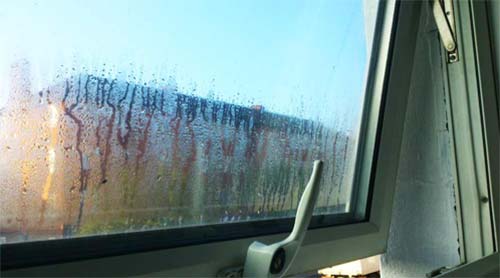
Ventilation is required to prevent condensation
Check Exterior Walls
Pick a bright Autumn day to have a look at pointing, stone, render and brickwork to make sure there are no cracks or flaking that need to be repaired.
Bright sunlight helps to highlight any defects in the mortar or on brickwork. We have a video guide to repointing walls at the end of our pointing project.
Water can find its way into the smallest defect so be sure to look carefully.
Once water has penetrated the wall it will then be subject to freeze/thaw action in the cold winter months and can cause a huge amount of damage if left unrepaired.
You can use a pair of binoculars to save you climbing a ladder or erecting scaffolding for a visual check.
Increasingly people are utilising Drones to examine brickwork and roofs but you need to make sure you are complying with the law if you have a drone and want to fly it – even on your own property.
Keep up to date with legislation and safety advice using the .Gov website.
As a final check, make sure there is no soil or other debris build up against any house walls which could cause a breach of your damp proof course.
Anything that is against the wall and is higher than the DPC can form a “bridge” for moisture to travel along and be sucked into the exterior walls, this can be piles of blown leaves, soil, a stack of logs or anything else that will attract and harbour moisture.
If you have anything like that building up or stacked against your walls make sure you move it away from the walls especially where there are air vents (see below).
Allow at least a metre or so between the wall and any stacked or piled materials, to allow good air flow and prevent moisture being trapped on the exterior walls.
Check Air Vents and Air Bricks
Air bricks and air vents are vital for ensuring a healthy air flow throughout your home.
In the autumn fallen leaves, rubbish and even spiders webs can block the holes in air vents. Take a stiff hand brush and brush them clear.
Air Bricks and how they Work
Air bricks are a vital part of your house’s air flow which is needed to prevent condensation and rot setting in.
Make sure they are not blocked by anything leaning against them. Make sure plants are not growing right in front of airbricks and soil or other material hasn’t built up across them.
Check that air bricks are clear of dirt and debris to ensure you get a proper flow of air under your suspended floor which helps prevent condensation and wet and dry rot. Read more about air bricks in this project.

Brush out your air bricks this Autumn to keep air free-flowing
Air Vents and Trickle Vents
Make sure that trickle vents in windows are clear of debris.
Trickle vents allow you to have a flow of air in the room when windows are shut tight without experiencing a draft. If you want to find out more about trickle vents and how to fit them, click on the image above.
Find out why ventilation is so important in our homes and how to ensure good ventilation in our project here.
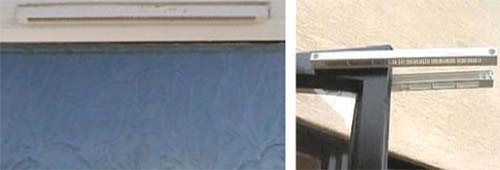
Keep Trickle Vents clear of debris to maintain air flow
Clear Drains, Gutters and Gullies
In late Autumn, when the leaves have fallen, remove leaves and other blockages from drains and gullies, and clean and repair leaking gutters and down pipes.
Keeping gullies, gutters and downpipes free-flowing prevents rainwater running down your walls and soaking into brick, stone, timber and render – See our guttering projects section here for more information.
We also have a dedicated project all about cleaning your gutters that will walk you through all that’s involved.
While walls will resist damp if they are in good condition if they become soaked over long periods of time they may allow water into the house, especially if the surface is damaged by freeze thaw action.
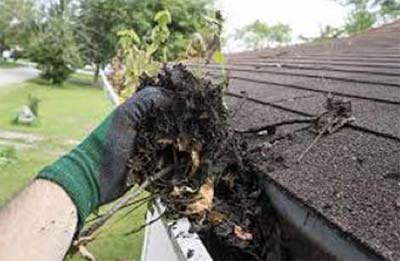
Leaves can quickly block gullies and gutters
Roof Maintenance
Use binoculars or a camera with a good zoom lens to check the condition of your roof.
If you have cracked or slipped tiles, damaged flashing, or valleys and gullies that are full of debris, you will need to hire scaffolding to carry out maintenance. Read more about using ladders and scaffolding safely.
Otherwise you should get quotes from reputable roofing companies to carry out repairs before the damage becomes more serious, and we give you some great tips on finding a good tradesman in the Find Tradesman tab at the top of the page.
As mentioned in the section on walls above you can use a drone to check the condition of you roof, but you need to make sure you stay within the law.
Once you have got access see our projects on roofing repairs and maintenance for further information on what to look out for and for help on carrying out any work that you might want to do yourself.
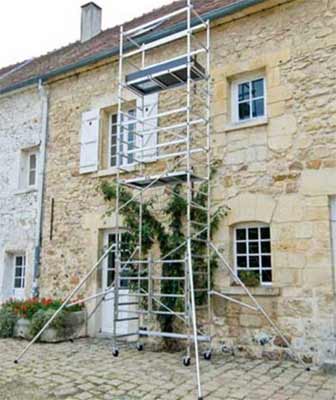
Secure your ladder or use a Scaffold Tower to work safely at height
Check Outside Taps
If you have an external tap, make sure both the pipes and tap itself is insulated to prevent freezing. Frozen pipes can easily burst as they thaw, which can lead to a waste of water, and in turn higher water bills if you are on a meter.
For ideas on how to insulate an outside tap head over to this article for more information.
If you haven’t got an outside tap yet then why not add our fitting a outside tap project to your list for Spring!
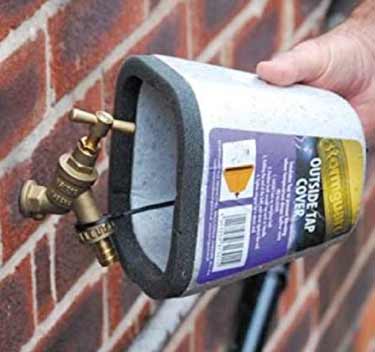
Outside Tap Cover a quick way to insulate outside taps this Autumn
Fit a Water Butt
There is unlikely to be a shortage of water over the winter period, but you can take advantage of seasonal special offers by buying a water butt and fitting it now. It will have plenty of time to fill up over the winter! Find out how to fit a water but in this project.
Water butts and water storage tanks help to conserve water by reducing or eliminating the need to use tap water to water flowerbeds and crops, and to fill up ponds.
Rainwater is much better for filling up ponds because it does not have the same chemical components and it also has some naturally occurring bacteria that can be quite beneficial for ponds, and can maintain the balance of your pond water.
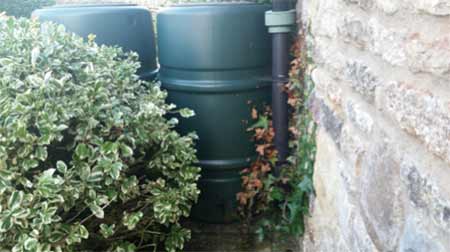
Fit a water butt in Autumn to fill up over winter
Pond Maintenance
Ensure your pond does not get full of falling leaves this autumn by fitting a net over it to catch the leaves.
If you already have a quantity of dead and dying leaves in your pond, scoop out as many as you can with a net and leave them to drain on the edge of the pond for a day or so to allow any waterborne insect chance to hop or slide back into the pond before you compost them.
Ponds and their surrounding vegetation are a great refuge for wildlife, just make sure that there is an escape ramp or two for any adventurous creatures to escape if they end up falling in.

Remove fallen leaves from your pond this autumn
Clean Paths, Patios and Decks
Get the pressure washer out or scrub some anti-fungal cleaner onto paths and paved areas then protect them using stone protector like the one from Everbuild.
Clean and treat decks with deck cleaner and timber care products to help to prevent them from being slippery when they are wet.
Clean and oil the deck with proprietary deck treatment, or you can apply decking stain after you have thoroughly cleaned the timber to remove dirt, moss and algae.

Right tool check video reviews and information
Treat Timber
Fences, decks and sheds will survive the winter months much better if they are treated to repel the rain and damp air.
Sheds and fences can be stained or painted to make them more weatherproof, and they will also look more “cared for”.
You can completely change the look of you garden shed by applying different paint finishes. You can opt for a beach-hut, dolls house or cool summer house, or smart home office look, depending on who is using it.
Painting your fences will also make a great difference to your garden, dark colours fade into the background and allow bright foliage and flowers to “pop”, lighter colours make smaller gardens seem bigger and work well with foliage that has silvery tones and white flowers.
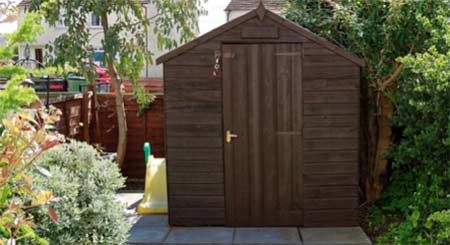
Treat you shed and other timber in autumn
Exterior Lighting
It is much nicer to come home to some lighting when the evenings are dark, so consider fitting a PIR light near your front door or garage to light your way home. See our project on choosing and fitting exterior lighting.
You can fit motion-sensitive lighting fixtures above your front door, and other entrances, garage door and gates to side or back gardens.
If you already have exterior lighting fitted don’t forget to check they are in working order and the bulbs are working.
Don’t forget you need to be competent to fit electrical items to your home, but there is a huge range of solar lighting that anyone can fit in their garden and gives a soft glow to light the way along the garden path in the evening. Improving lighting around you home also aids home security.
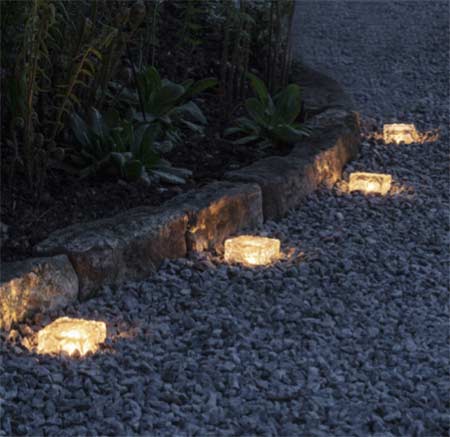
Use Solar Powered Lights for and easy way to light up you path this autumn – Image courtesy of Lights4fun.co.uk
Home Security
Darker nights mean your home is more vulnerable to burglary so check all the door and window locks are working properly. Make sure you can securely bolt or padlock side and back gates.
Store ladders away and padlock them to a secure bracket or eyelet fixing so they can’t be used to gain access through upstairs windows or a flat roof.
Fit good quality window locks to all downstairs windows, and to easily accessible upstairs windows, and make sure you actually use them. Hide keys so they are not on view.
If you have recently moved make sure you change to code to the burglar alarm – if you have been putting it off make it one of your autumn checks.
Fit timers to indoor lights when you are out for the evening or going on holiday.
Thieves have been known to hook keys off hallway tables through the letterbox – so make sure any keys are put away from view and out of reach.
Why not join or start a Neighbourhood Watch scheme to help keep your area safe?
Sheds are very vulnerable to break-ins so make sure you buy and fit a really good quality padlock and hide the keys.
You should also ensure your garage and any outbuildings are fitted with suitable locks to deter burglars. See our guides about home security.

Step up home security this autumn to avoid Burglaries
Chimneys and Flues
You should have your chimney swept and flues checked to make sure you can use them safely when the nights get colder. You do not want to cause a chimney fire when you light a fire in the colder evenings.
It is a good idea to have this done in autumn and spring, depending on how often you use your fire.
You can get a professional to sweep your chimney for you or you can do it yourself, we have a project where you can learn how to sweep your own chimney using a brush and rods, without making too much mess.
There is also advice on the tools that you will need to have to be able to sweep your chimney or flue yourself.
You might want to think about fitting a woodburner which is a more efficient way of heating a room than using an open fire, and still gives you the cosy feeling of having a real flame fire.
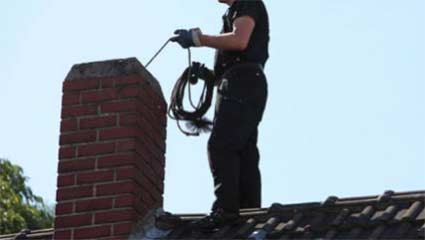
Learn how to sweep your own Chimney this Autumn
Fit Smoke Detectors
Check the battery in all your smoke detectors. See our step by step guide to changing a battery in a smoke alarm
If you don’t have smoke detectors go and buy some now, they are cheap and super-easy to fit so there really is no excuse for not having working smoke detectors.
While thinking about safety in the home you should also have a carbon monoxide alarm positioned near your boiler, and woodburners to ensure that you are not getting poisonous fumes from heating appliances.
Carbon monoxide is odourless and you could suffer the effects without knowing it, Gas Safe have a really good guide to spotting the warning symptoms of Carbon monoxide poisoning.
Autumn is a time we shut doors and window and avoid ventilation so the chances of gasses building up are more likely at this time of year.
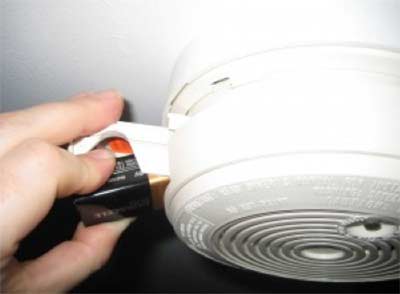
Check and change all the batteries in your smoke alarms this autumn
Dry Lining Walls
For a long term condensation remedy it is as well to look at warming up the walls by dry lining them. This involves battening the walls fitting insulation between the battens then fixing and decorating plasterboard.
The battening can be done using 19 x 32mm battens with 19mm thick polystyrene sheeting in between.
A polythene vapour barrier is required on top of the battens before 9.5mm plasterboard is fixed to the wall. Instead of the polythene barrier you can fix Vapourshield plasterboard which has silver foil on the back.
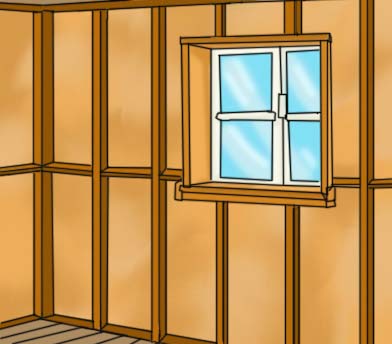
How to fix battens on wall for dry lining
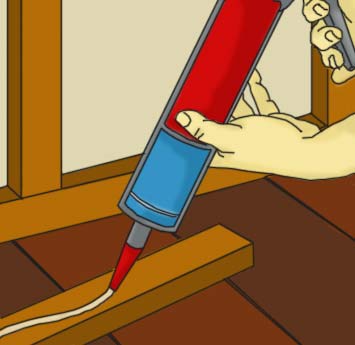
Apply adhesive to each batten
Here follows a quick guide to the process, but you can read the full instructions for fitting Dry Lining here.
- Start by stripping off all the old wall coverings and remove skirting boards carefully as they may be re-used
- If mould growth is present treat the wall with Fungicidal wash killing off spores in the plaster. Follow the instructions on the container
- Fix battening at 400mm centres, after fixing all round the perimeter of the wall/room. Measure carefully as the long vertical joints of the plasterboard must finish in the centre of a batten
- Fix a horizontal batten if you intend to have a Dado or picture rail
- Make sure the surface of the battens are all aligned by packing out behind them where necessary. The battens should be secured with plugs and screws or a strong adhesive
- To allow for the new wall surface, all sockets and switches will need to be disconnected from the supply and moved forwards. Battens need to be placed round these as shown in the diagram, below
- Cut the polythene to fit very tightly in between each section. There should be no fixings required and a tight, friction fit is all that is required. There should be absolutely no gaps whatsoever
- Staple the polythene vapour barrier to the battens as seen in the diagram, above, and then nail or screw the plasterboard to the battens. If you have never done this before, go to the project on partition walls to see how to fix plasterboard
- Socket and light switch face plates can be put on and skirtings and other mouldings etc can now be replaced
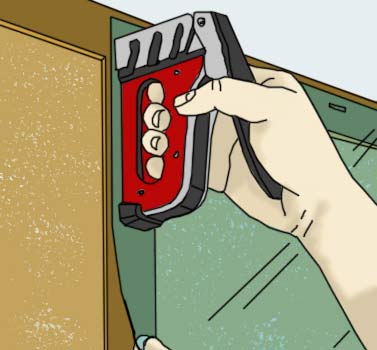
Staple the Polythene Barrier in place
Please remember this idea is a solution for walls affected by condensation only. If the wall is wet as a result of water ingress from outside you should solve the cause first.
Water coming into the house can be caused by many problems. This may be defective pointing, cracked or split render, broken bricks or simply old bricks which have become porous. See any of our projects on damp walls for more information on how to deal with wet walls.
Do you have any tips for Autumn Maintenance checks? Get in touch with your ideas or tweet us @DIYDoctor.

